
Get Ready to Save….$$$

Surprise! It’s time for FREE SHIPPING! Today 23 July 2025 through 25 July 2025, for three days only, you can shop and save on all qualifying orders of $75 or more. What a great way to stock up on all your favorite products from the catalog, Online Exclusives, kits, and more! So start making your wish list now —> Click Here!
Details:
Ordering Deadlines
Phone: 25 July 2025 at 6:59 p.m. (MT)
Online: 25 July 2025 at 11:59 p.m. (MT)
All order types qualify for this promotion.
Free shipping is for 24 hours only. Orders must be opened and closed on 25 July 2025.
Free shipping automatically applies to your cart after the qualifying amount has been met, which is $75 USD | $100 CAD (before tax).
Coupon codes and product credits are non-commissionable and will lower your order’s retail amount. Orders must meet the qualifying amount to be eligible for free shipping.
The additional cost for expedited shipping is not covered by this promotion.
Prepaid 3-, 6-, or 12-month Paper Pumpkin subscriptions can contribute to the qualifying amount for free shipping (Month-to-month subscriptions do not qualify). Subscriptions billed and shipped this month will be charged for the normal amount ($24.50 USD | $34.00 CAD shipping included) + tax.

DIY 4th of July Card – Patriotic, Handmade, and Full of Sparkle!
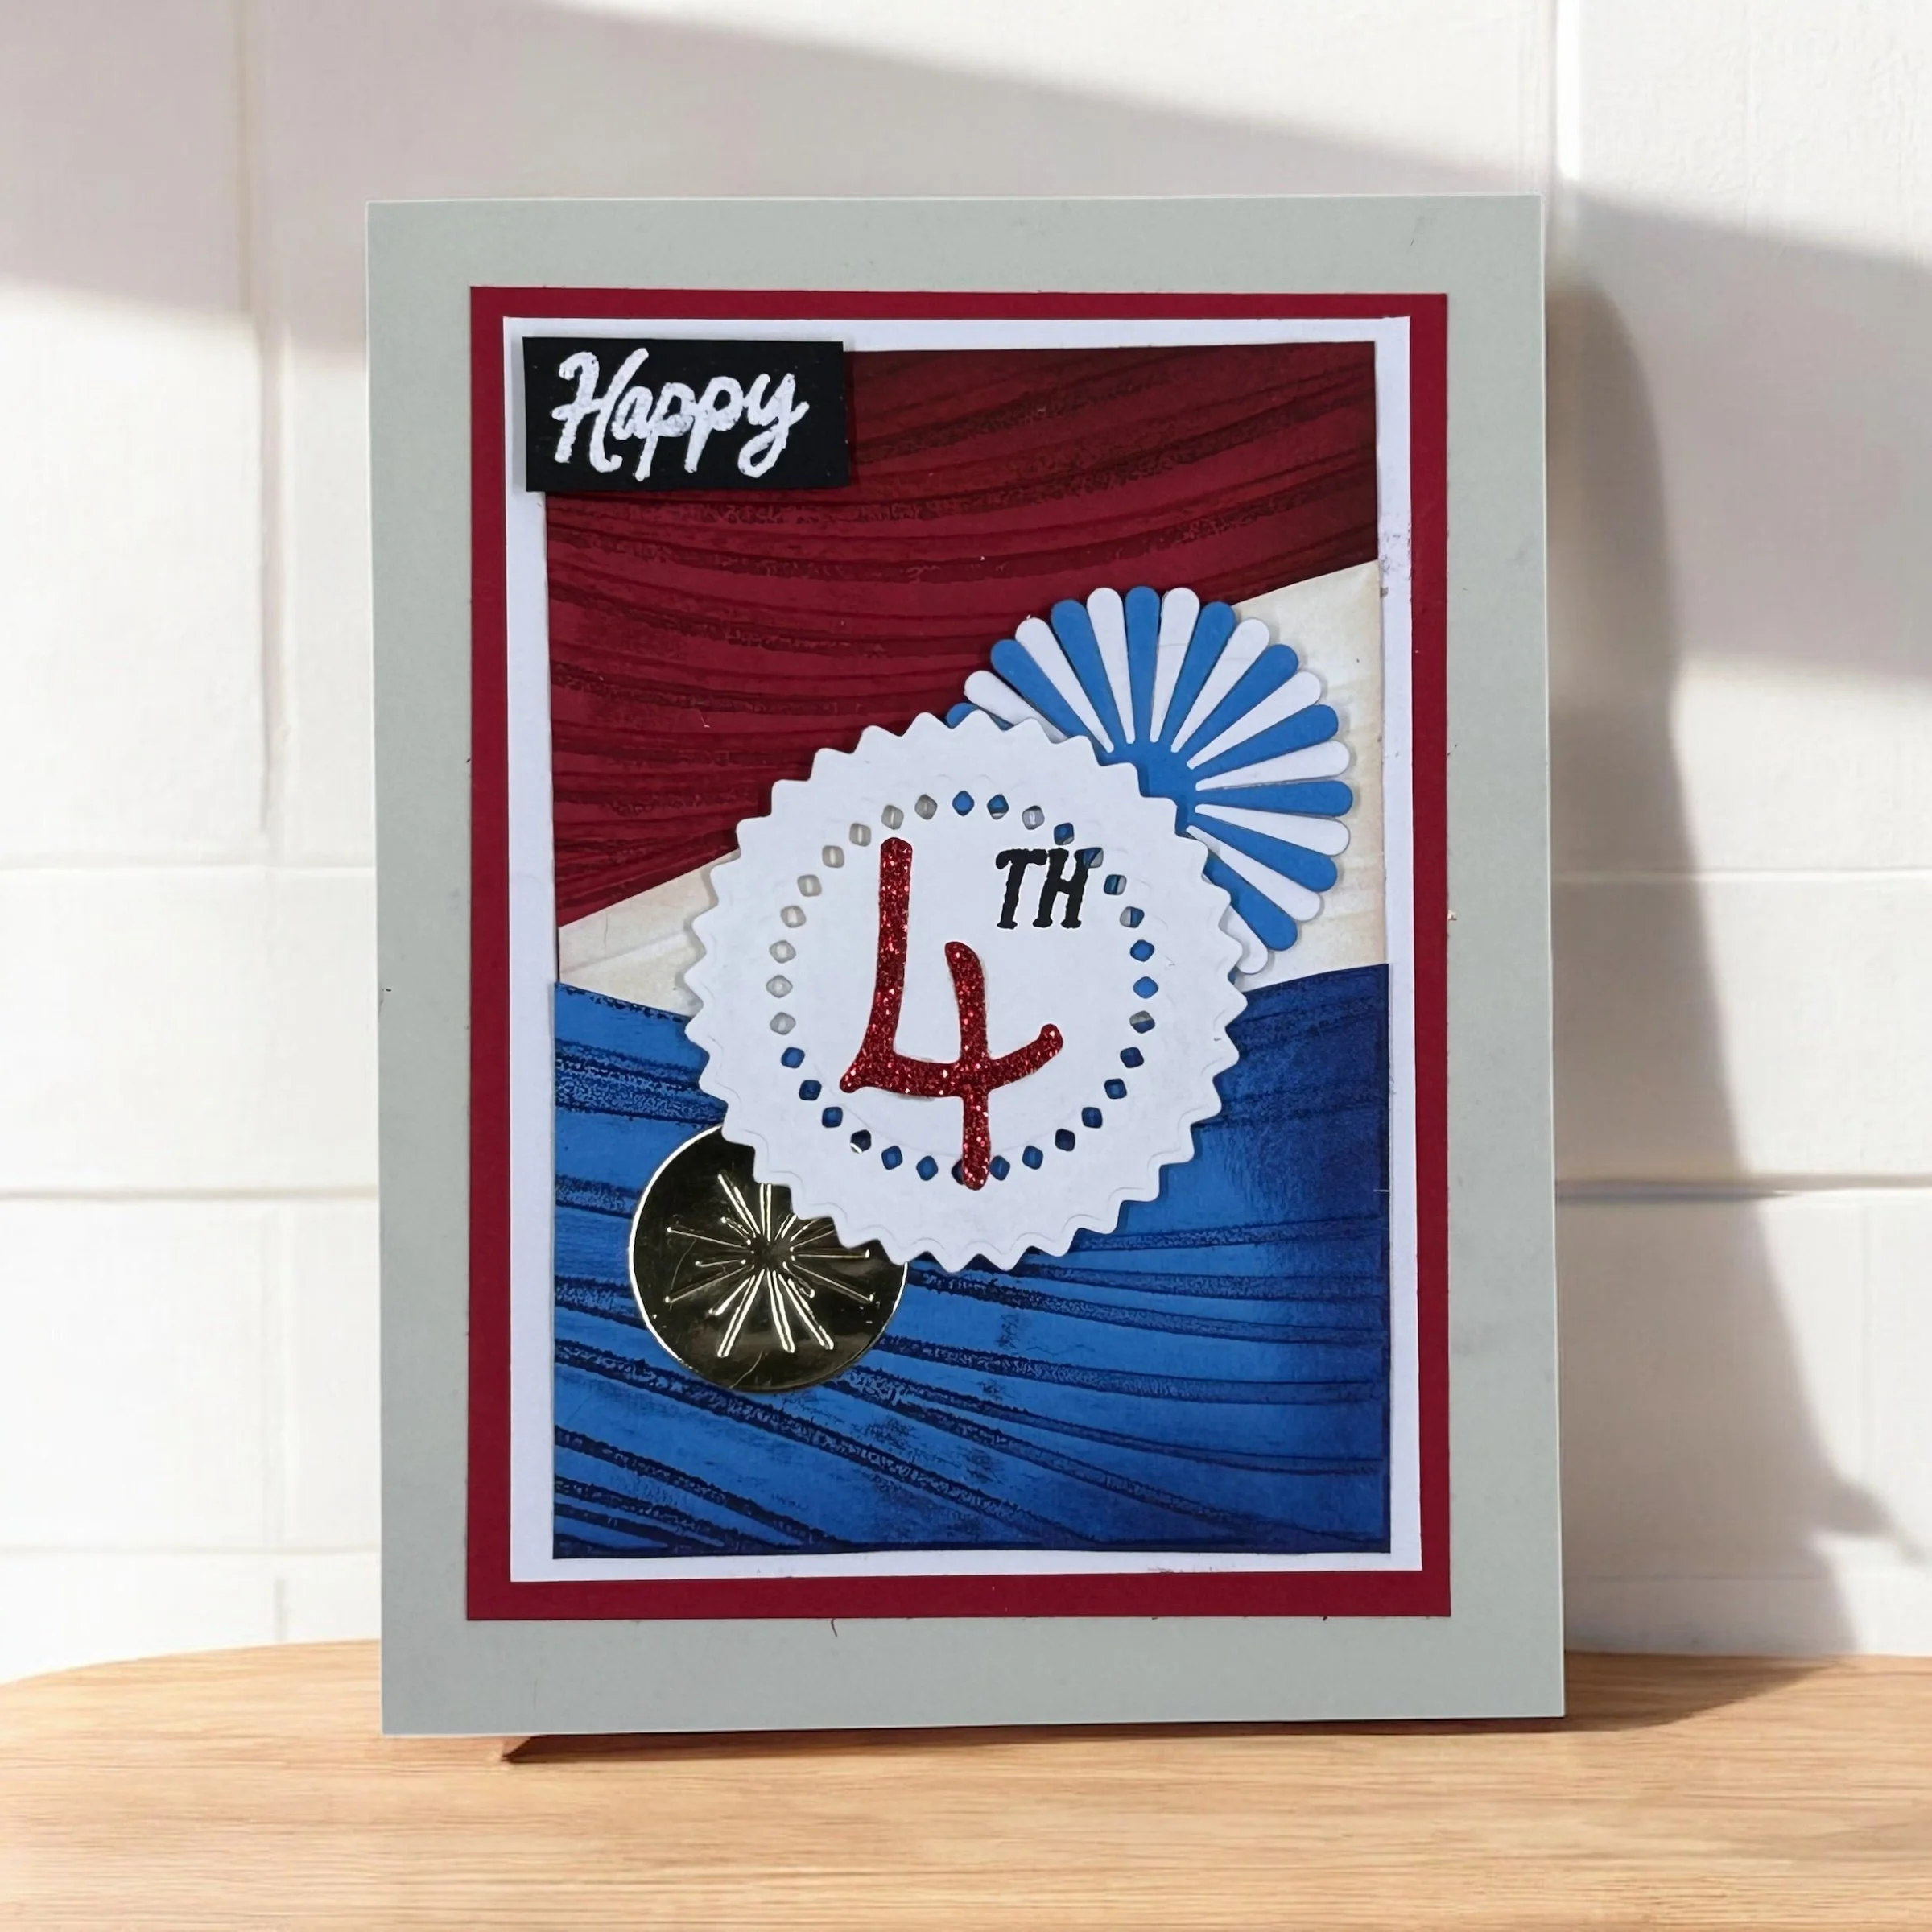
Looking for a fun and festive way to show your patriotic spirit this Independence Day? This handmade 4th of July card is a firework of creativity! With bold red, white, and blue layers, a touch of shimmer, and dimensional embellishments, it’s the perfect card to give to a friend, family member, or even use as decor at your July 4th celebration. Below, I’ll walk you through exactly how I made it—plus a few tips to make it your own!
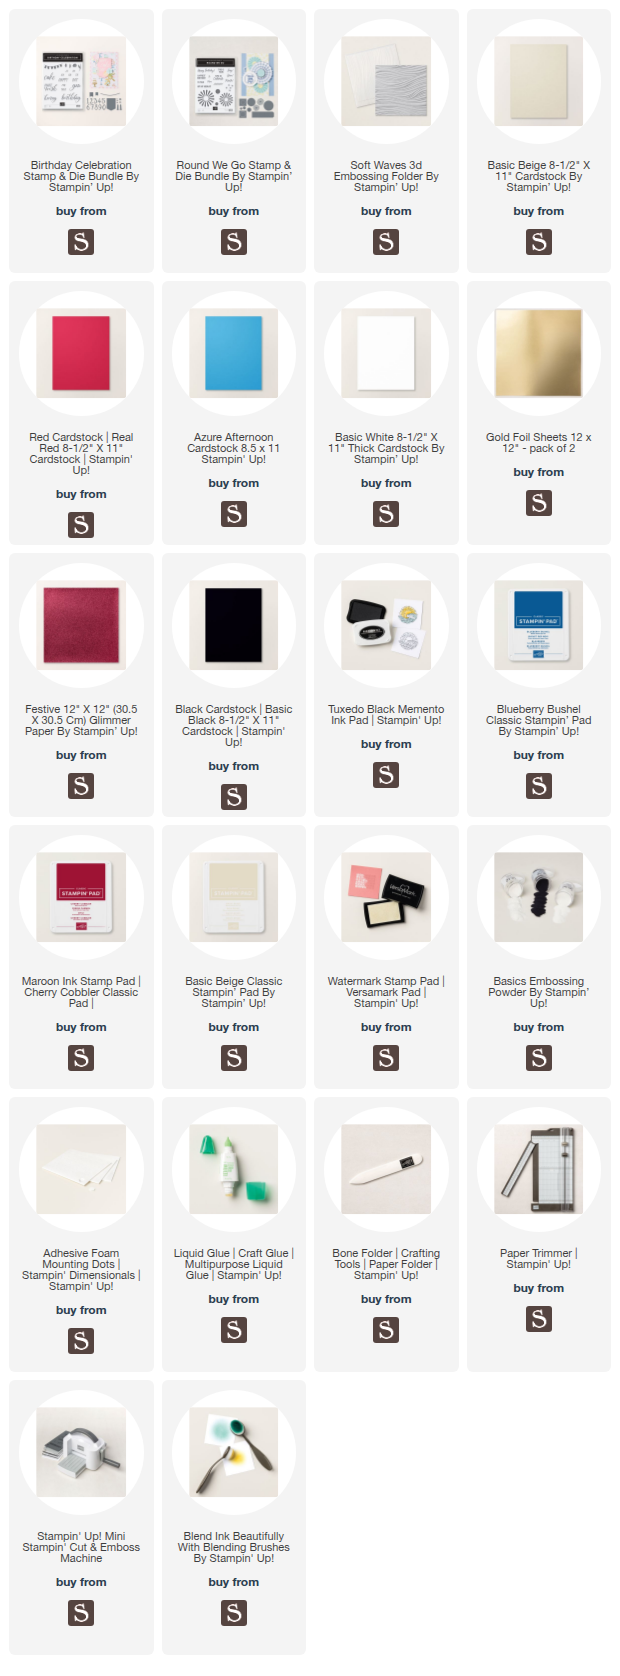
All the supplies you will need are listed this blog post page down below, click view original post if you are viewing this via email.
Step-by-Step Instructions:
1. Prep Your Base Layers
Start with a sheet of Basic Beige cardstock to make your card base. Cut your sheet in half at on the 11 inch side at 5.5 inches, and then rotate and score at 4.25 inches, fold and burnish. Cut your first layer, a piece of Real Red cardstock smaller at 3 1/2 x 4 4/8 and then your second layer with a piece of Basic White, at 3 1/4 x 4 1/2 panel for contrast. These borders make everything pop! Adhere your red piece first using a bit of glue, and then white piece onto your folded basic beige card base.
2. Create the Wavy Background
Using the Soft Waves embossing folder, emboss a piece of real red cardstock (cut to 6 x 6”), then a piece of basic white card stock (cut to 6 x 6”) and then a piece of azure afternoon cardstock (blue) (6 x 6”). Cut all three of these pieces in half, so now they are 3 x 6” in size each. And then I fussy cut each into 3rds, following the wave pattern.
Using the ink blending brushes, I ink blended the darker red ink (cherry cobbler) onto the edges of the real red cardstock waved piece, and the I did the same using blueberry bushel ink onto the azure afternoon waved piece. I also added a bit of basic beige ink to the white waved piece. For a little extra flare, you can use your inks right on. your embossing folder before you emboss your piece of cardstock, to give the pieces further dimension.
I then glued down my red waved piece first, then I added the white piece a bit on top of that below it, and then the blue piece. I adhered these pieces so that you would see about 1/8 of inch of the basic white layer below it.
3. Add the Sentiment Panel
Die-cut a white scalloped circle using the die set from the Round We Go bundle, and stamp “4TH” in the center. I die cut and used red glitter paper for the number 4 and stamped the “TH” in memento black ink for contrast.
4. Fireworks & Shine
Add embellishments like a layered rosette burst using dies from the Round We Go Bundle in blue and white, and a shiny gold foil firework burst at the bottom left. These really make the design feel like a celebration.
5. Embossed "Happy" Label
Stamp “Happy” on black cardstock and heat emboss it in white for a bold contrast. Adhere it near the top left for a balanced layout.
6. Assemble It All
Use foam tape behind the scalloped circle to give your card depth. Layer everything as shown, and finish with a few sparkle accents or glitter if desired.

Buy One, Get One 50% Off All Suites and Suite Products!!

This is huge news!!! Starting June 3, all available suites and suite products from the 2025–2026 Annual Catalog and Online Exclusives are buy one, get one 50% off! If you’ve had your eye on a new suite from the annual catalog or you really like the look of a stamp set from an Online Exclusives suite, you don’t have to choose—you can get both! Click here to shop the suites now.
Further Details…
All available suites and suite products from the 2025–2026 Annual Catalog and Online Exclusives are buy one, get one 50% off.
When you shop the sale, the 50% off discount will apply to the lower-priced item (for example, if you buy a suite collection and a stamp set from a suite, the suite would be full price, and the stamp set would be 50% off).
Suite collections are available if all items are in stock; if all items are not in stock, you can still shop the available suite products.
You don’t have to buy a suite and suite products all from the same suite collection for the discount to apply. You can buy any suite products from any suite.
The discount will appear in your cart once you’ve added two items within the sale parameters to your cart.
Products are available only while supplies last.

Starter Kit Special…
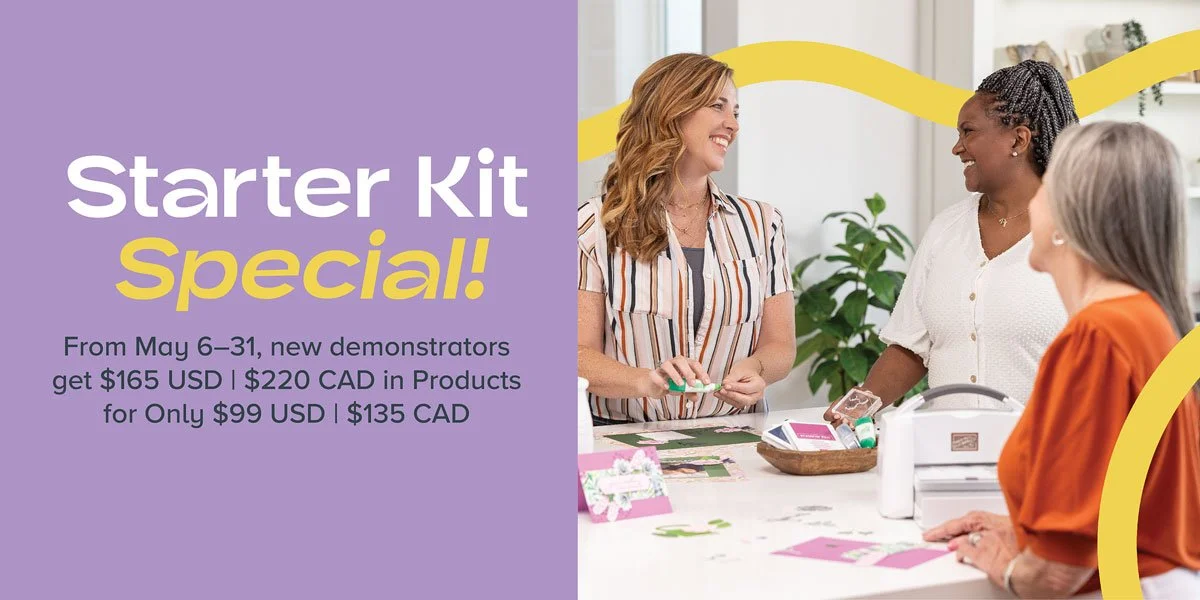
Our BIGGEST Starter Kit Special is available for a limited time! Between May 6–31, anyone who signs up to be a demonstrator can pack their Starter Kit with $165 USD | $220 CAD worth of products for only $99 USD | $135 CAD. That’s an extra $66 USD | $85 CAD in products to kickstart your business or just help fund your crafty obsession!
There are so many benefits to becoming a Stampin’ Up! demonstrator (other than being one of the cool kids with the Stampin ‘N the Pines time):
20 - 25% discount on Stampin’ Up! products
Exclusive early access to products
The opportunity to earn a modest supplemental income
The chance to attend incredible training and crafting events
And so much more!
Watch the video below to find out more, and when you are ready to join, just click HERE to join my team now.

New Annual 2025-2026 Catalog Has Launched Today!!!
The new Annual 2025-2026 Caatalog is now Live! You can view & download the PDFs by clicking one of the images below. And you can Shop the New Products here!


Double Stampin’ Up! Rewards May 2 -3

We’re so excited to celebrate National Scrapbooking Day with the crafting community around the world! For 2 days only (May 2–3) Stampin’ Up! is offering 2x rewards on all purchases! What better way to celebrate one of our favorite crafting holidays? And the best part? This offer applies to ALL products, not just scrapbooking items! (Some exclusions apply, see more below.)
Earn double rewards (2x rewards) for two days only, from May 2–3!
This offer applies to ALL products (excluding non-commissionable products and existing Paper Pumpkin subscriptions).
All orders qualify once the rewards threshold of $20 USD | $25 CAD is met.
To participate, you must have a Stampin’ Up! account and be opted in to Stampin’ Rewards. Please ensure you have opted in before you place your order, see below for further instructions. If you are a demonstrator you are automatically already opted in for Stampin’ Rewards.
How To Enroll in New Stampin’ Rewards:

When you login to your account, you should see a pop up, like the one in the image on the left, be sure to click the Sign Up button if you want to start earning rewards ( only if you want to, you don’t have to). For further details watch the video below.

2025 Spring Mini Catalog, Sale-A-Bration brochure and Companion Scrapbooking Brochure are Live!!!
The new Spring (January - April 2025) Mini Caatalog, Sale-a-Bration brochure and the companion Scrapbooking Brochure are now Live! You cn view & download the PDFs by clicking one of the images below. And you can Shop the New Products here!


Woot Woot!! The new January - April 2025 Mini Catalog is live!! You can View & download the the PDF here and Order these new fabulous spring products here. The new Scrapbook Brochure products are also live! You can View & download the Scrapbook Brochure PDF here and Order these new products here. And last but not least you can download the PDF for the Sale-a-Bration brochure here and shop for those products here.
For every $60 USD in product you spend, you get to choose a level 1 Sale-A-Bration item for Free! Or combine two sale-a-bration rewards to get a level 2 sale-a-bration item for free. Shop soon, this offer only lasts until February 28th.
Some of my new favs this season…
(click an image below to find out more)


2024 Holiday Mini Catalog and Companion Scrapbooking Brochure are Live!!!
The new (Holiday) September-December 2024 Mini Catalog and the companion Scrapbooking Brochure are now Live! You can view & download the PDFs by clicking one of the images below. And you can Shop the New Products here!


Woot Woot!! The new September-December 2024 Mini Catalog is live!! You can View & download the September-December 2024 Mini Catalog PDF here and Order these new Holiday products here. The new Scrapbook Brochure products are also live! You can View & download the Scrapbook Brochure PDF here and Order these new products here. (*The new scrapbook kits & products might sell out and are only available while supplies last). Plus there are two new kits that have been added to the Kit Collection.
Some of my new favs this season…
(click an image below to find out more)


Light The Year - Fall Card


The new Holiday (September through December) Mini catalog is launching next week for everyone, and I couldn’t be more excited to share a beautiful fall themed card project with you. There wasn’t a ton of fall stamp and die sets this year in the catalog but I’m told there is more to come online with Stampin’ Up! Very soon.
Watch the live replay on YouTube
Measurements:
· Base of card in Basic Beige, folded 4 ¼ x 5 ½, unfolded 11 x 4 ¼ , scored in the middle at 5 ½
· Layer 1 – early espresso, cut to 4 1/8 x 5 3/8
· Layer 2 – gold foil specialty card stock, cut to 4 x 5 ¼
· Layer 3 – Very Vanilla thick card stock, cut to 3 x 5, embossed using Changing Leaves folder
· Layer 4 – Country Woods DSP, cut to 3 7/8 x 5 1/8
· Inside layer is Very Vanilla thick card stock, cut to 4 x 5 ¼
Techniques:
· Lanterns were made using window sheets and the brown saddle StazOn and then embellished with copper enamel effects drops.
· Leaves were made by taking very vanilla card stock, and spraying one sheet with blackberry bliss, crushed curry, and cajun craze. Take another sheet of very vanilla card stock, and spray crushed curry and mossy meadow. Die cut the leaves using the Autumn Expressions and Encircled in Nature dies.
· Sentiment on the front was stamped and die cut from the Wonderful Thoughts set, used early espresso.
· Sentiment on the inside was stamped with the Autumn Expressions in Early Espresso and then the leaf was brushed with crushed curry and cajun craze.
List of Supplies Used:


Get Ready to Save….$$$
Hey there,
Surprise! It’s time for FREE SHIPPING! On 21 May 2024, for one day only, you can shop and save on all qualifying orders of $75 or more. What a great way to stock up on all your favorite products from the catalog, Online Exclusives, kits, and more! So start making your wish list now —> Click Here!
Details:
Ordering Deadlines
Phone: 21 May 2024 at 6:59 p.m. (MT)
Online: 21 May 2024 at 11:59 p.m. (MT)
All order types qualify for this promotion.
Free shipping is for 24 hours only. Orders must be opened and closed on 21 May 2024.
Free shipping automatically applies to your cart after the qualifying amount has been met, which is $75 USD | $100 CAD (before tax).
Coupon codes and product credits are non-commissionable and will lower your order’s retail amount. Orders must meet the qualifying amount to be eligible for free shipping.
The additional cost for expedited shipping is not covered by this promotion.
Prepaid 3-, 6-, or 12-month Paper Pumpkin subscriptions can contribute to the qualifying amount for free shipping (Month-to-month subscriptions do not qualify). Subscriptions billed and shipped this month will be charged for the normal amount ($24.50 USD | $34.00 CAD shipping included) + tax.

Starter Kit Special - May 1 - 31
Exciting News! Between 1–31 May, anyone who joins my team and becomes a Stampin’ Up! demonstrator will receive FOUR 2024–2026 In Color products in their Starter Kit for FREE! This is one of our richest offerings yet!

New Stampin ‘N The Pines demonstrators will receive the following products in their Starter Kit at no additional cost:
2024–2026 In Color Classic Stampin’ Pad Bundle
2024–2026 In Color 8-1/2" x 11" (21.6 x 27.9 cm) Cardstock
2024–2026 In Color 6" x 6" (15.2 x 15.2 cm) Designer Series Paper
2024–2026 In Color Stampin’ Write Markers
In addition to the In Color products, new Stampin ‘N The Pines demonstrators will pick $125 USD | $165 CAD worth of products of their choice. They will also receive free business supplies with their order and free shipping. Not to mention all the fun that comes with being a part of our wonderful crafting community.
When a new Stampin ‘N The Pines demonstrator joins, all In Color products will be automatically added to their Starter Kit.
What are you waiting for? Click here to join my team!!!
If you have any questions about joining, please don’t hesitate to contact me.

Last Chance Sale - Starts April 9th!!!
Hello, my lovely friends,
It's always hard today to say goodbye to our favorite products from our catalogues. But you can get your products with great offers and deals here. Don't miss out, get your wish list ready for the sale!
The sale starts on April 9th 2024, for only limited period only.
Sales Period: 9–30 April 2024
Ordering Deadlines
Phone: 30 April 2024 at 5:29 p.m. (MST)
Online: 30 April 2024 at 11:59 p.m. (MST)
There is a retiring list for the mini catalogue and annual catalogue. These lists detail the products that will no longer be available once the catalogues are gone.
For full Catalogs PDF versions to refer to:
Stampin’ Up January - April 2024 Spring Mini Catalog PDF
May 2023 - April 2024 Annual Catalog PDF Click here
Last Chance Products from January through April 2024 Mini Catalog listed below:
Last Chance Products from May 2023 - April 2024 Annual Catalog - listed below:
Not all items on the Last Chance products List will be discounted. When they are, they will vary from one market to another depending on product performance.
All products are available while supplies last, and there are no purchase limits.
Discounted items can be added to a Starter Kit and redeemed as a 50% off item or with Stampin’ Rewards.
Only orders opened and closed during the promotion period apply.
Click here to Shop Online.
If you have any questions, please don't hesitate to contact me.
Have a lovely day! Happy Stamping!
xoxo —Amanda
Stampin ‘N The Pines

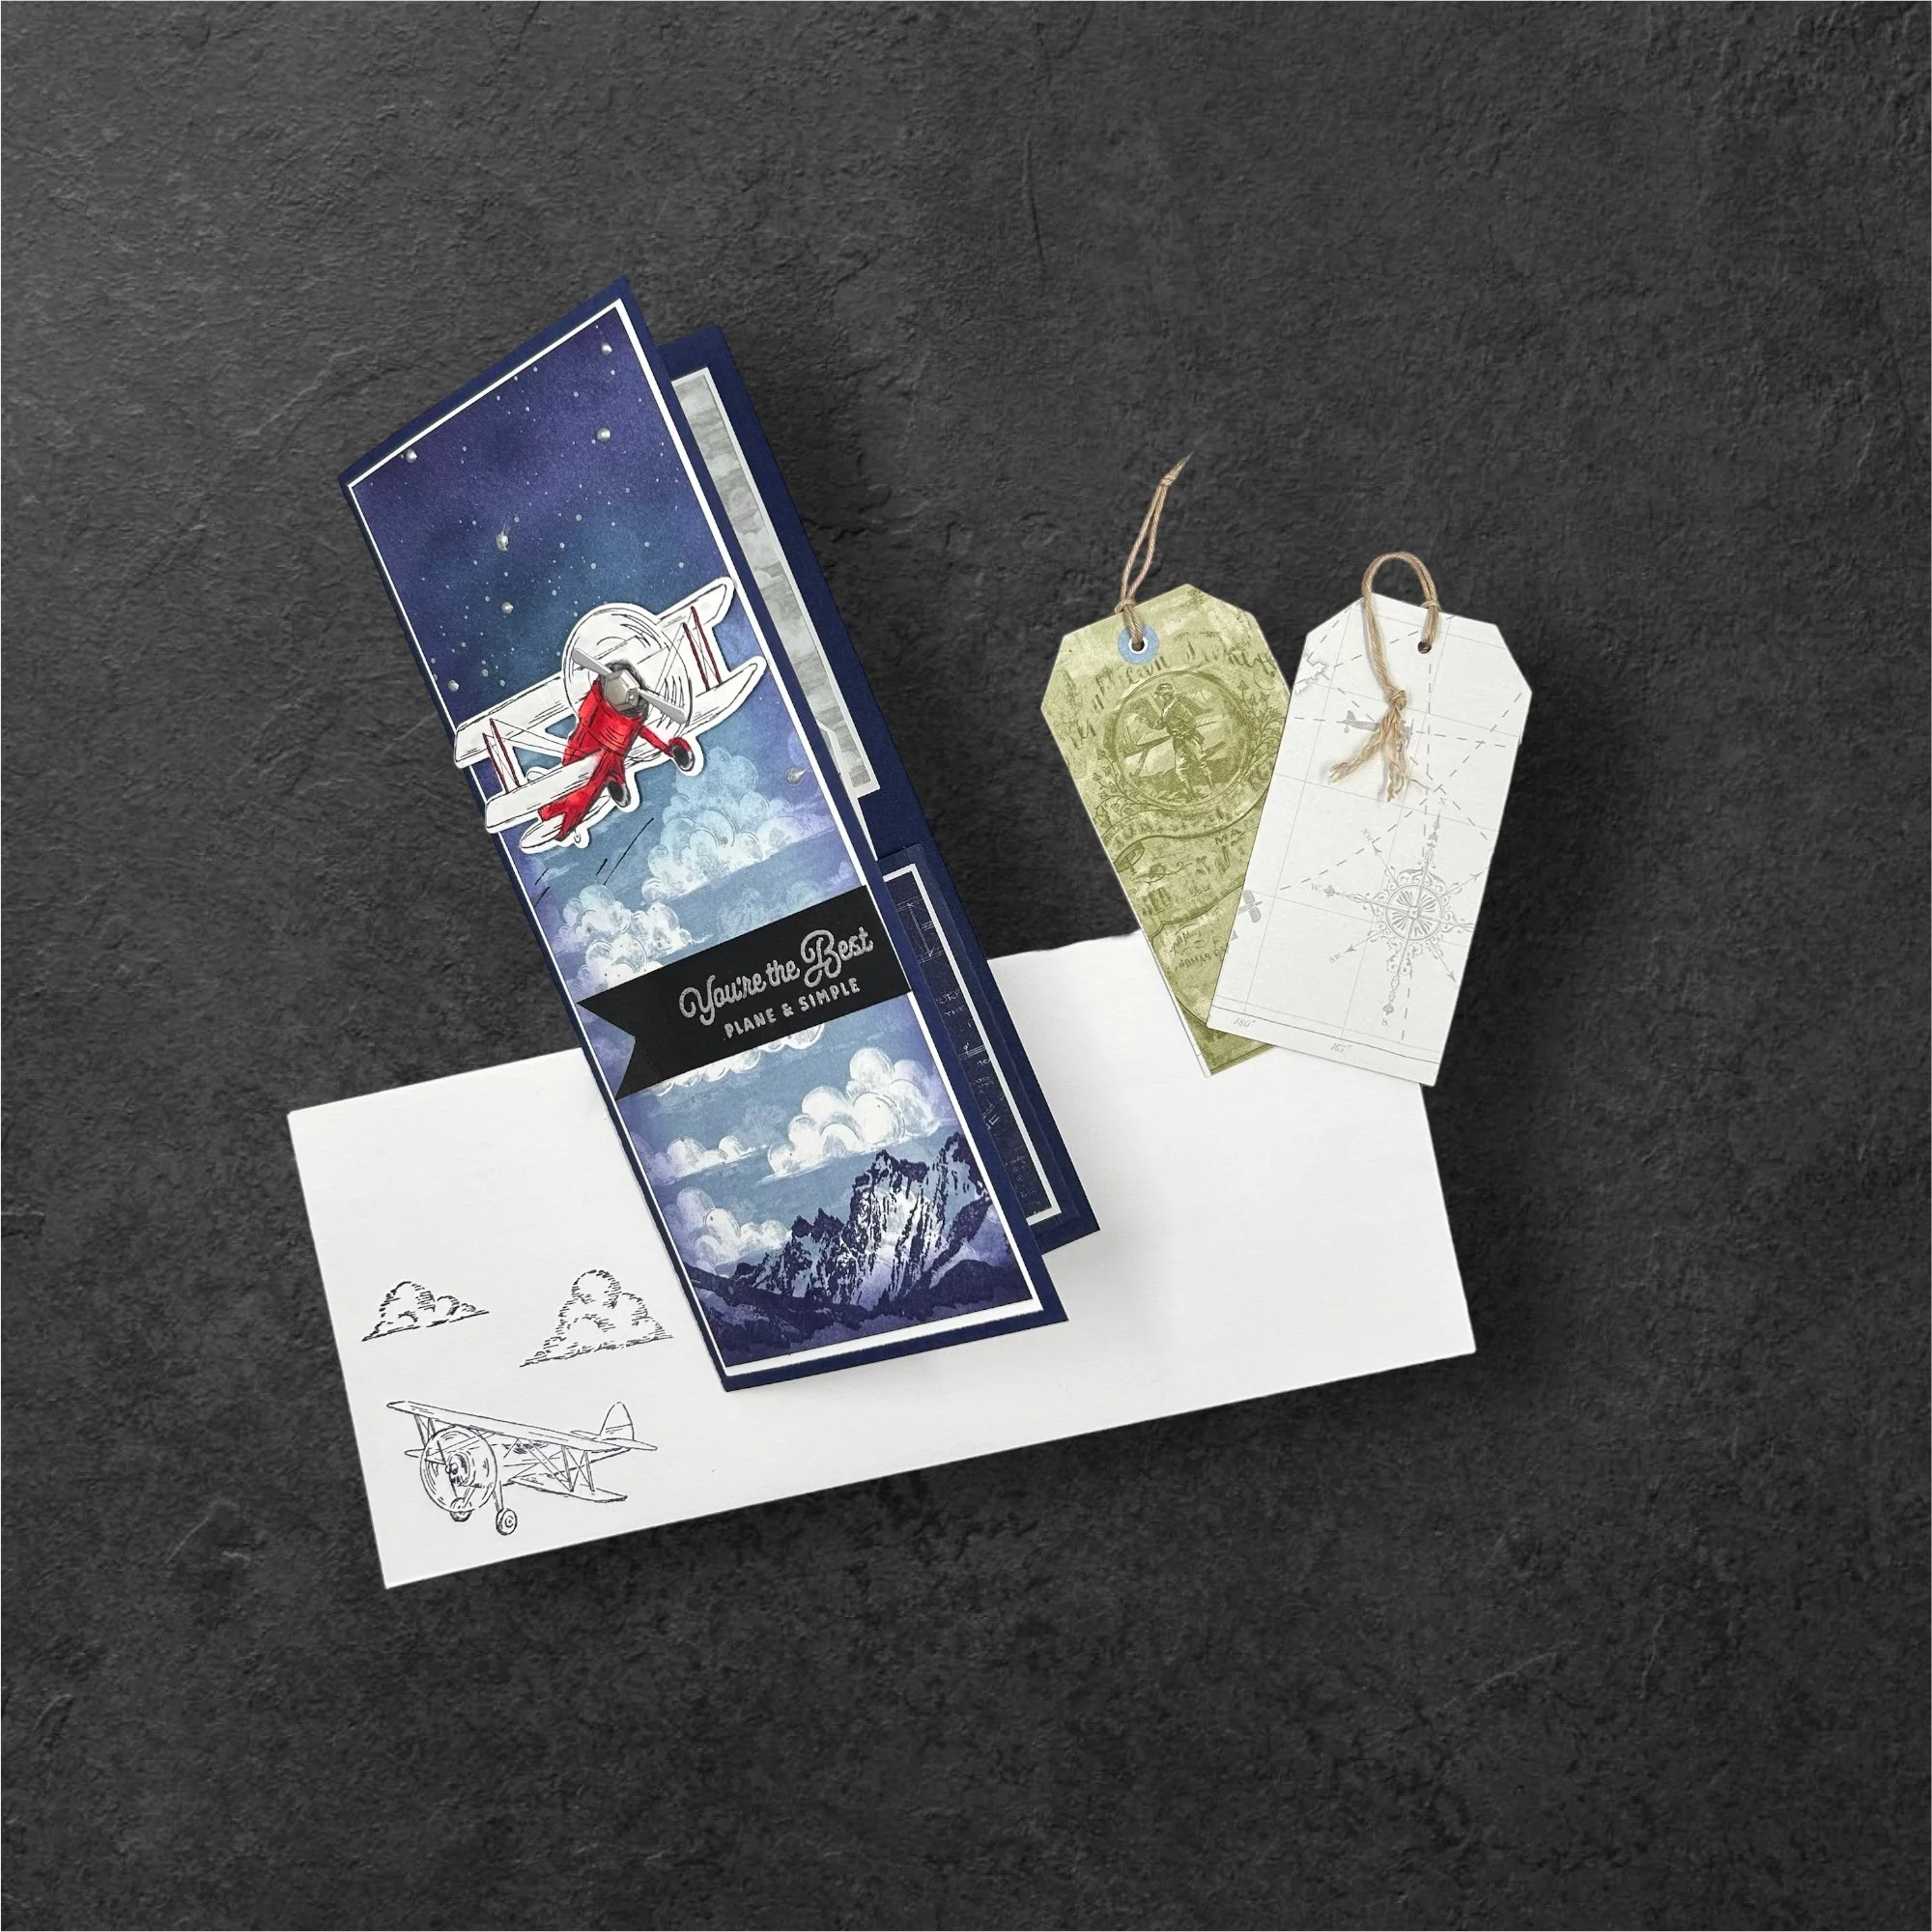
Take to the Sky Suite - Sneak Peek
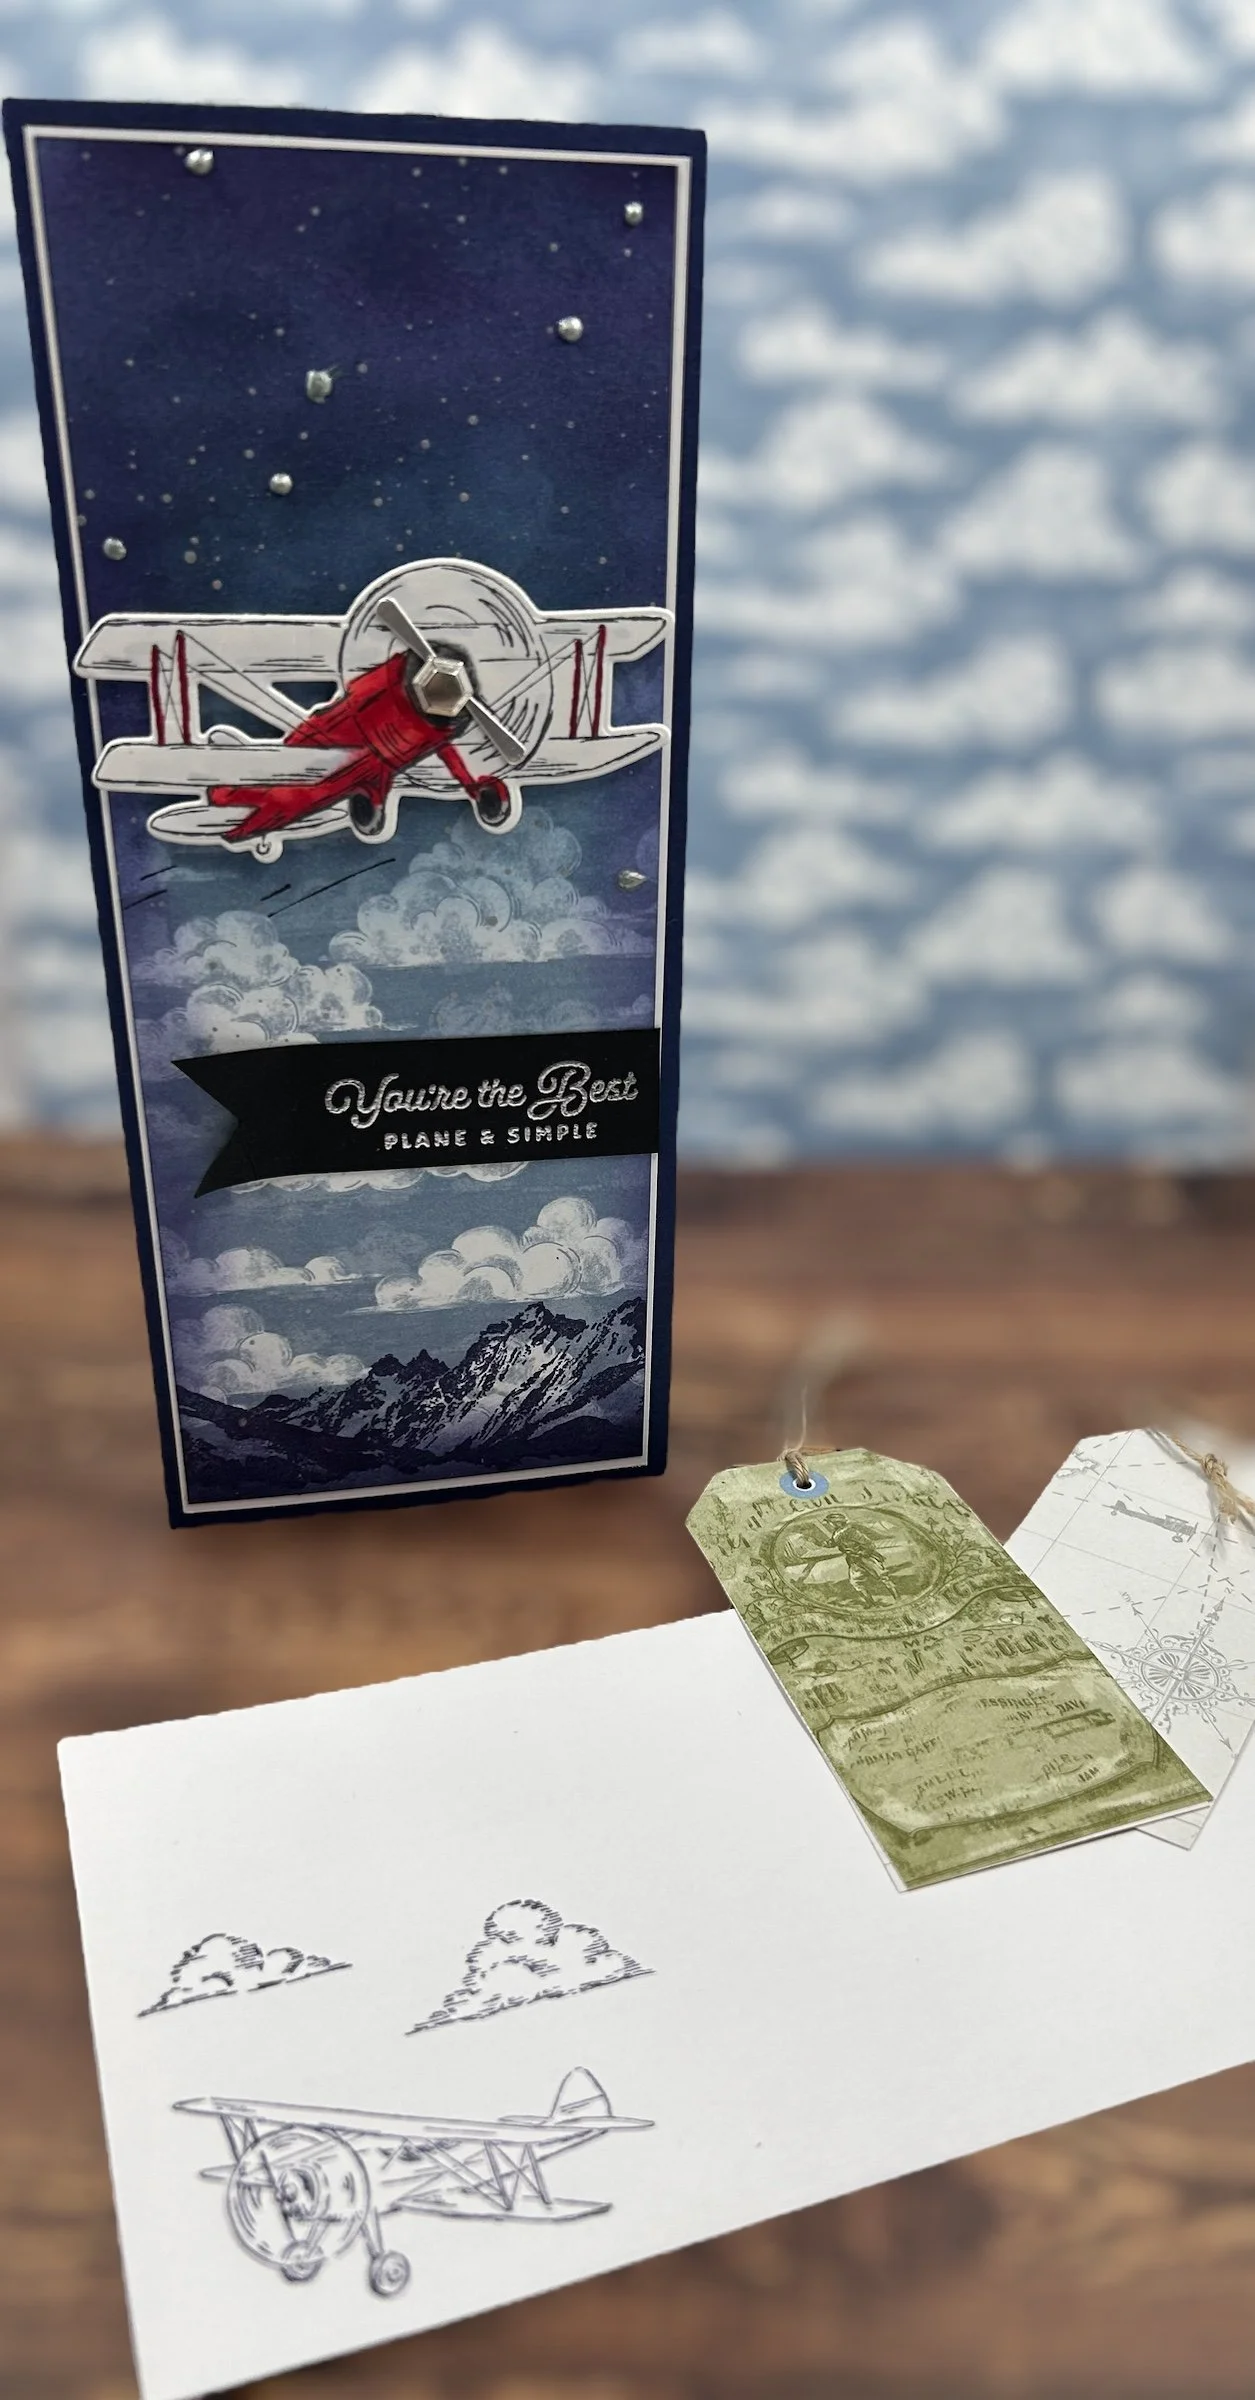
Hey there my crafty friends! I have a very exciting sneak peek for you here today, from Stampin’ Up’s new annual 2024-2025 Catalog! I think this one has to be my favorite from the new catalog actually - it’s called the Take to the Sky suite collection. As soon as I had seen it at on Onstage 2024 the other week I knew I had to have it, and already had the inspiration to make a birthday card for my husband. This stamp and die set, which is called Adventurous Sky, including the designer series paper which is called Take to the Sky, all works beautifully for a more masculine type card.
I will be publishing a YouTube video very soon, within the next day or two, to show you how I exactly made this very handsome card. You will be able to purchase this suite, bundle and/or DSP as a demonstrator on April 2nd or as customer you can purchase on May 1st. Because the catalog has not been officially published yet for customers, I am unable to give you links at this time to take a look at the products directly online. As soon as I can do so I will update this blog post with the links.
Items used:
Cardstock Colors: Night of Navy, Basic White and Basic Black
Ink Pad Colors: Night of Navy, Misty Moonlight, Boho Blue, Memento Tuxedo Black
Versamark Clear embossing ink
Silver embossing powder
Crumb cake thread or brown suede ribbon
In The Grove stamp set
Take to the Sky Suite:
Adventurous Sky Stamp Set
Adventurous Sky Dies
Take to the Sky Designer Series Paper
Industrial Trinkets embellishments
Quick Instructions:
Take a piece of Night of navy cardstock, and make your slimline card base, cut on the long side down to 7 inches, so your piece now should be 8 1/2 x 7 inches. Score and fold your 7 inch side at 3 1/2 inches, using a bone folder burnish.
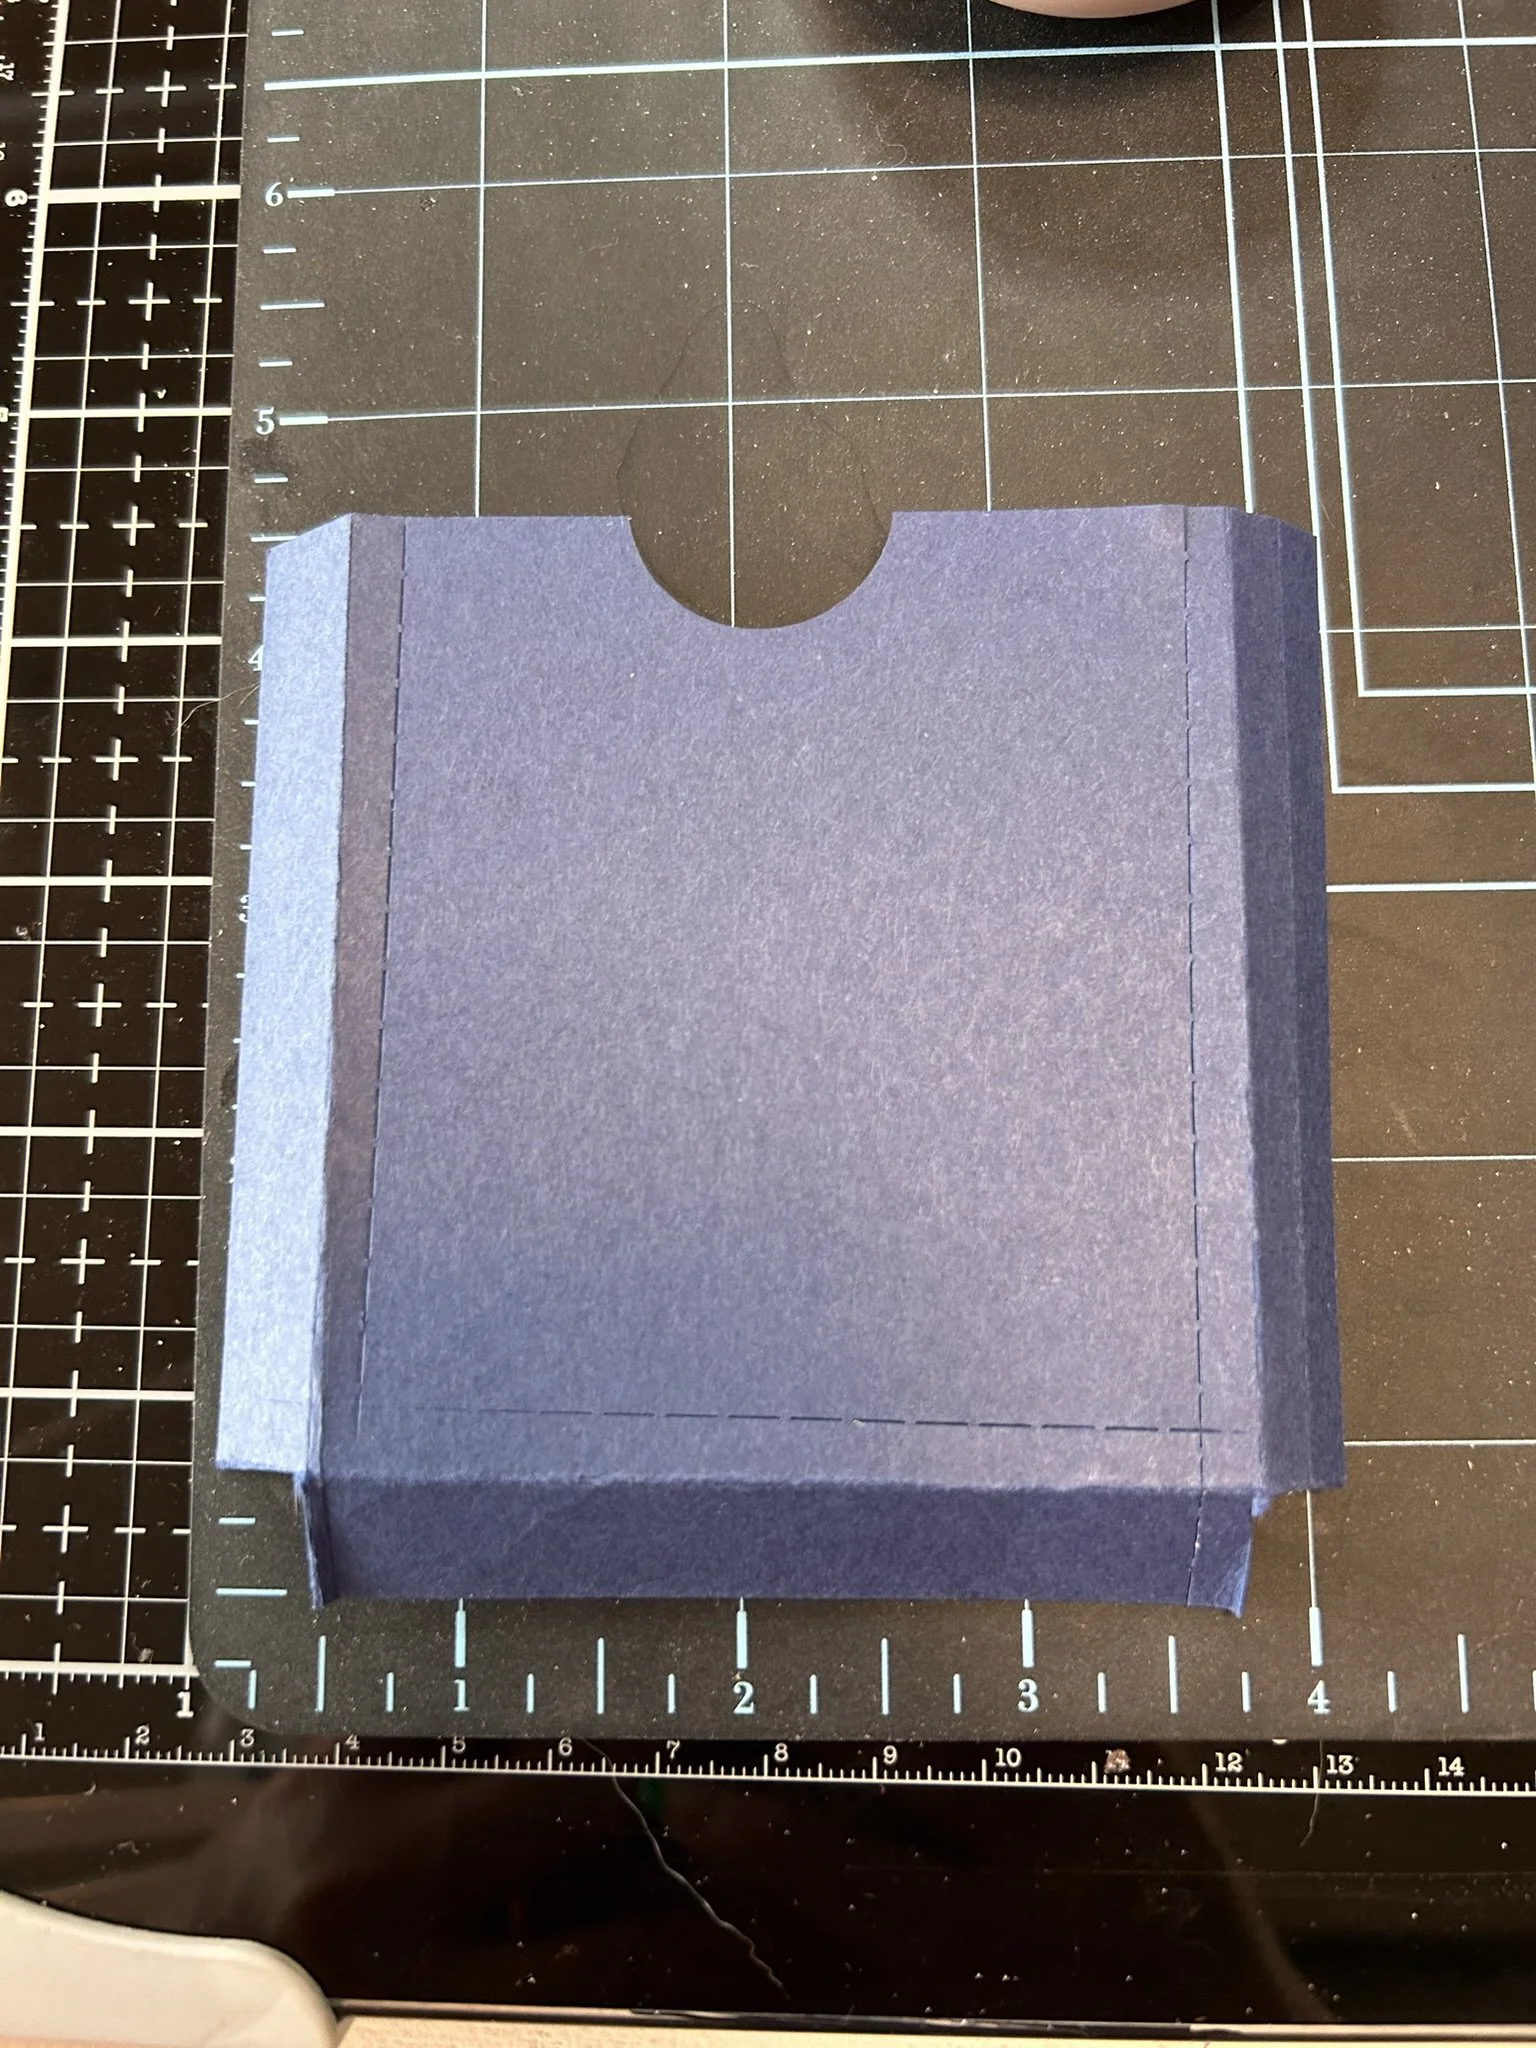
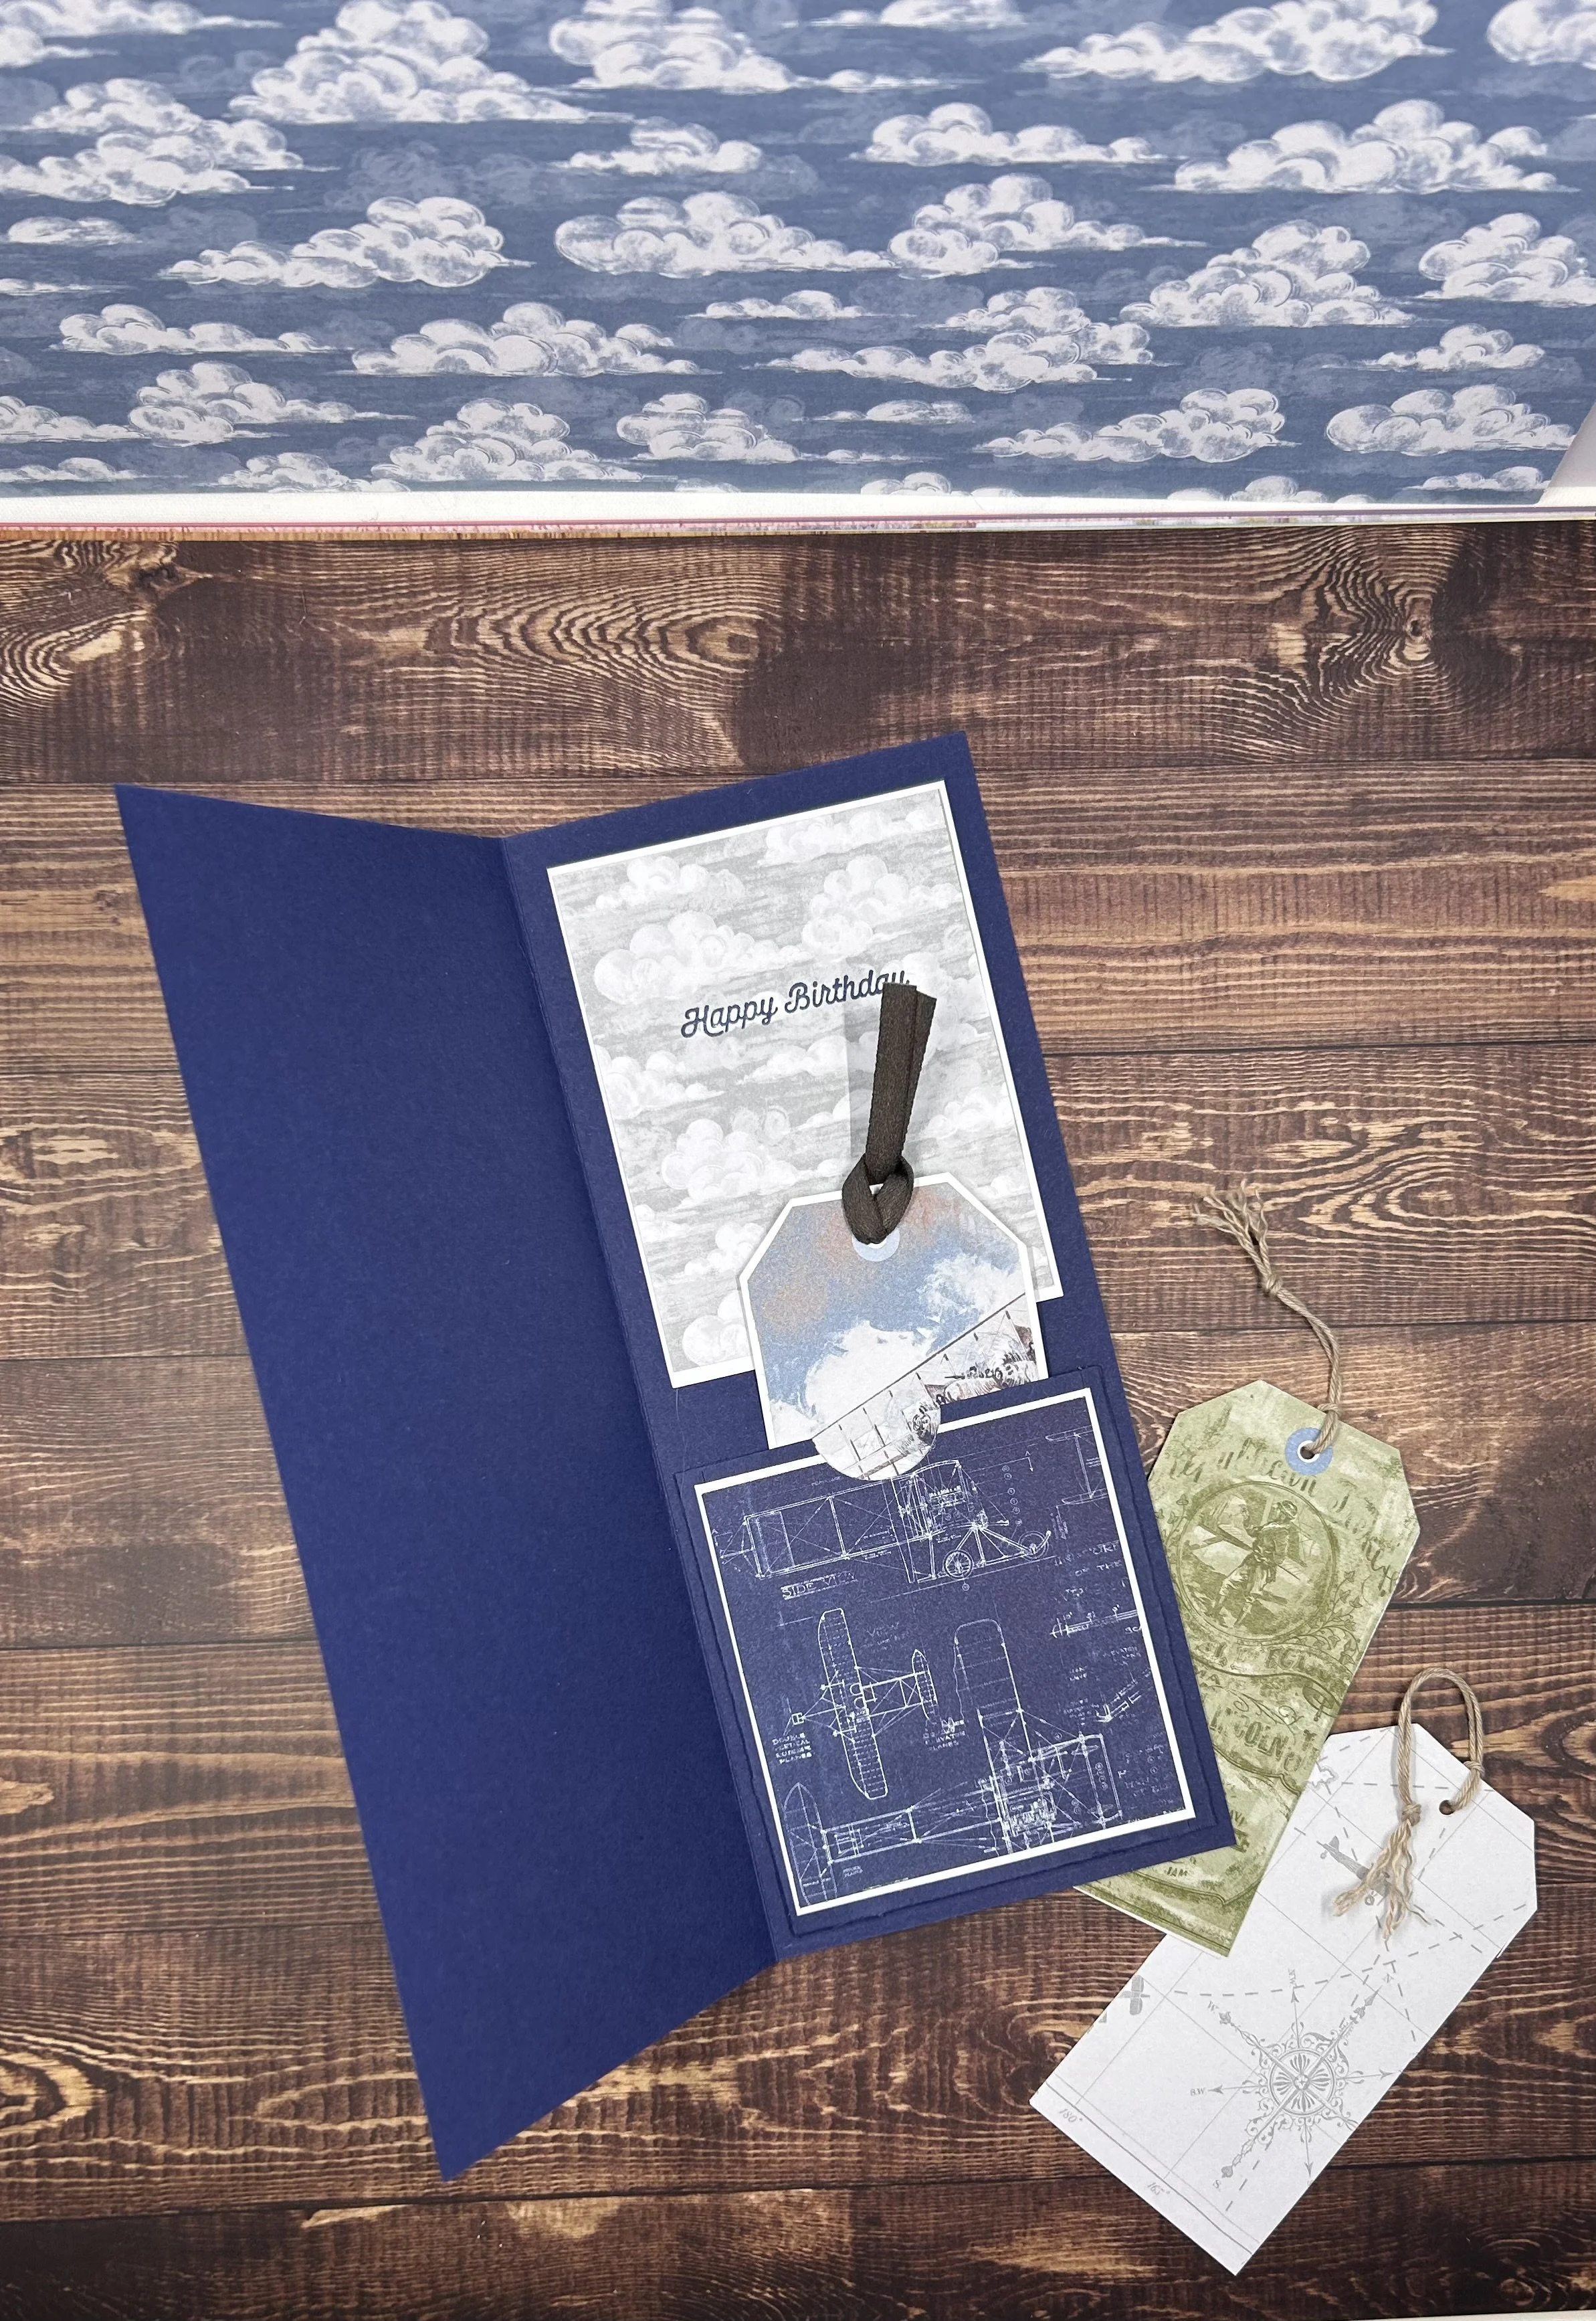
2. Cut a small piece of Night of Navy to 4 1/4 x 4 inches, this will be for your inside pocket. Score 3 sides at 1/2 inch. Using 1 inch circle punch, punch out a half circle on the one side that is not scored, see picture below.
3. Cut out the following sized pieces of basic white cardstock:
Slimline base layer - 8 1/4 x 3 1/4”
Inside card for pouch - 2 3/4 x 3 1/4 “
Inside card for sentiment layer -
4. Cut out the following sized pieces of Take to the Sky DSP:
Slimline layer - 8 1/8 x 3 1/8”
Inside card for pouch - 2 3/4 x 3 1/4, cut an 1/8 off on two sides
Inside card for sentiment layer -
The DSP has two sheets that have tags already set for you to cut out, cut out at least two of them, and punch out 1/8” circle for ribbon or thread
5. Using a large ink blending brush, starting from just above the middle top of the largest piece of DSP, brush on some Boho Blue ink, then blend in some Misty Moonlight and then at the very top some night of Navy, and then I also brushed a bit of night of navy on the sides.
6. Using the new In the Grove stamp set, stamp the mountain range in night of navy at the bottom of the DSP piece.
7. Using the Adventurous Sky stamp set, stamp the larger airplane stamp using Memento Tuxedo black in on small piece of basic white card stock. Color airplane with Dark Pink Flamingo, Light Real Red and Dark Real red, stampin blends markers. Then color the wheels with dark smokey slate and light basic black.
8. Die cut out the plane using the Adventurous Sky die set.
9. Stamp a sentiment on small piece basic black cardstock, using versamark embossing clear ink, silver embossing powder, and heat set. Cut down piece to 1 “ x 3”. Cut out fishtail.
10. On a white slimline envelope, you can get them on amazon or make one yourself. Stamp the medium sized plane and smaller clouds using Night of Navy ink on the envelope.
11. Glue on pieces of white cardstock, larger one on the front, and smaller two inside the card, one for the sentiment and the other for the pouch.
12. Stamp Happy Birthday message using Misty Moonlight to inside DSP piece, then glue on pieces of cut DSP.
13. Adhere plane to front of the card just above the middle using mini dimensionals
14. Glue on black embossed sentiment to the front below the airplane a couple of inches down.

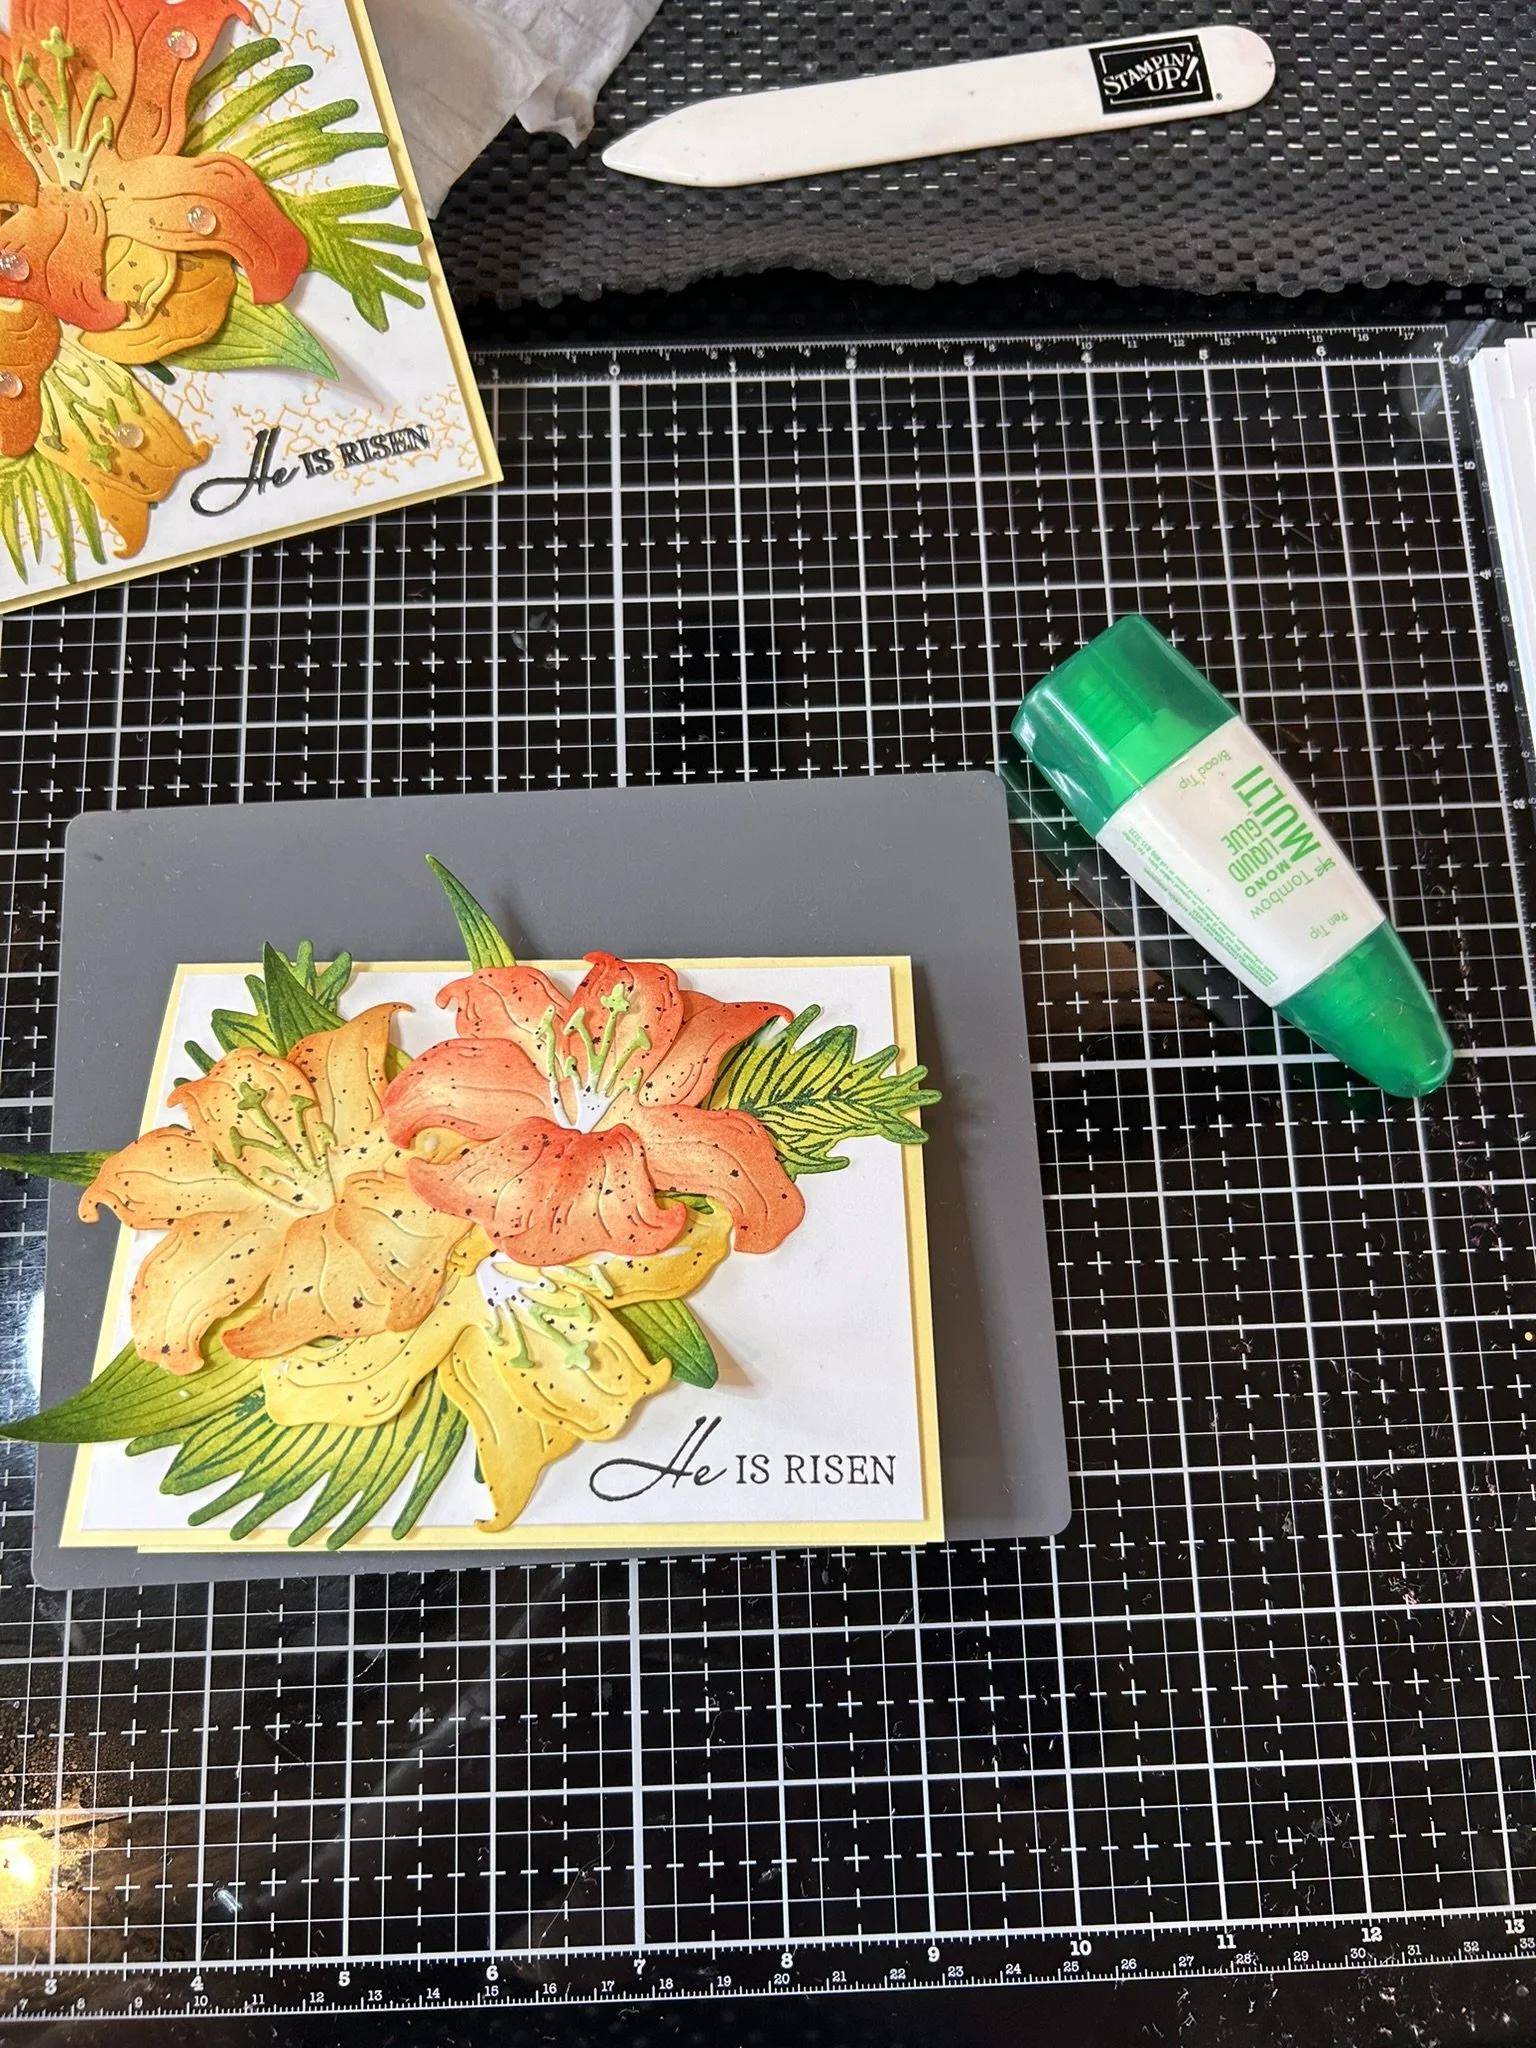
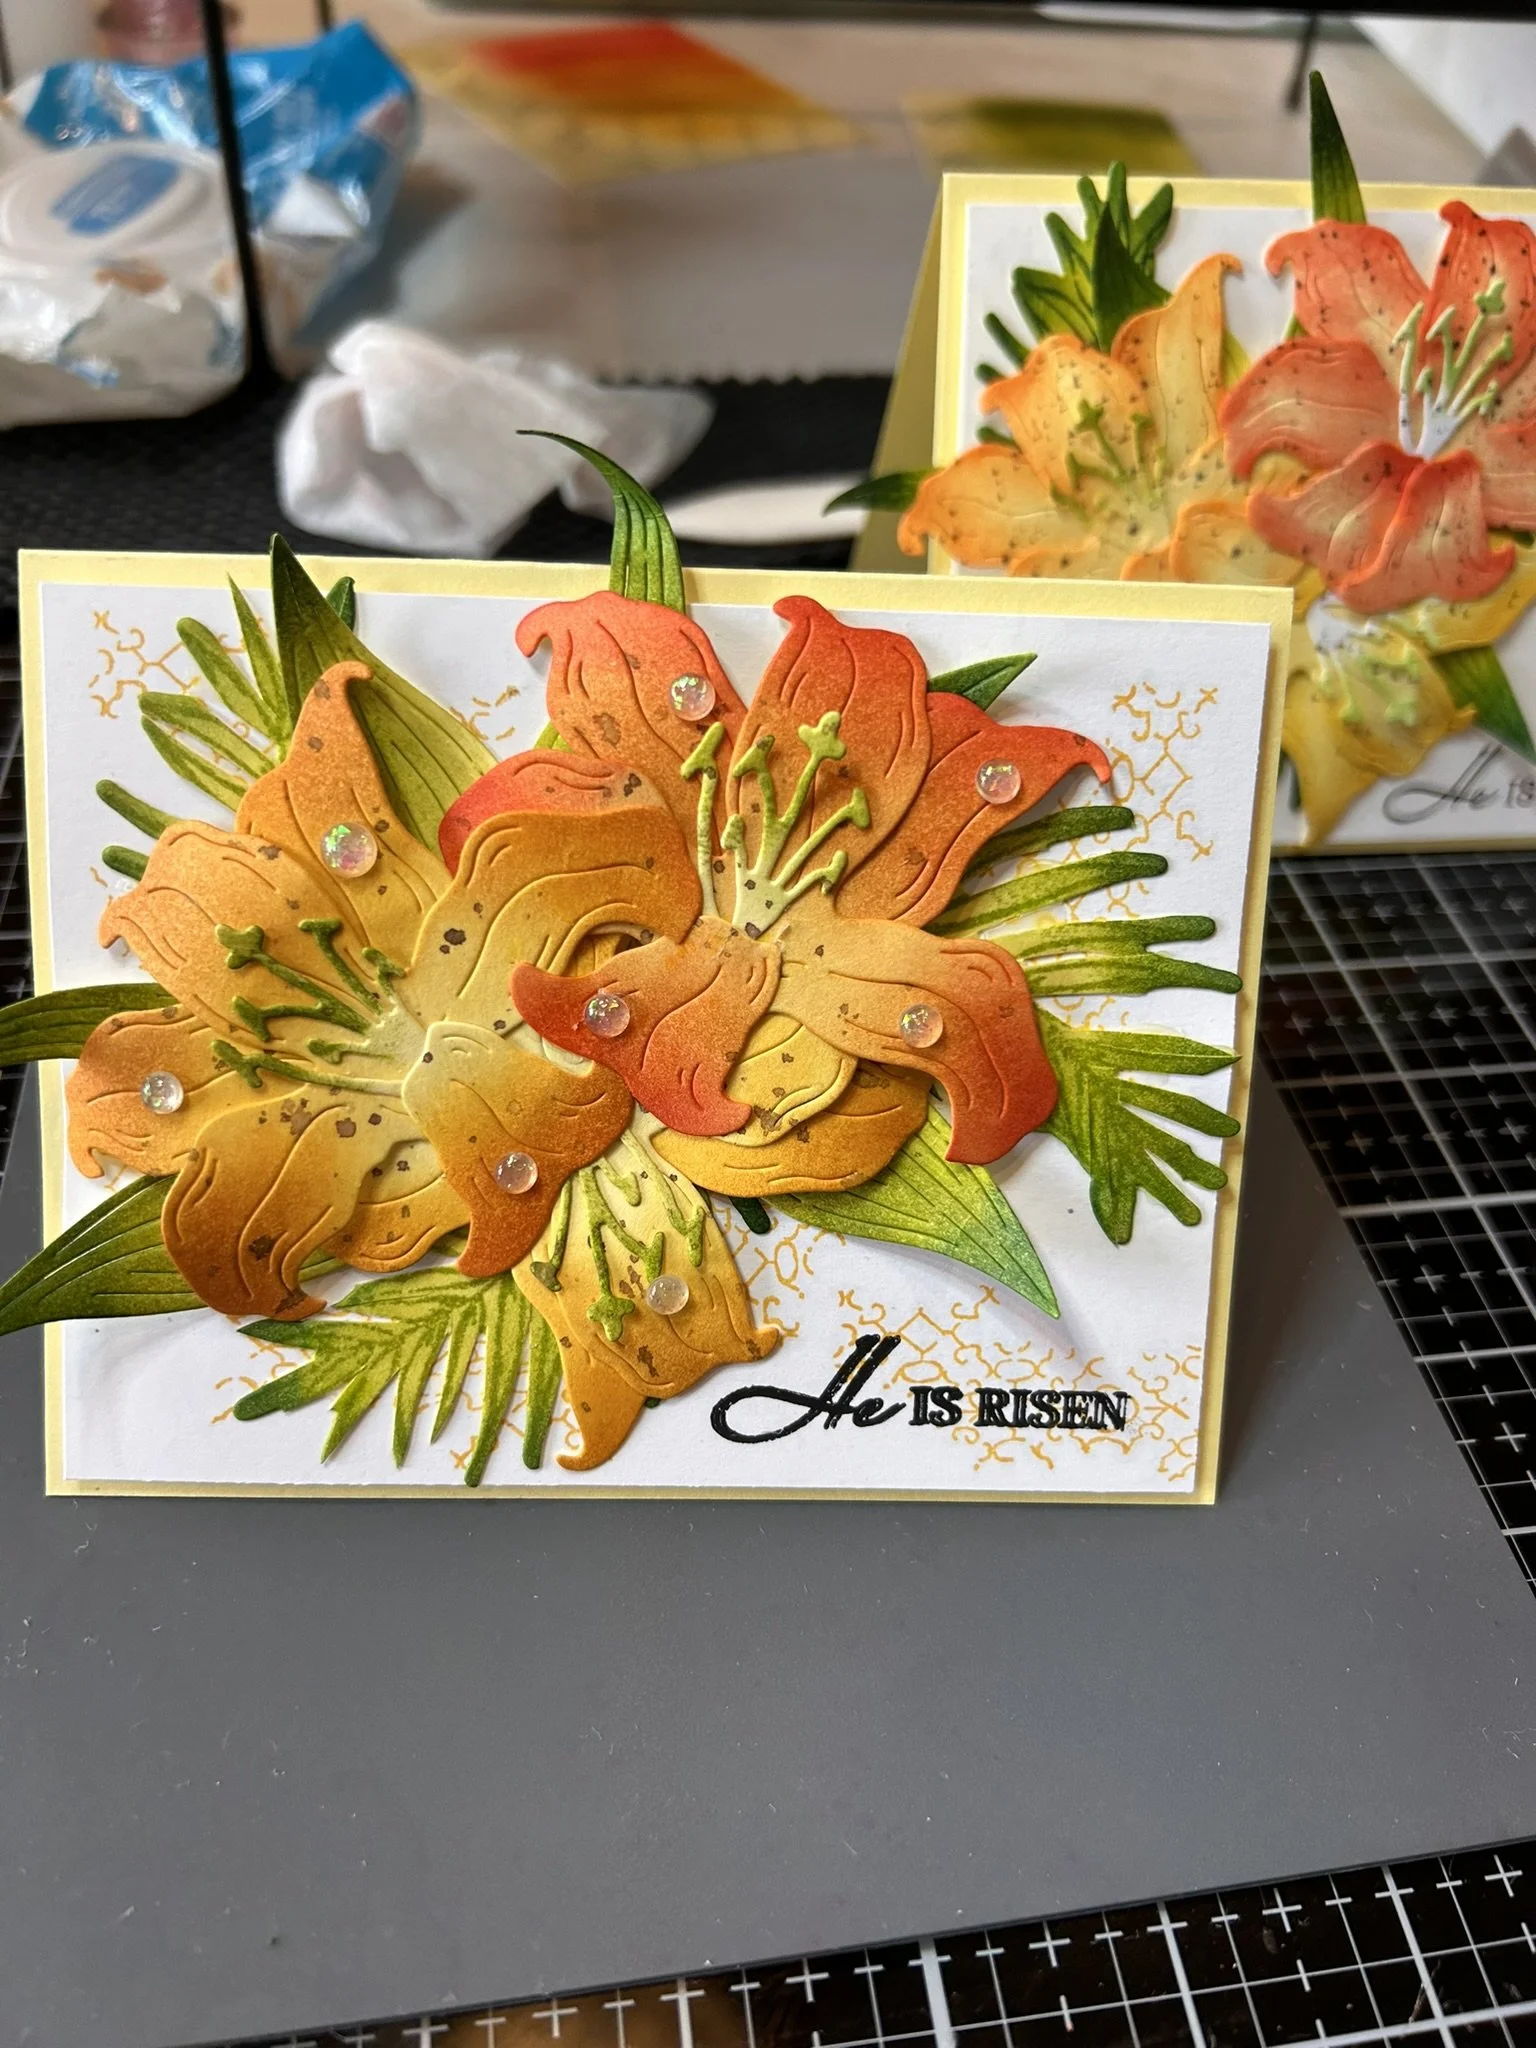
Easter Lilies Project
List of supplies used for yellow card: https://ldli.co/e/gqx4klj
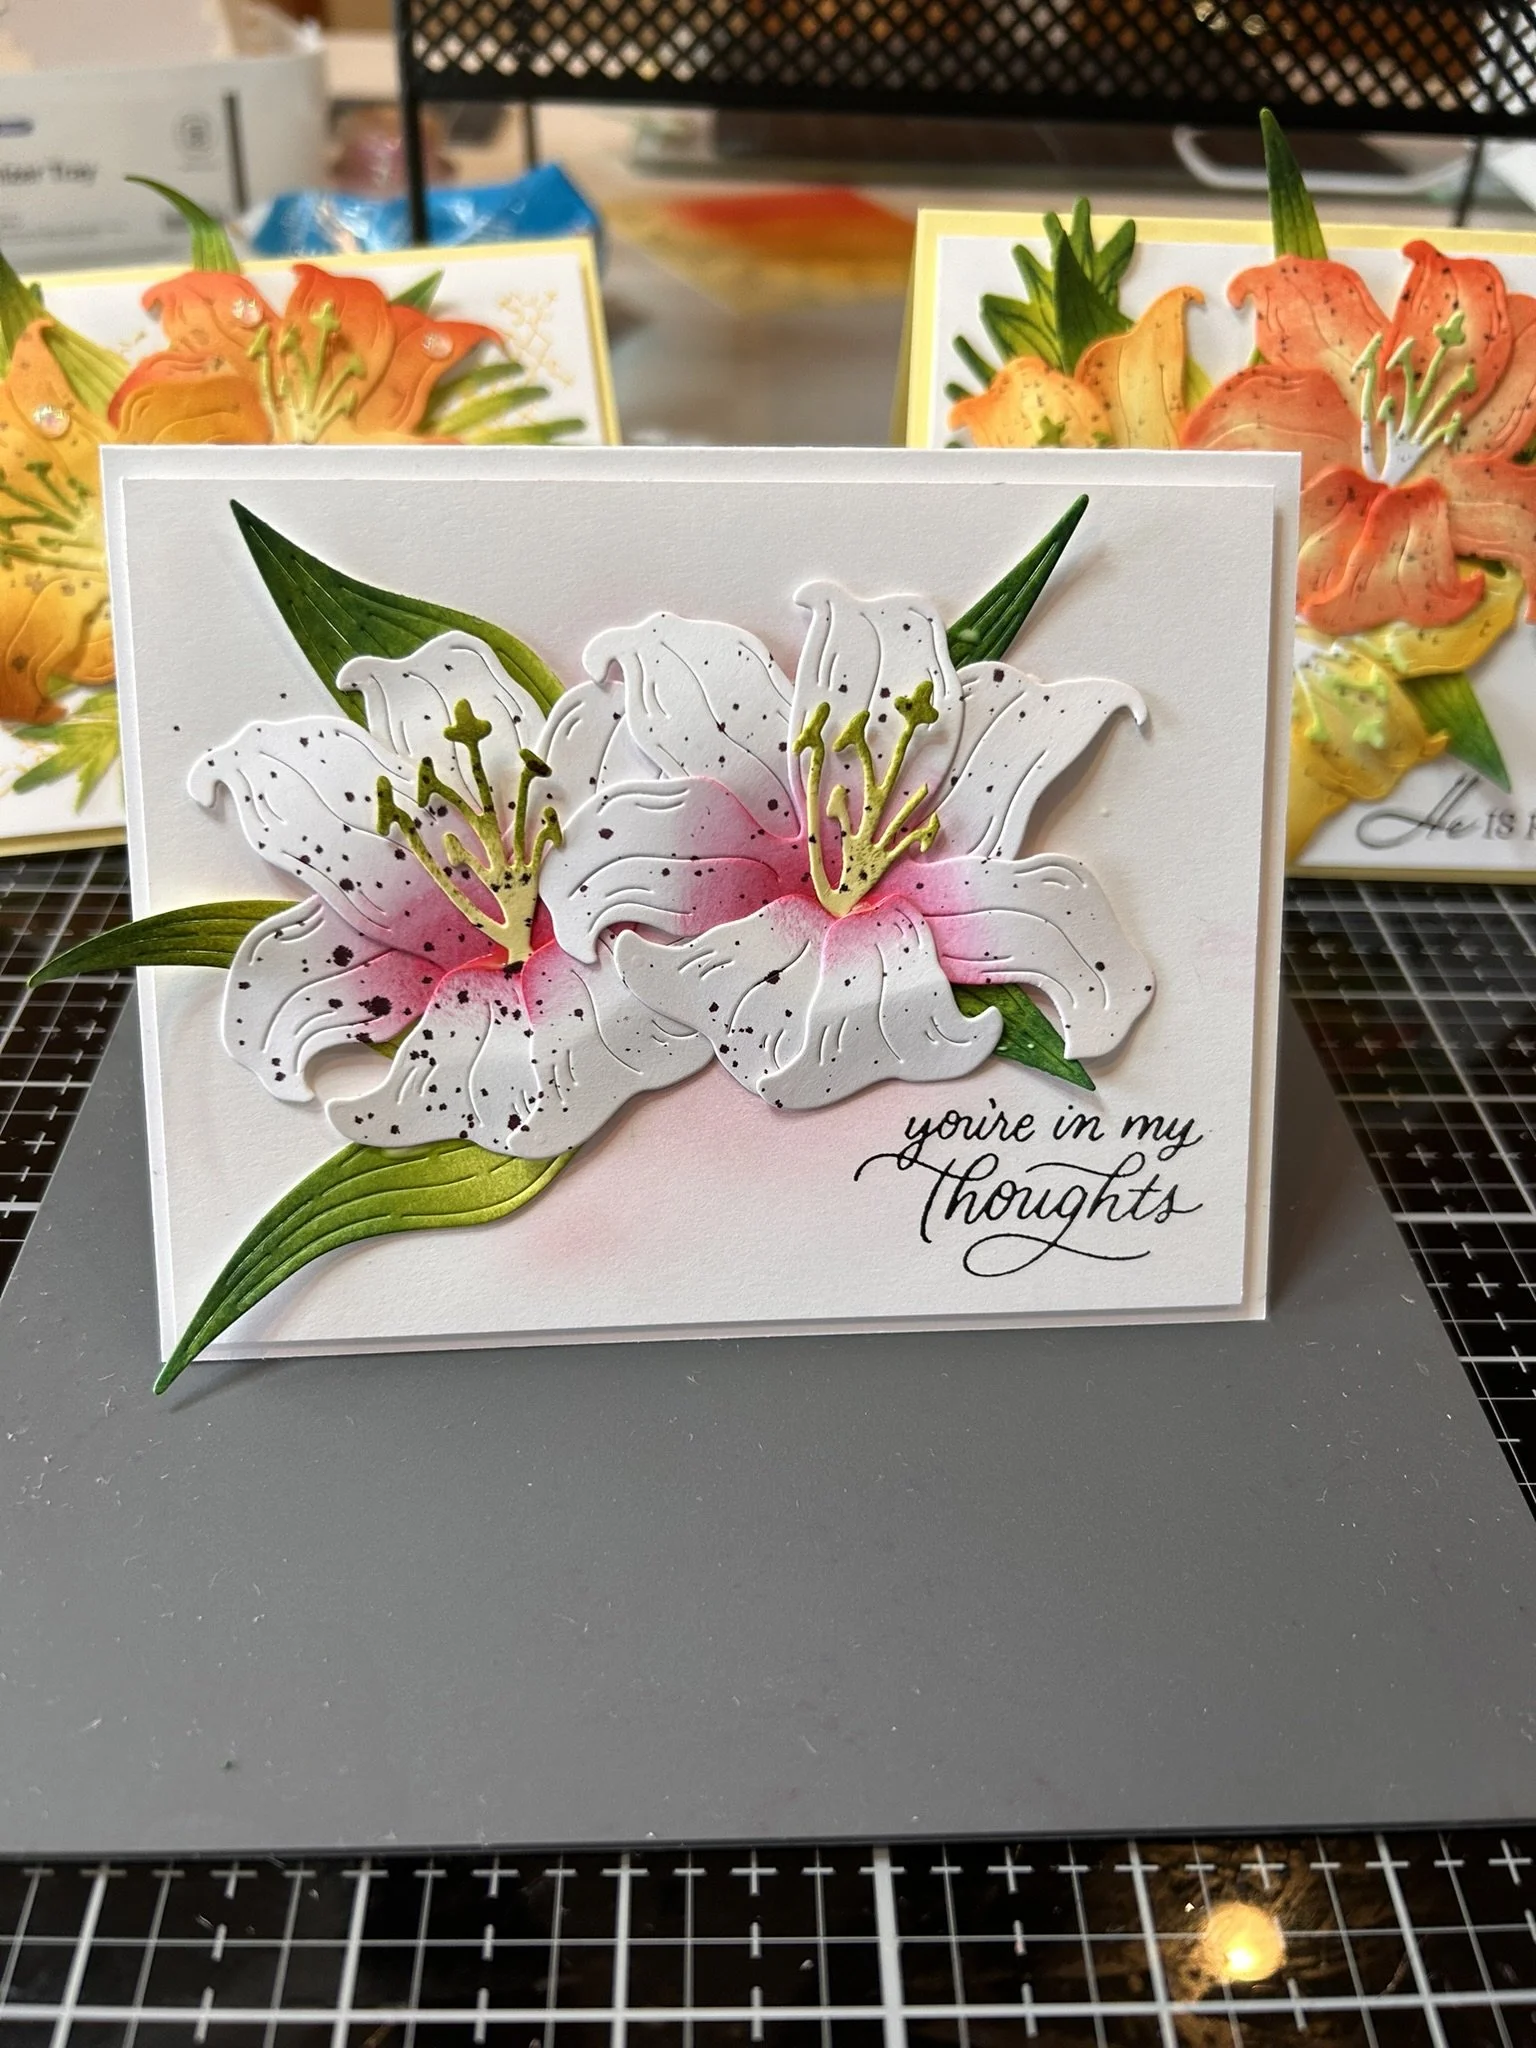
List of supplies used for pink card: https://ldli.co/e/073xjy4
Photo Gallery:
Directions listed below gallery.
Directions:
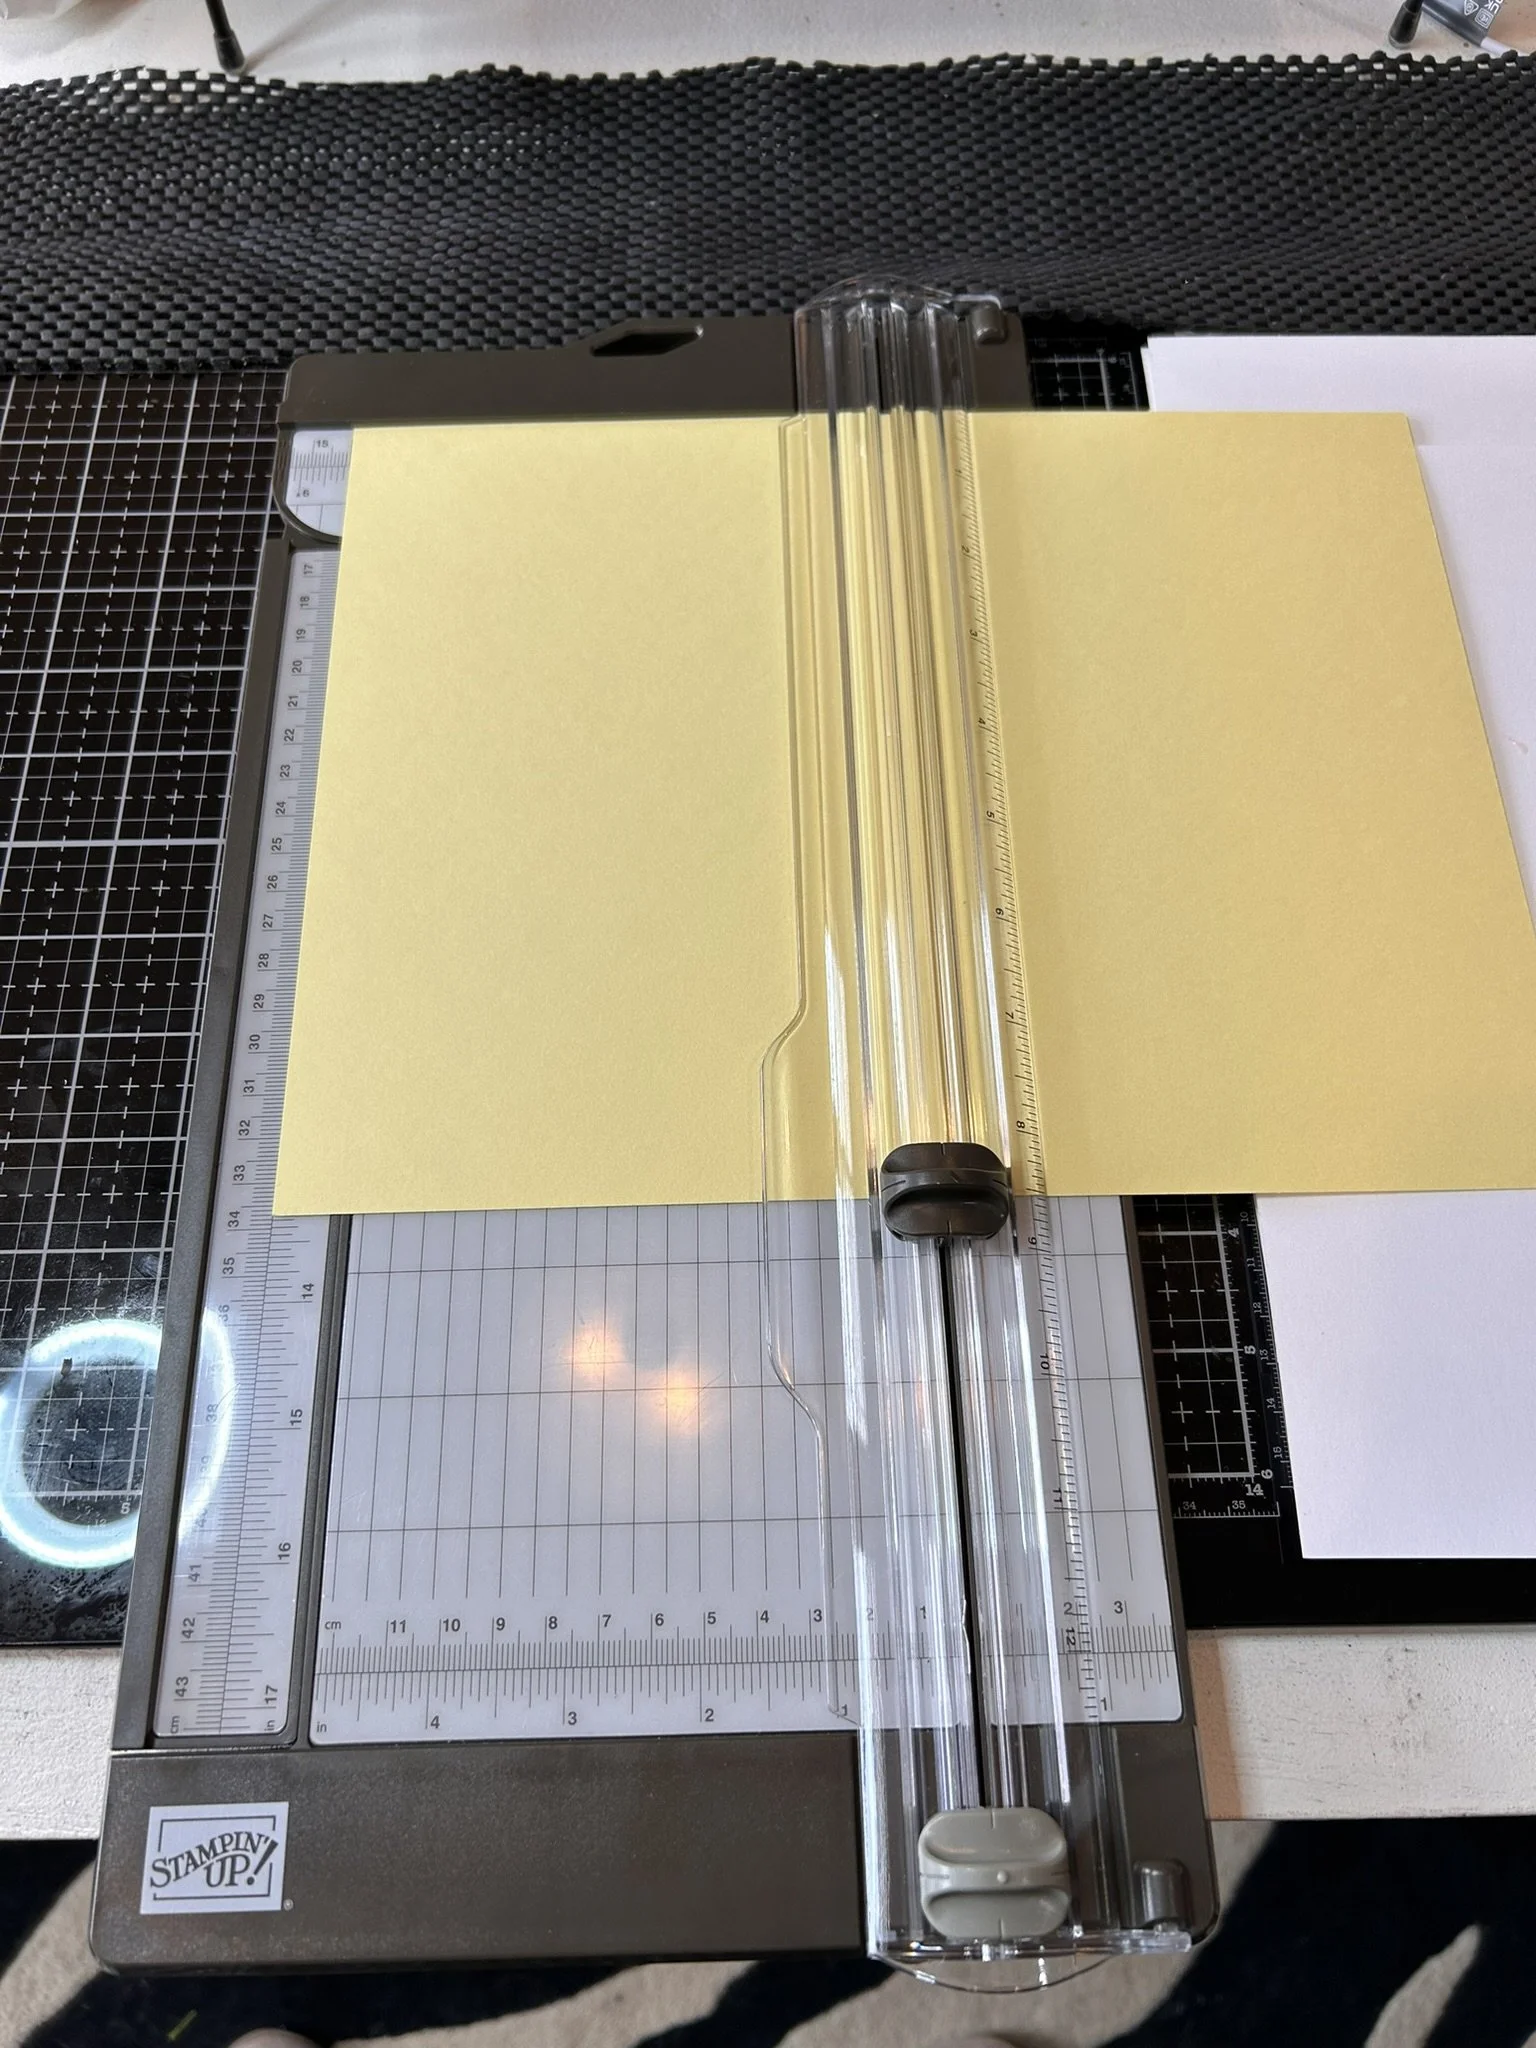
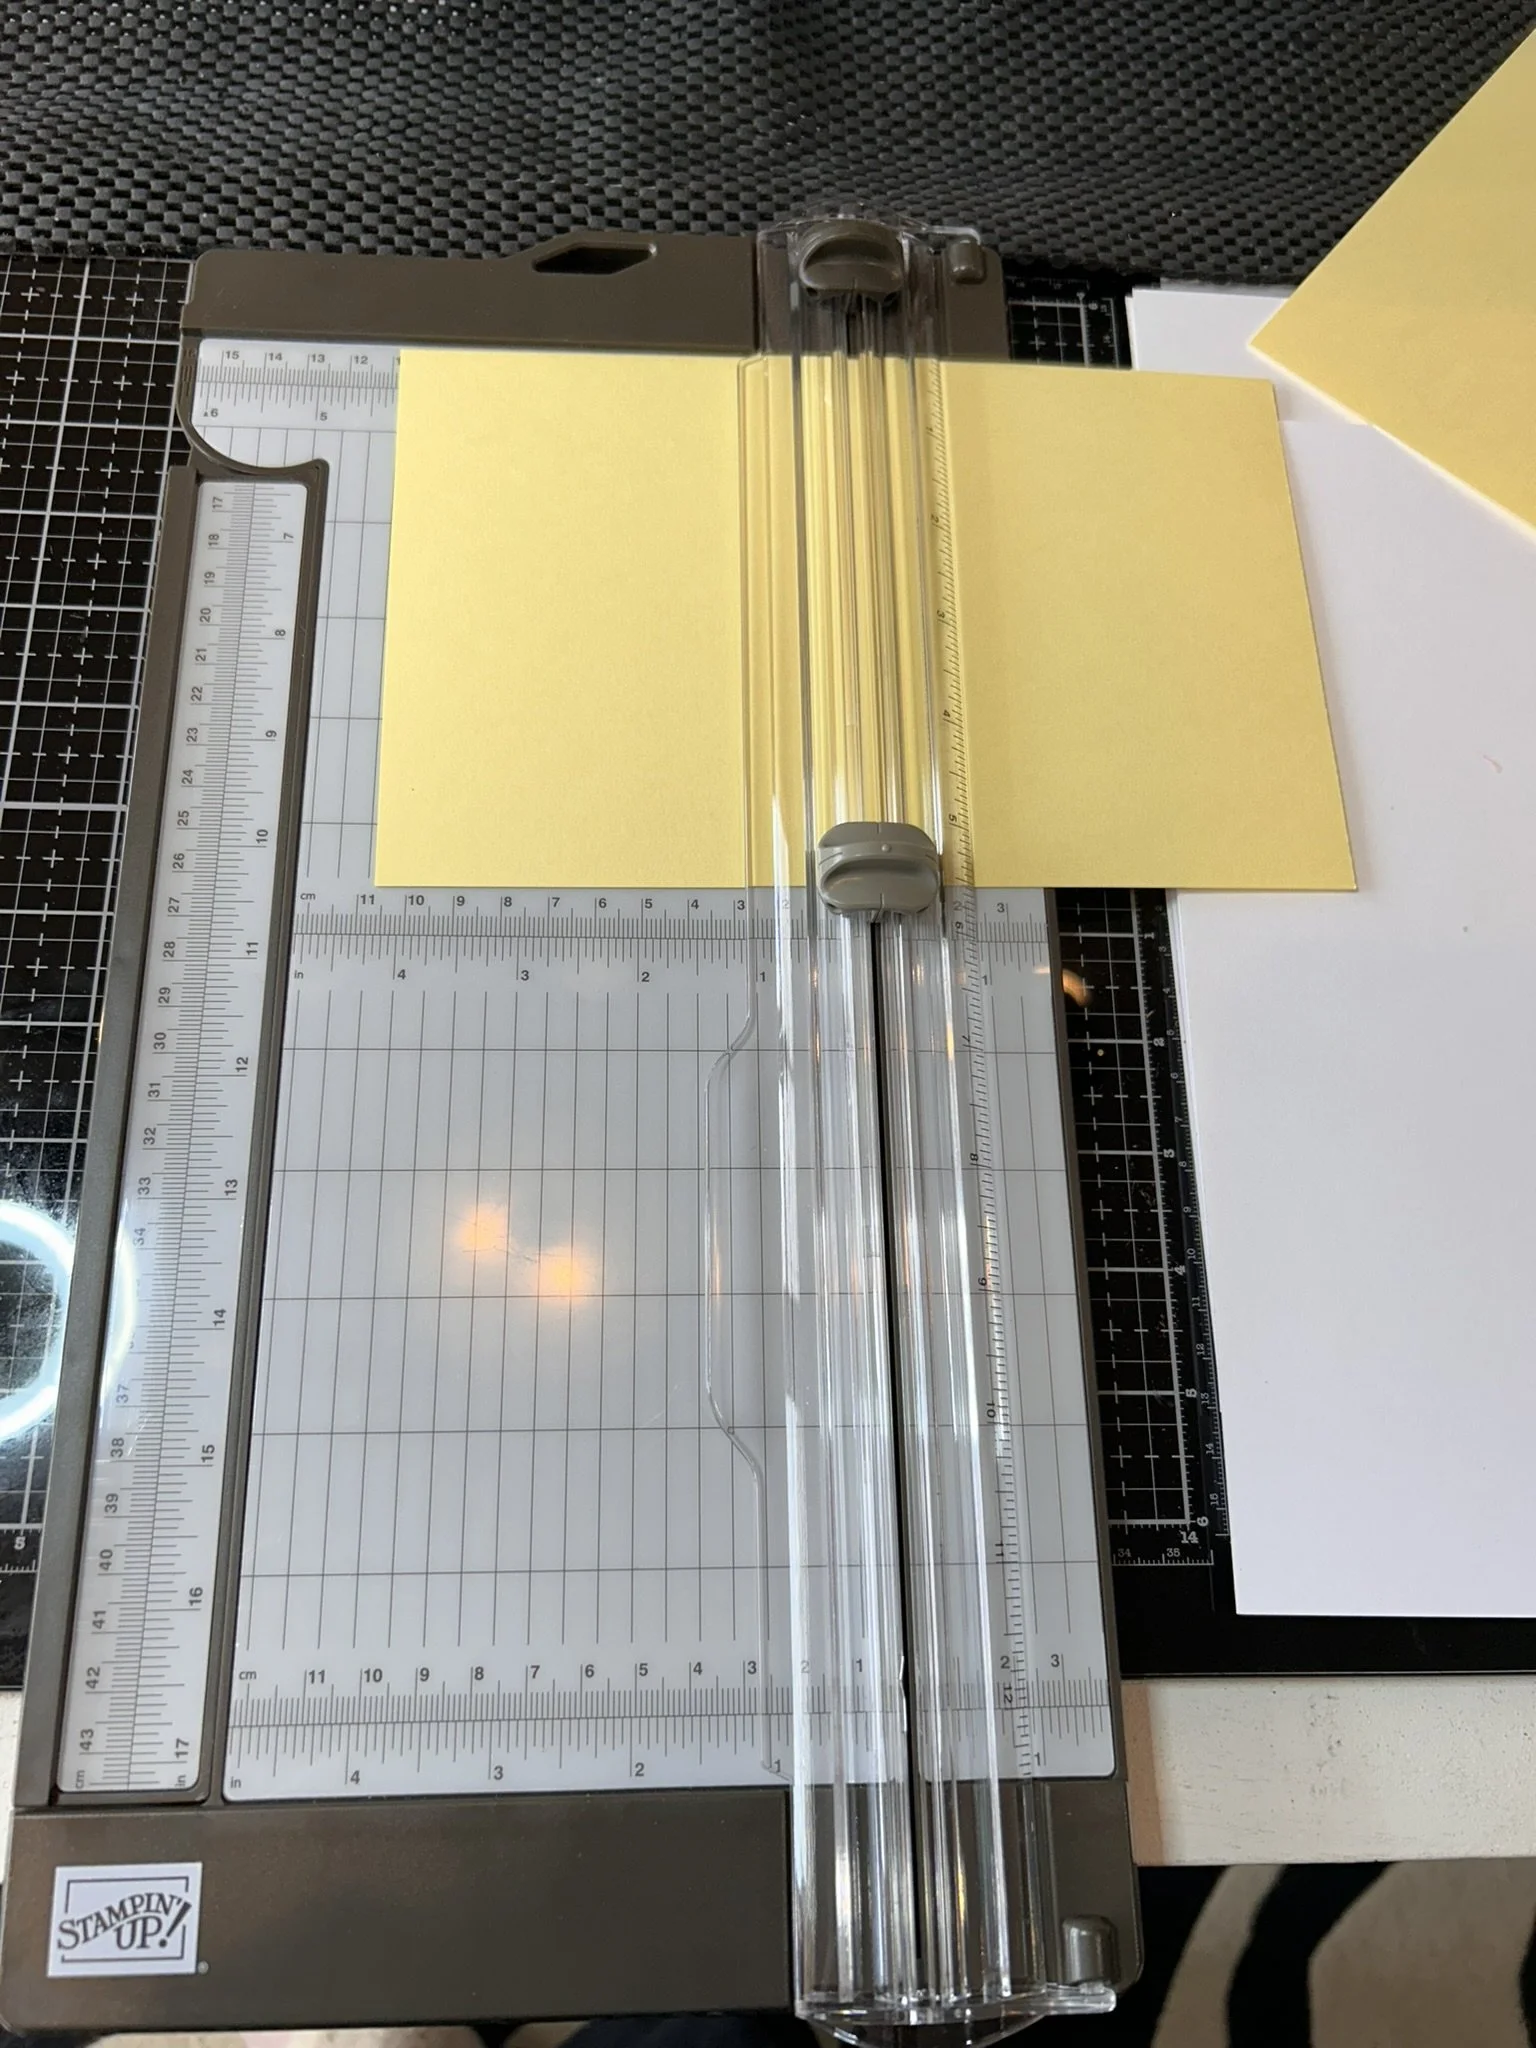
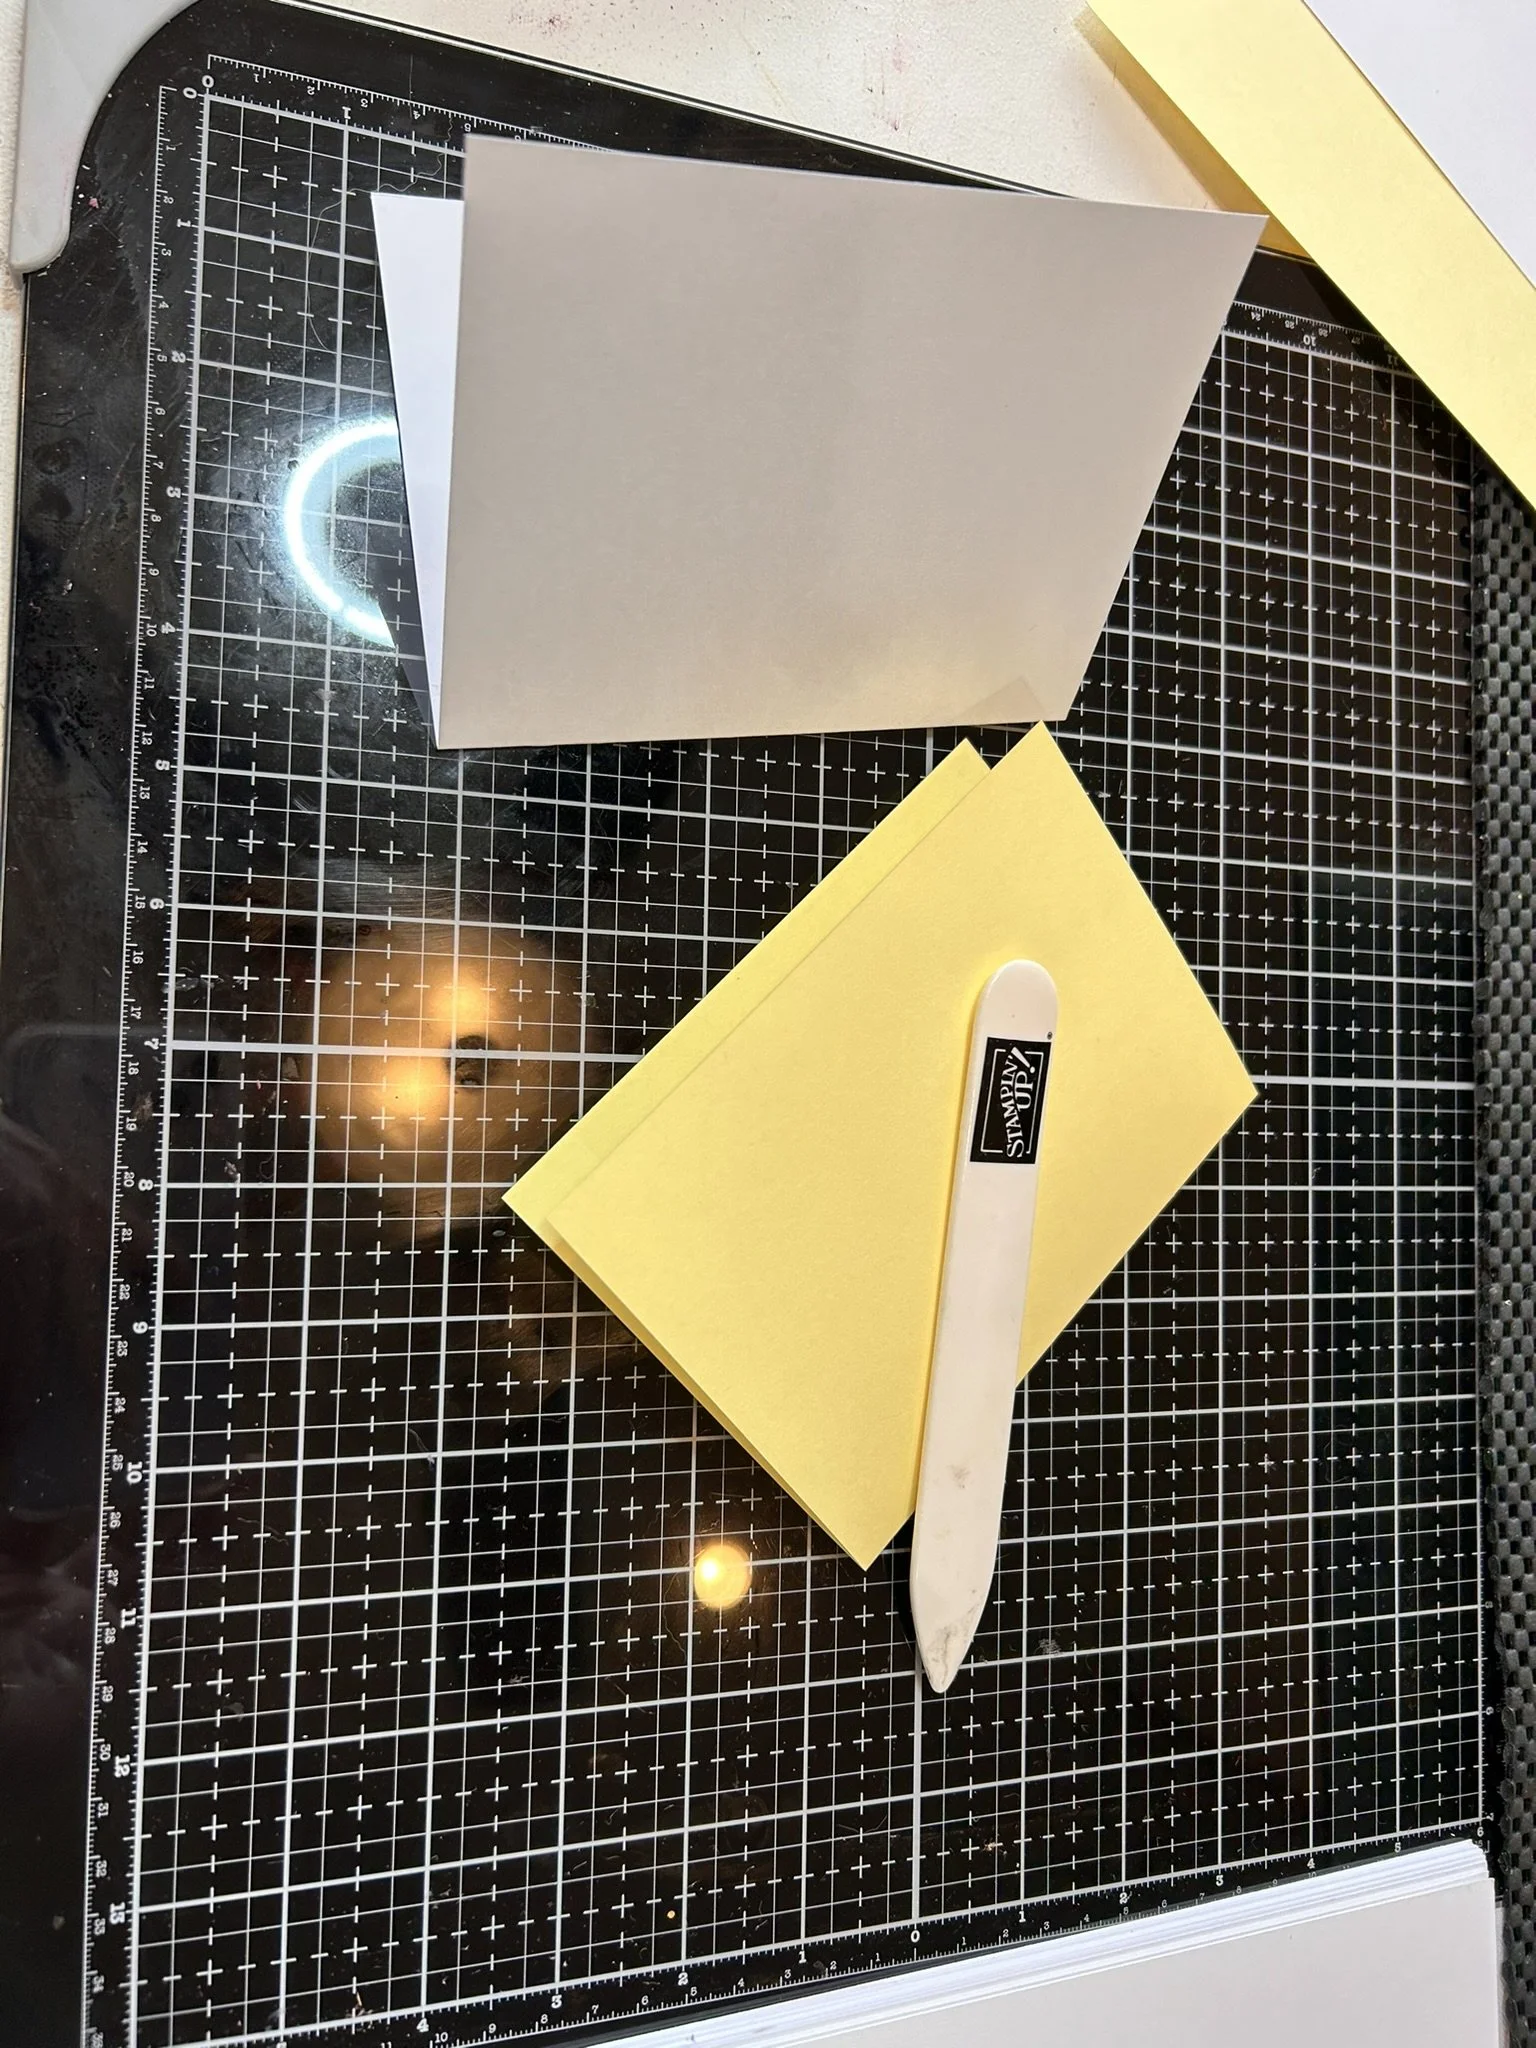
Take a piece of Lemon Lolly card stock, cut along long side at 5 ½ “, you will have two card bases measuring 5 ½” by 8 ½”.
Score one piece in half on long side at 4 ½”
Fold and burnish using your bone folder
Repeat with one piece of thick basic white cardstock
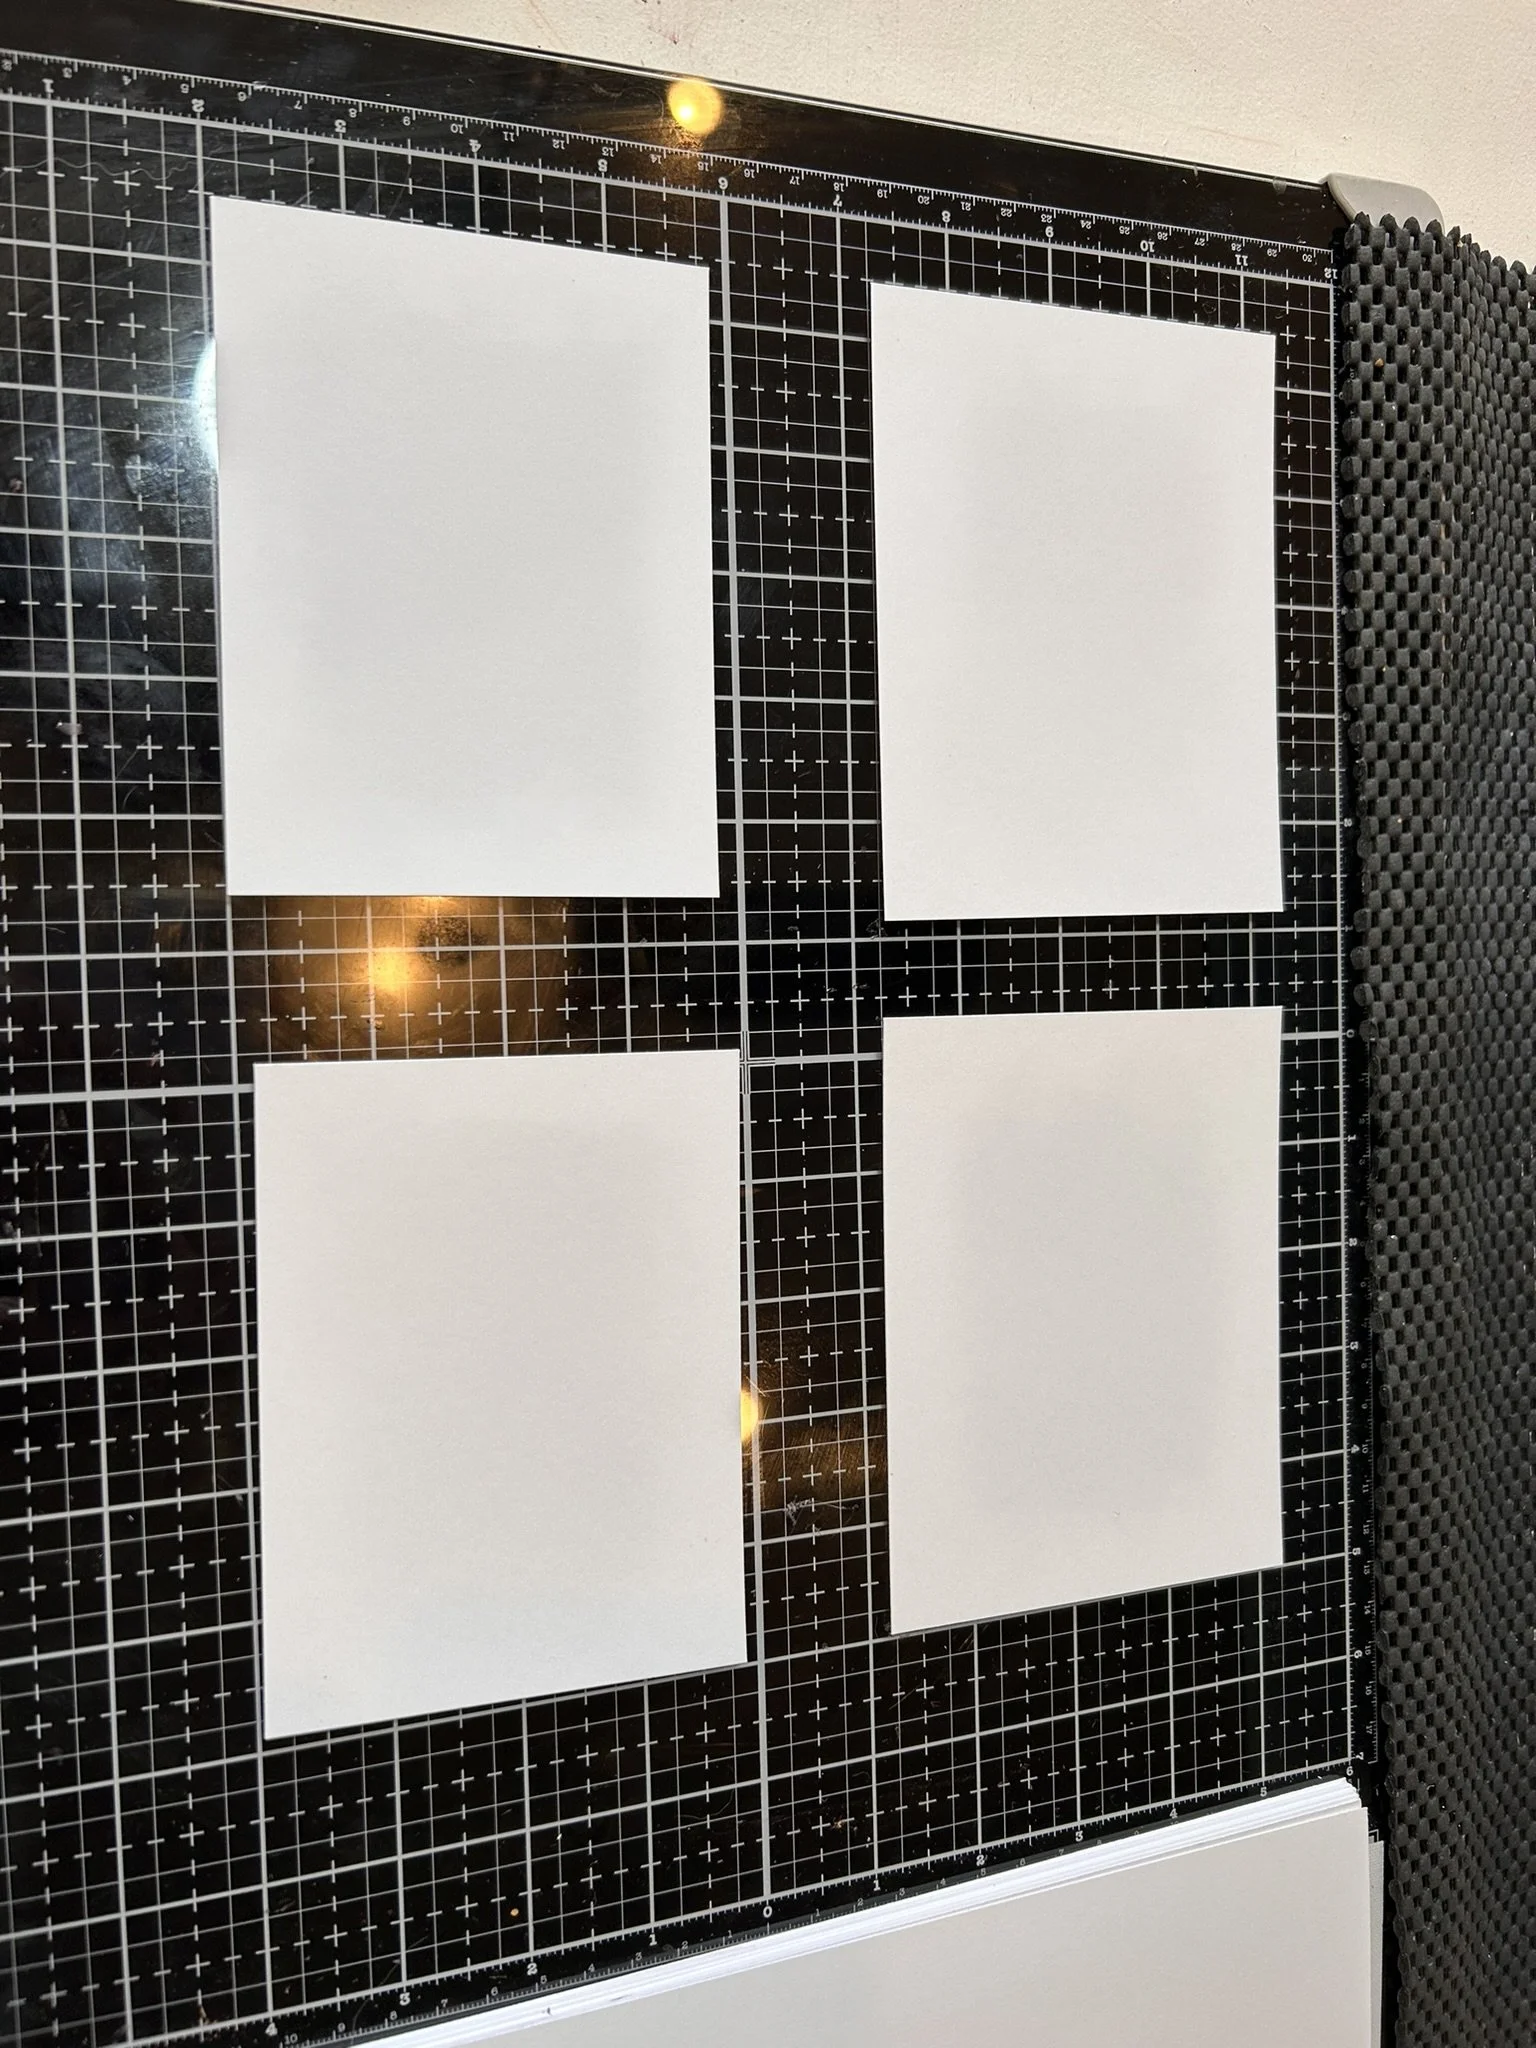
Take another piece of basic white cardstock and cut into four pieces to make your layers. Cut along long side at 5 ¼” and then turn to cut two pieces at 4”. Repeat.
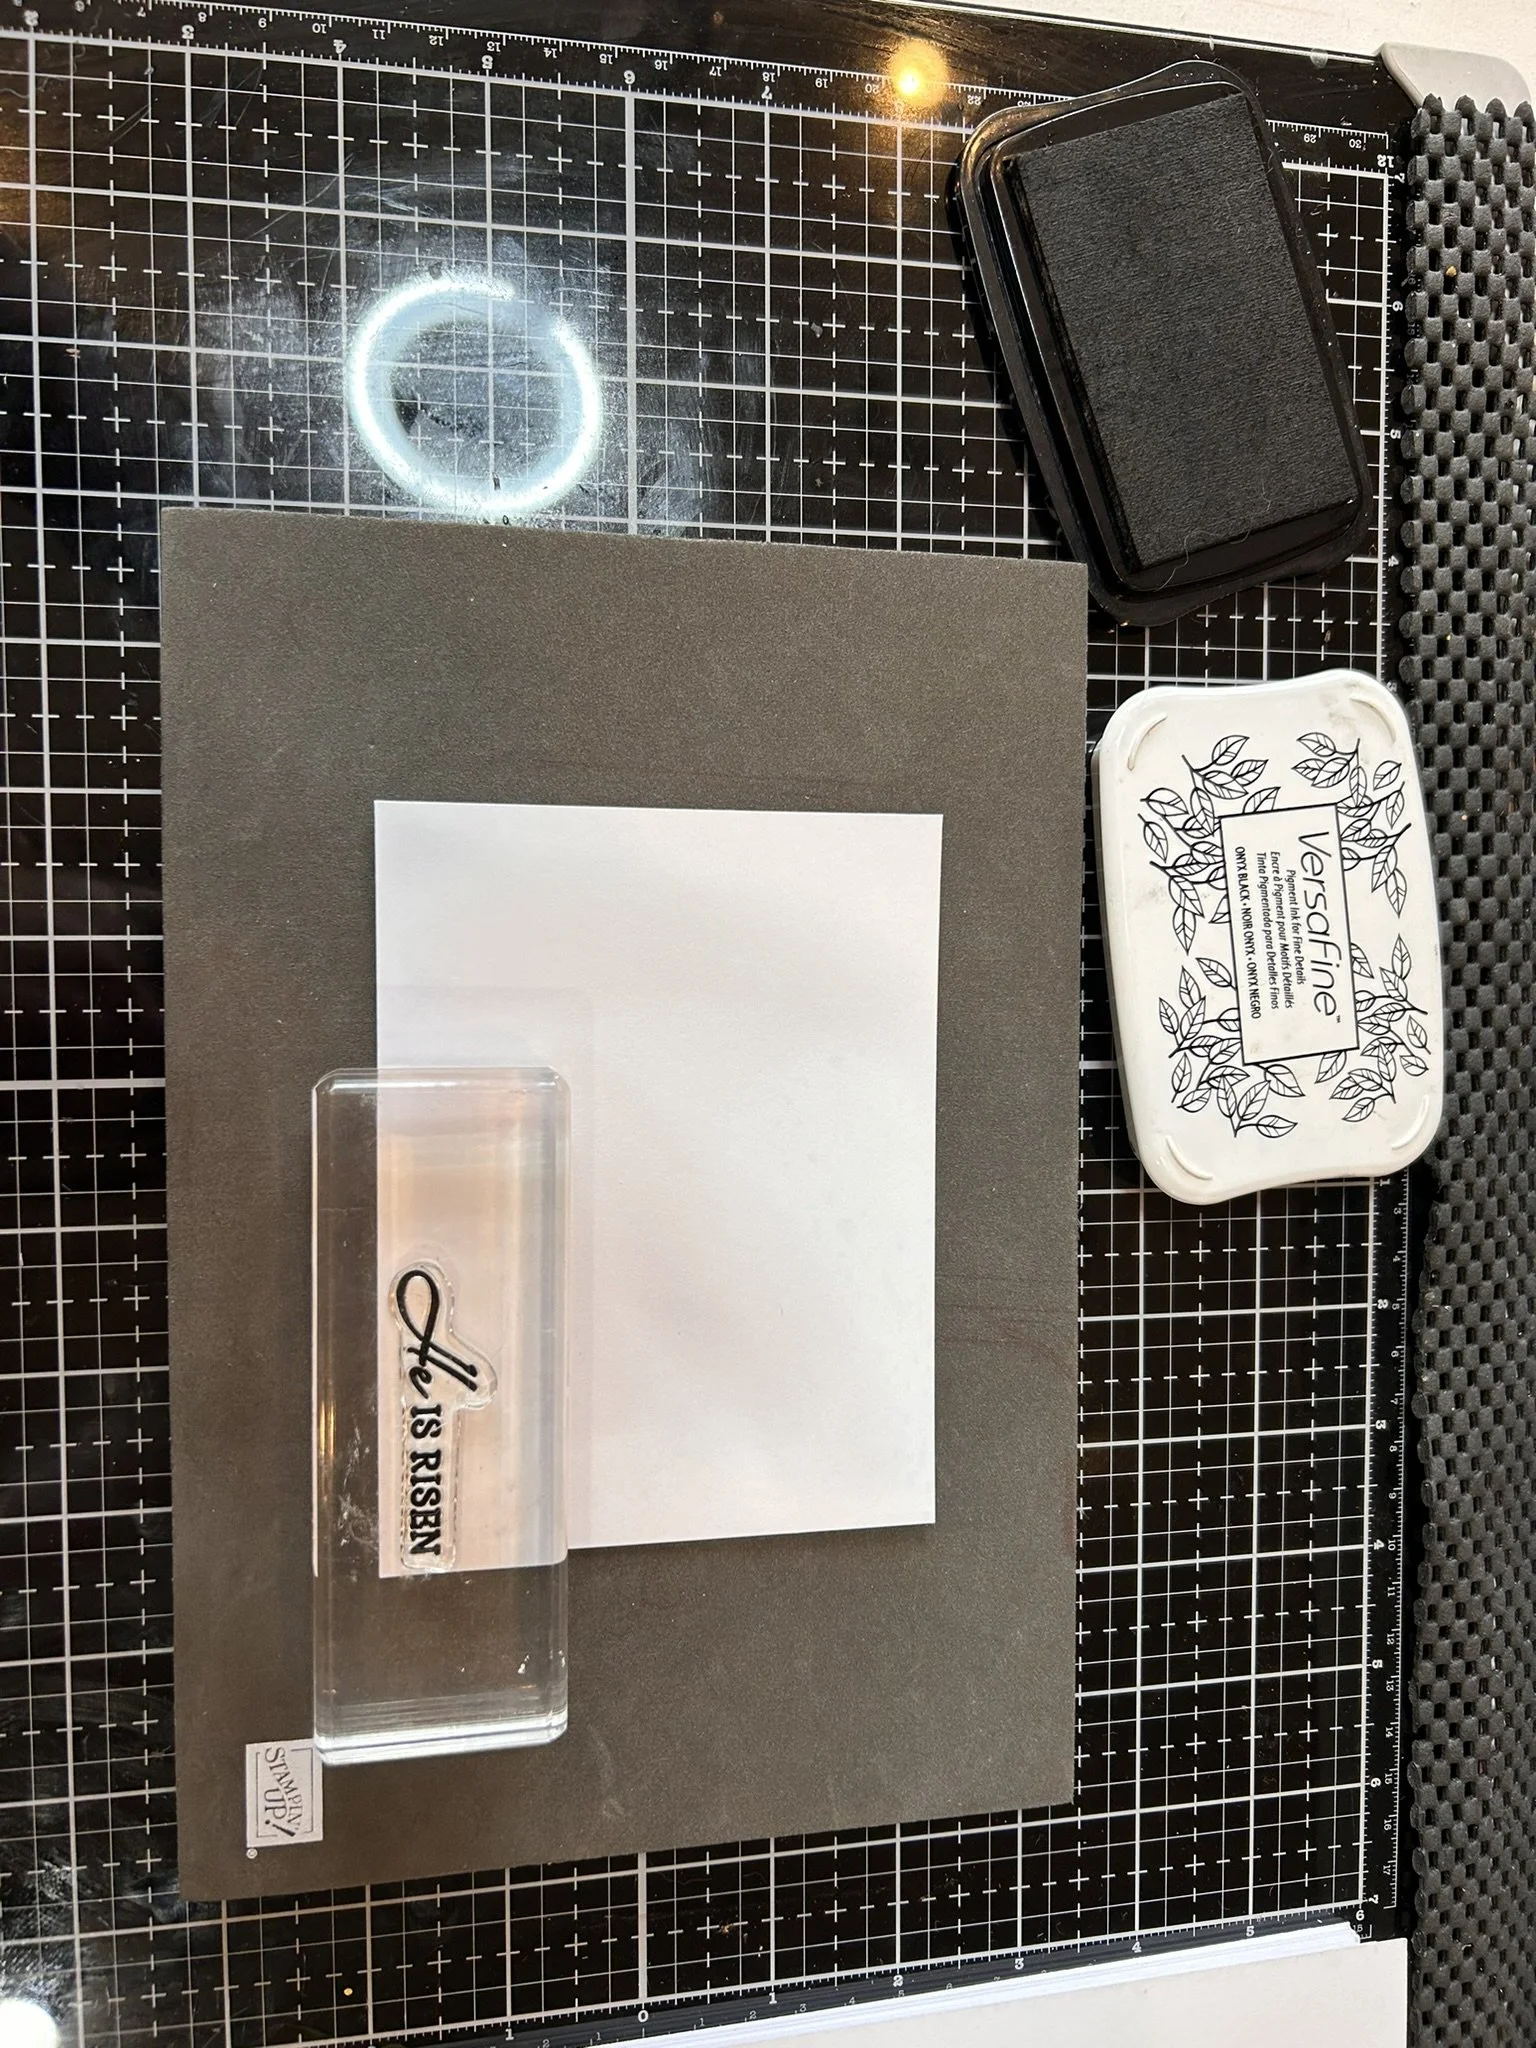
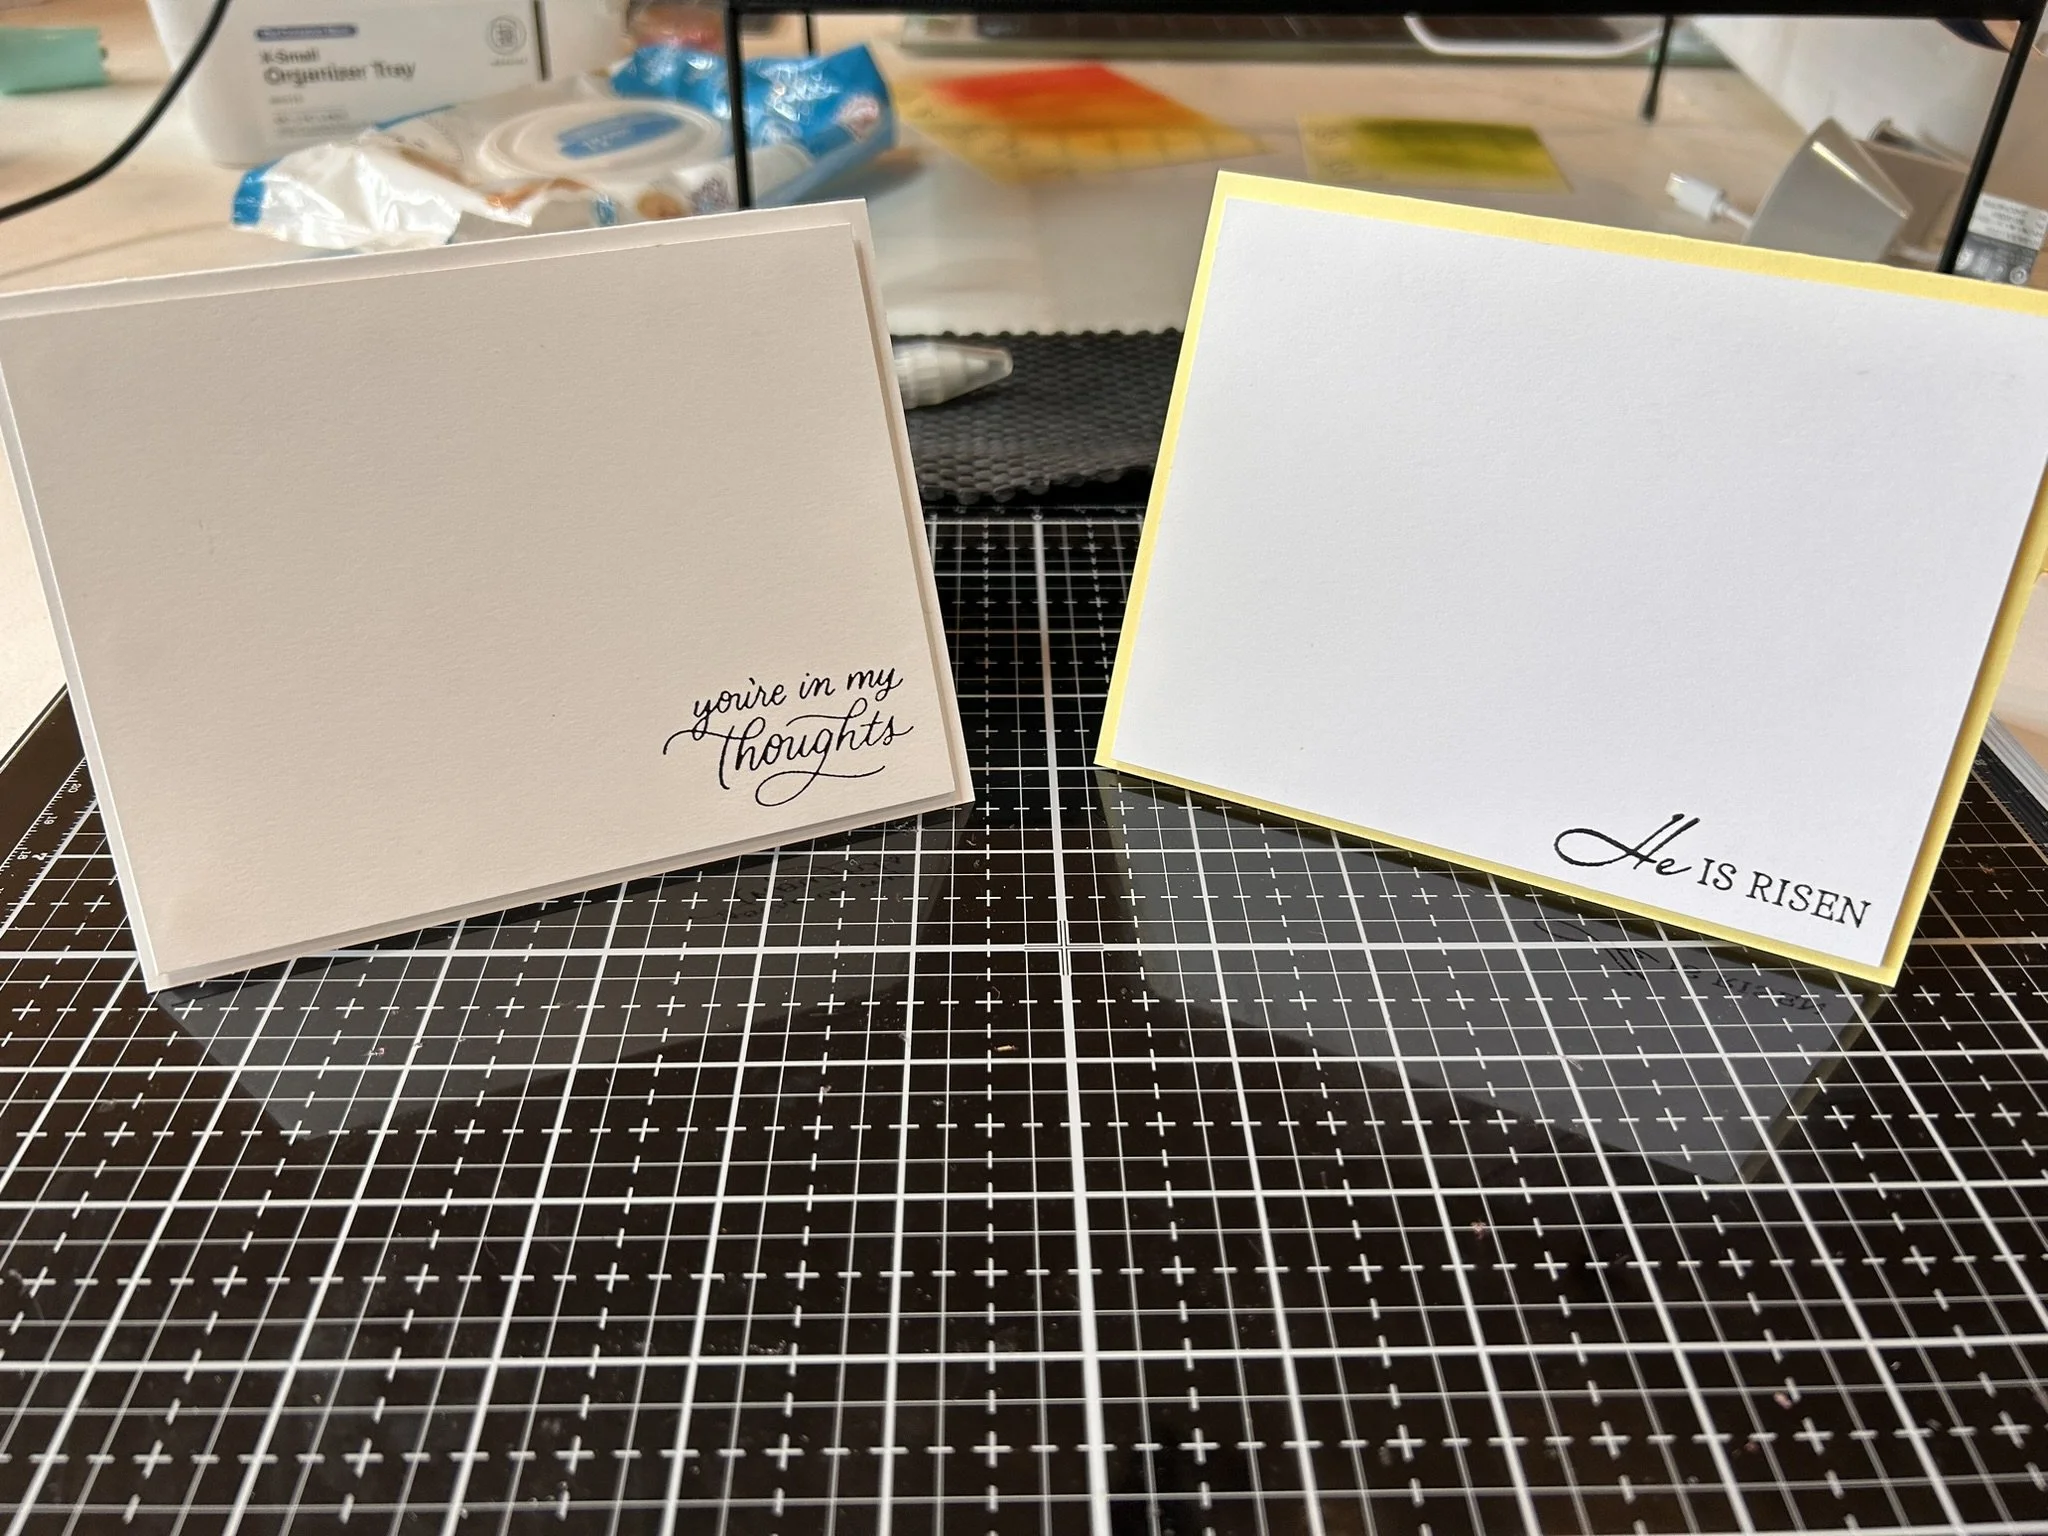
Stamp sentiment on one of your white layers in the lower left corner, using Versafine Onyx ink. Side aside to dry.
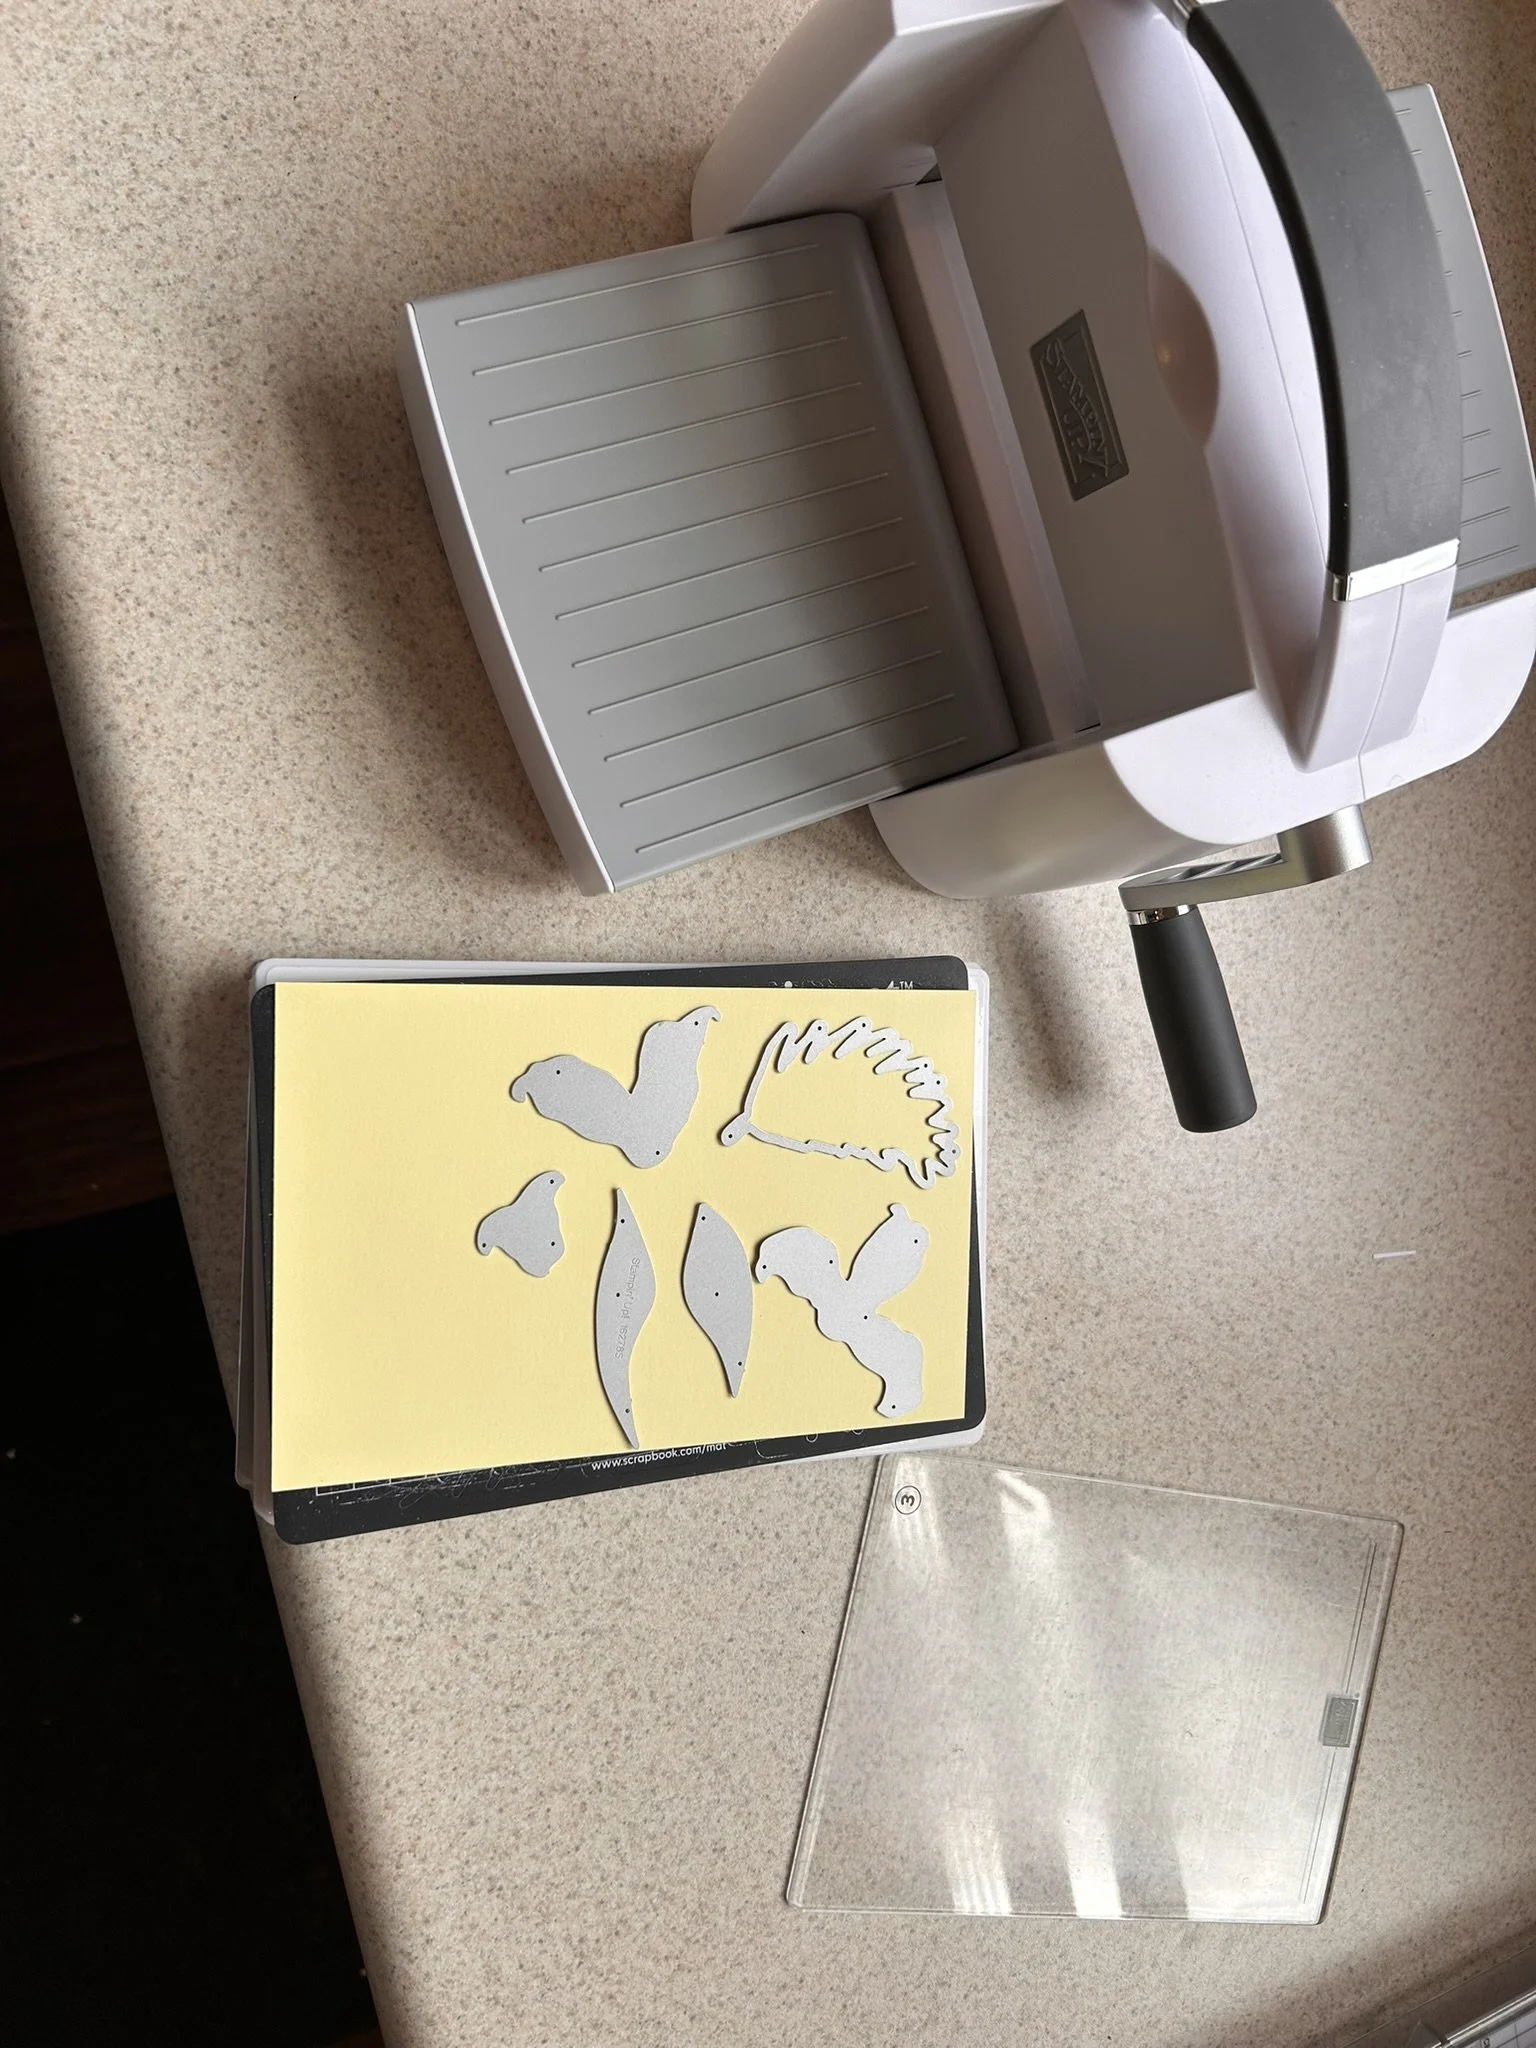
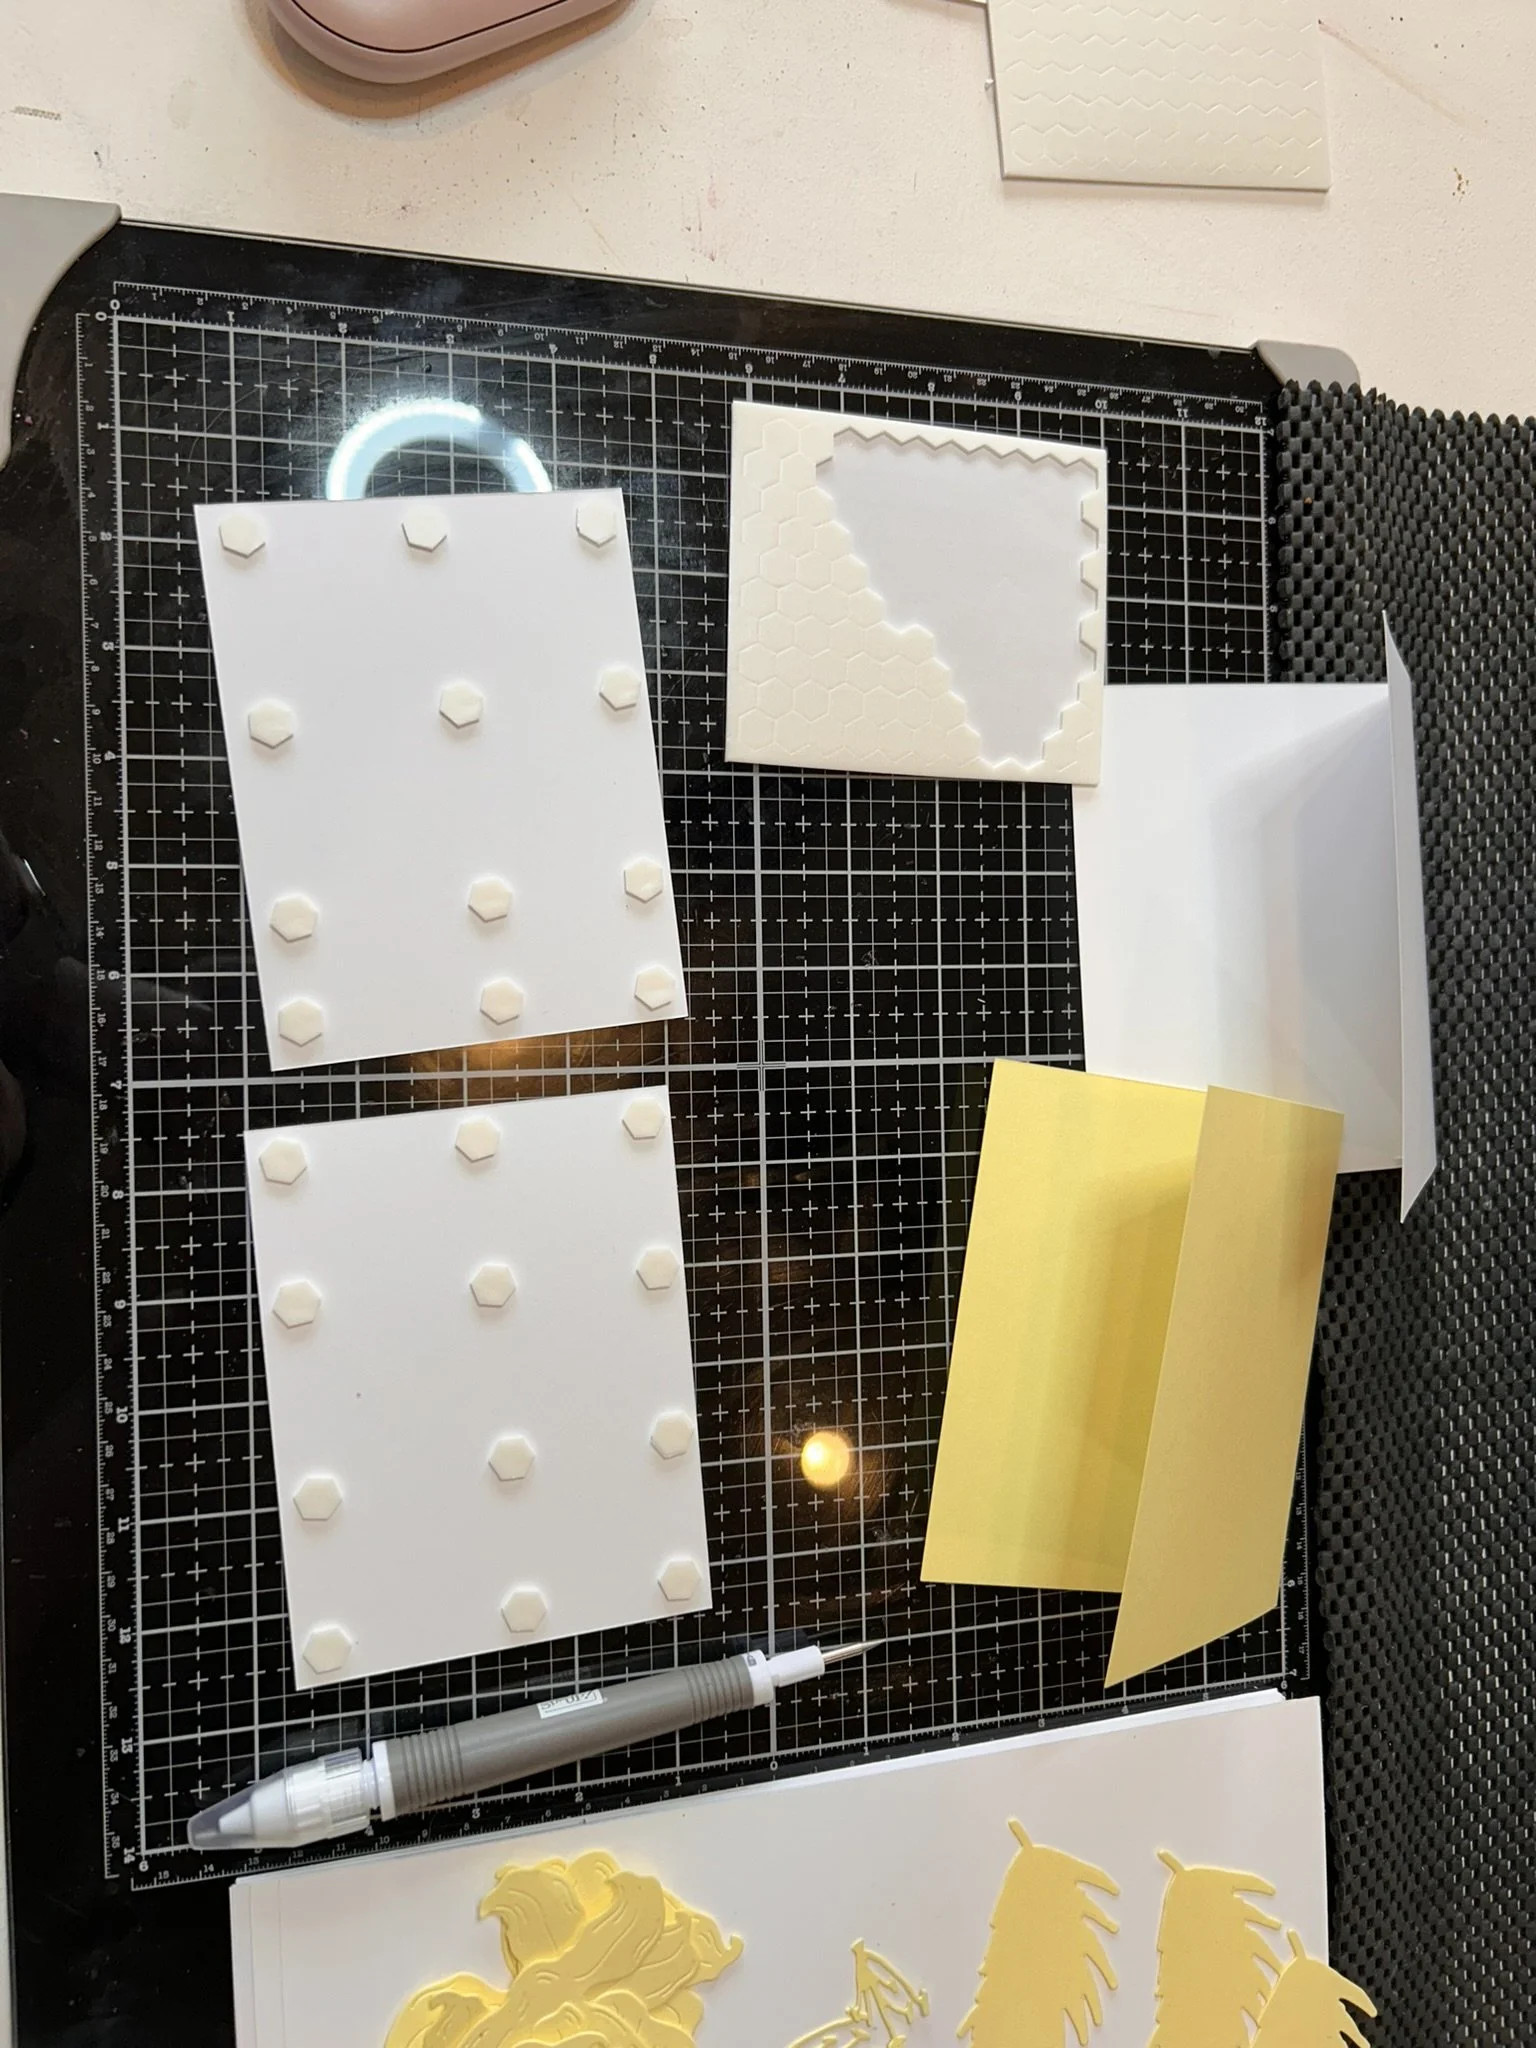
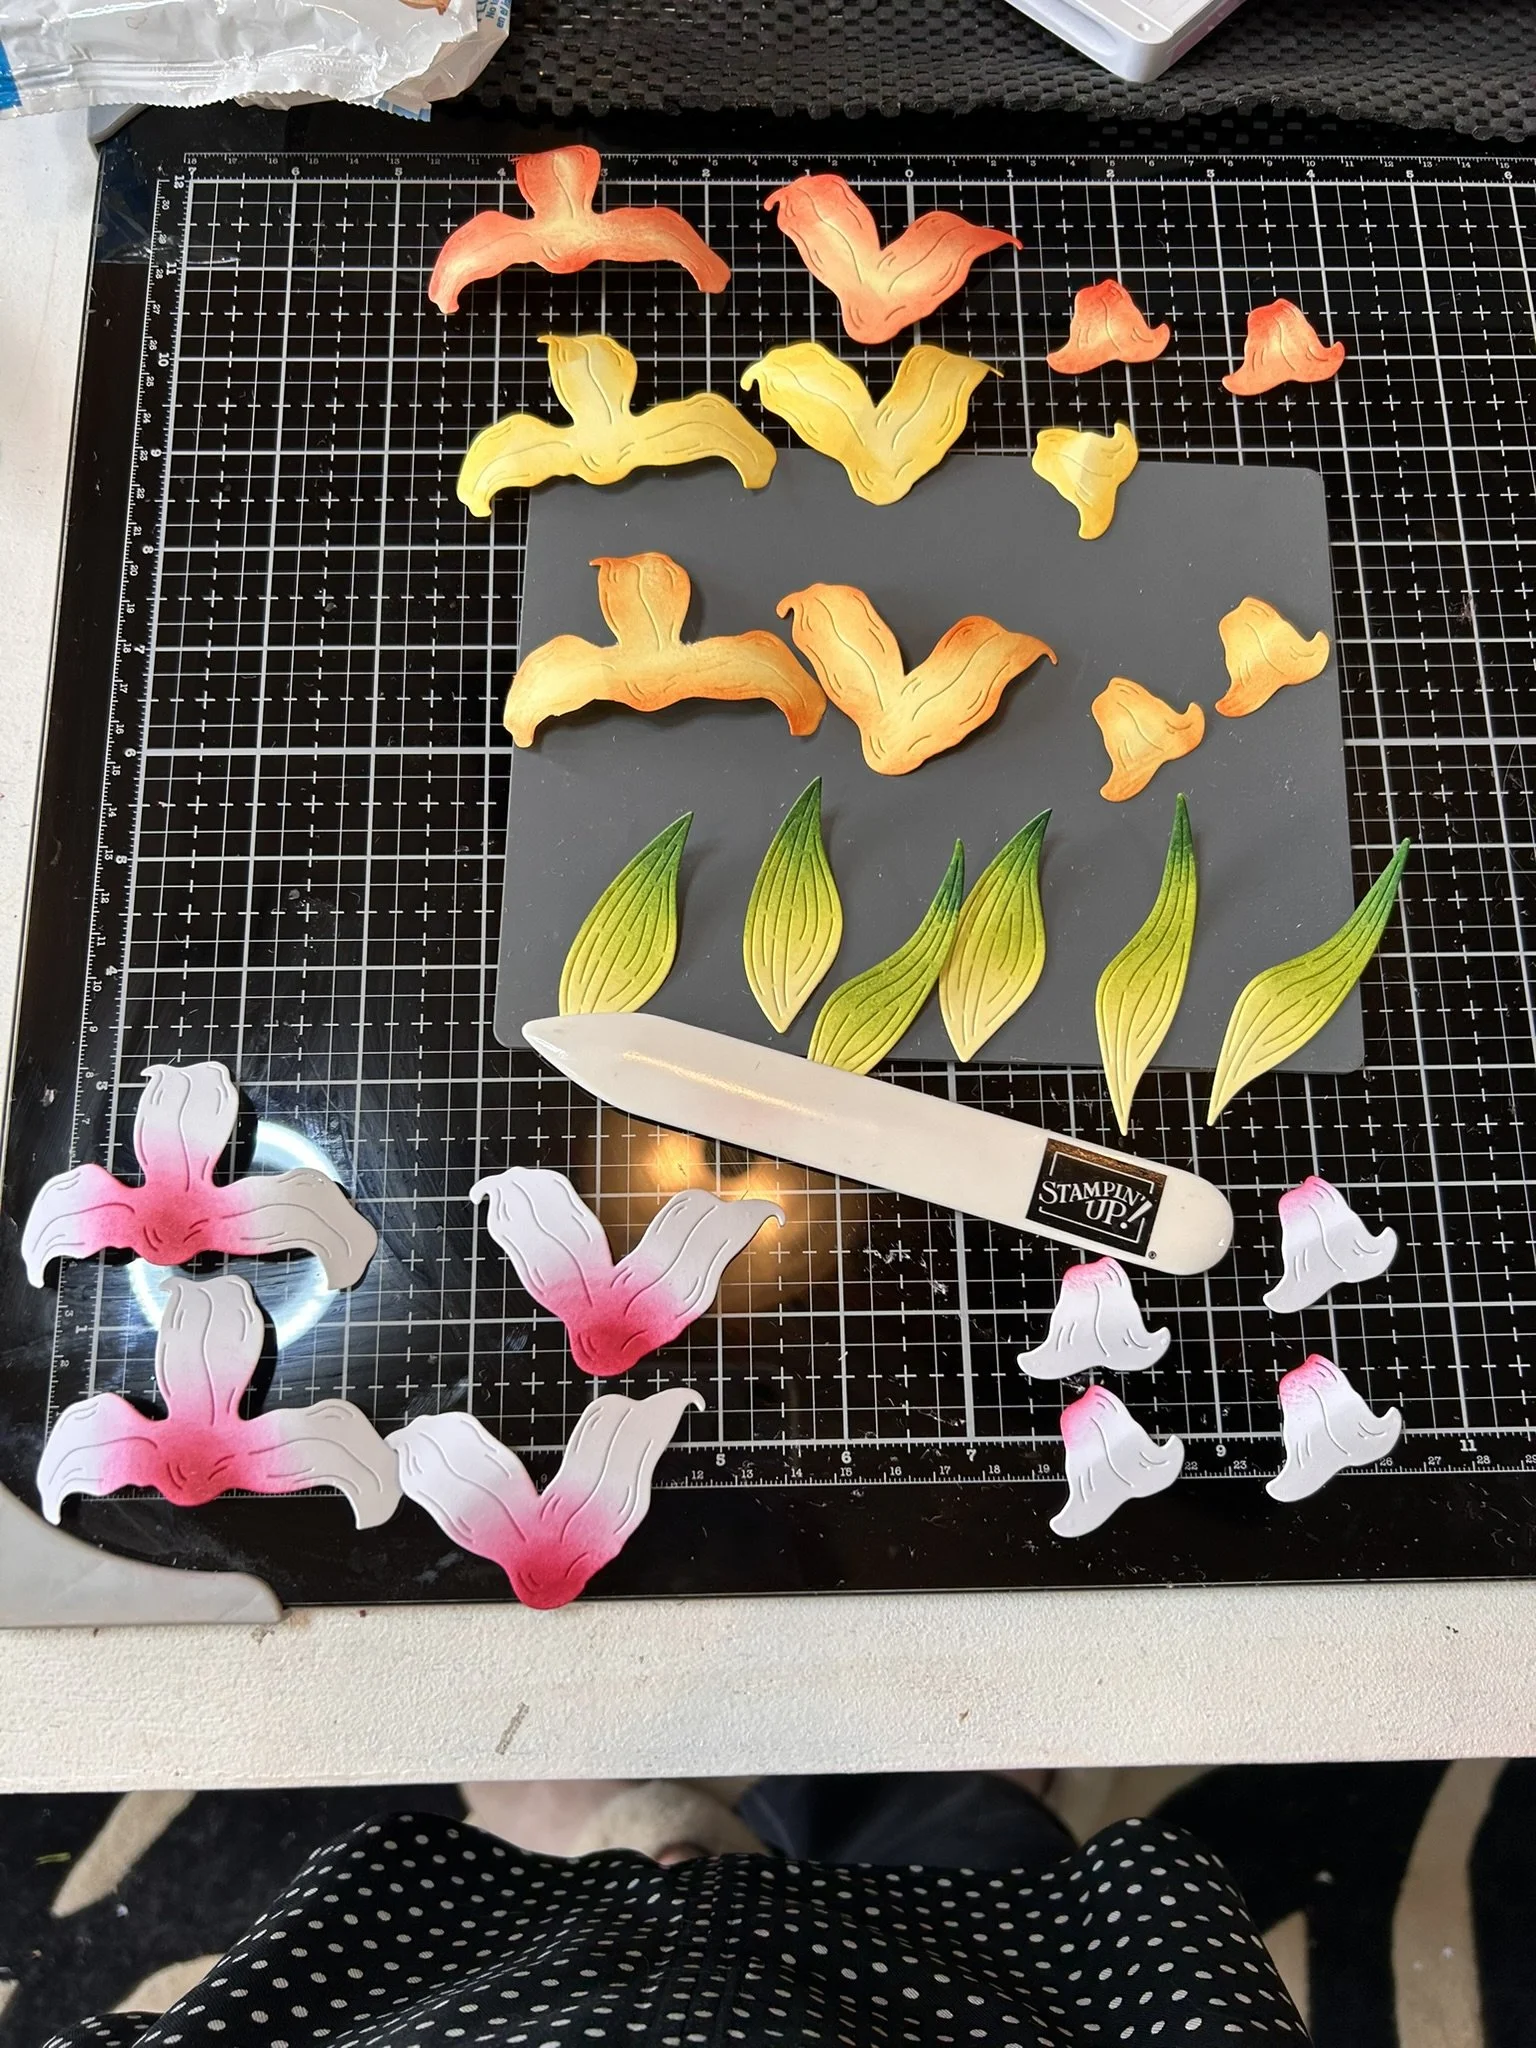
Using detailed flower building dies from your Easter Lilies bundle (the ones with the lines inside), cut out three sets of leaves and flowers out of your lemon lolly cardstock, and cut out two sets of leaves and flowers out of your thick basic white card stock.
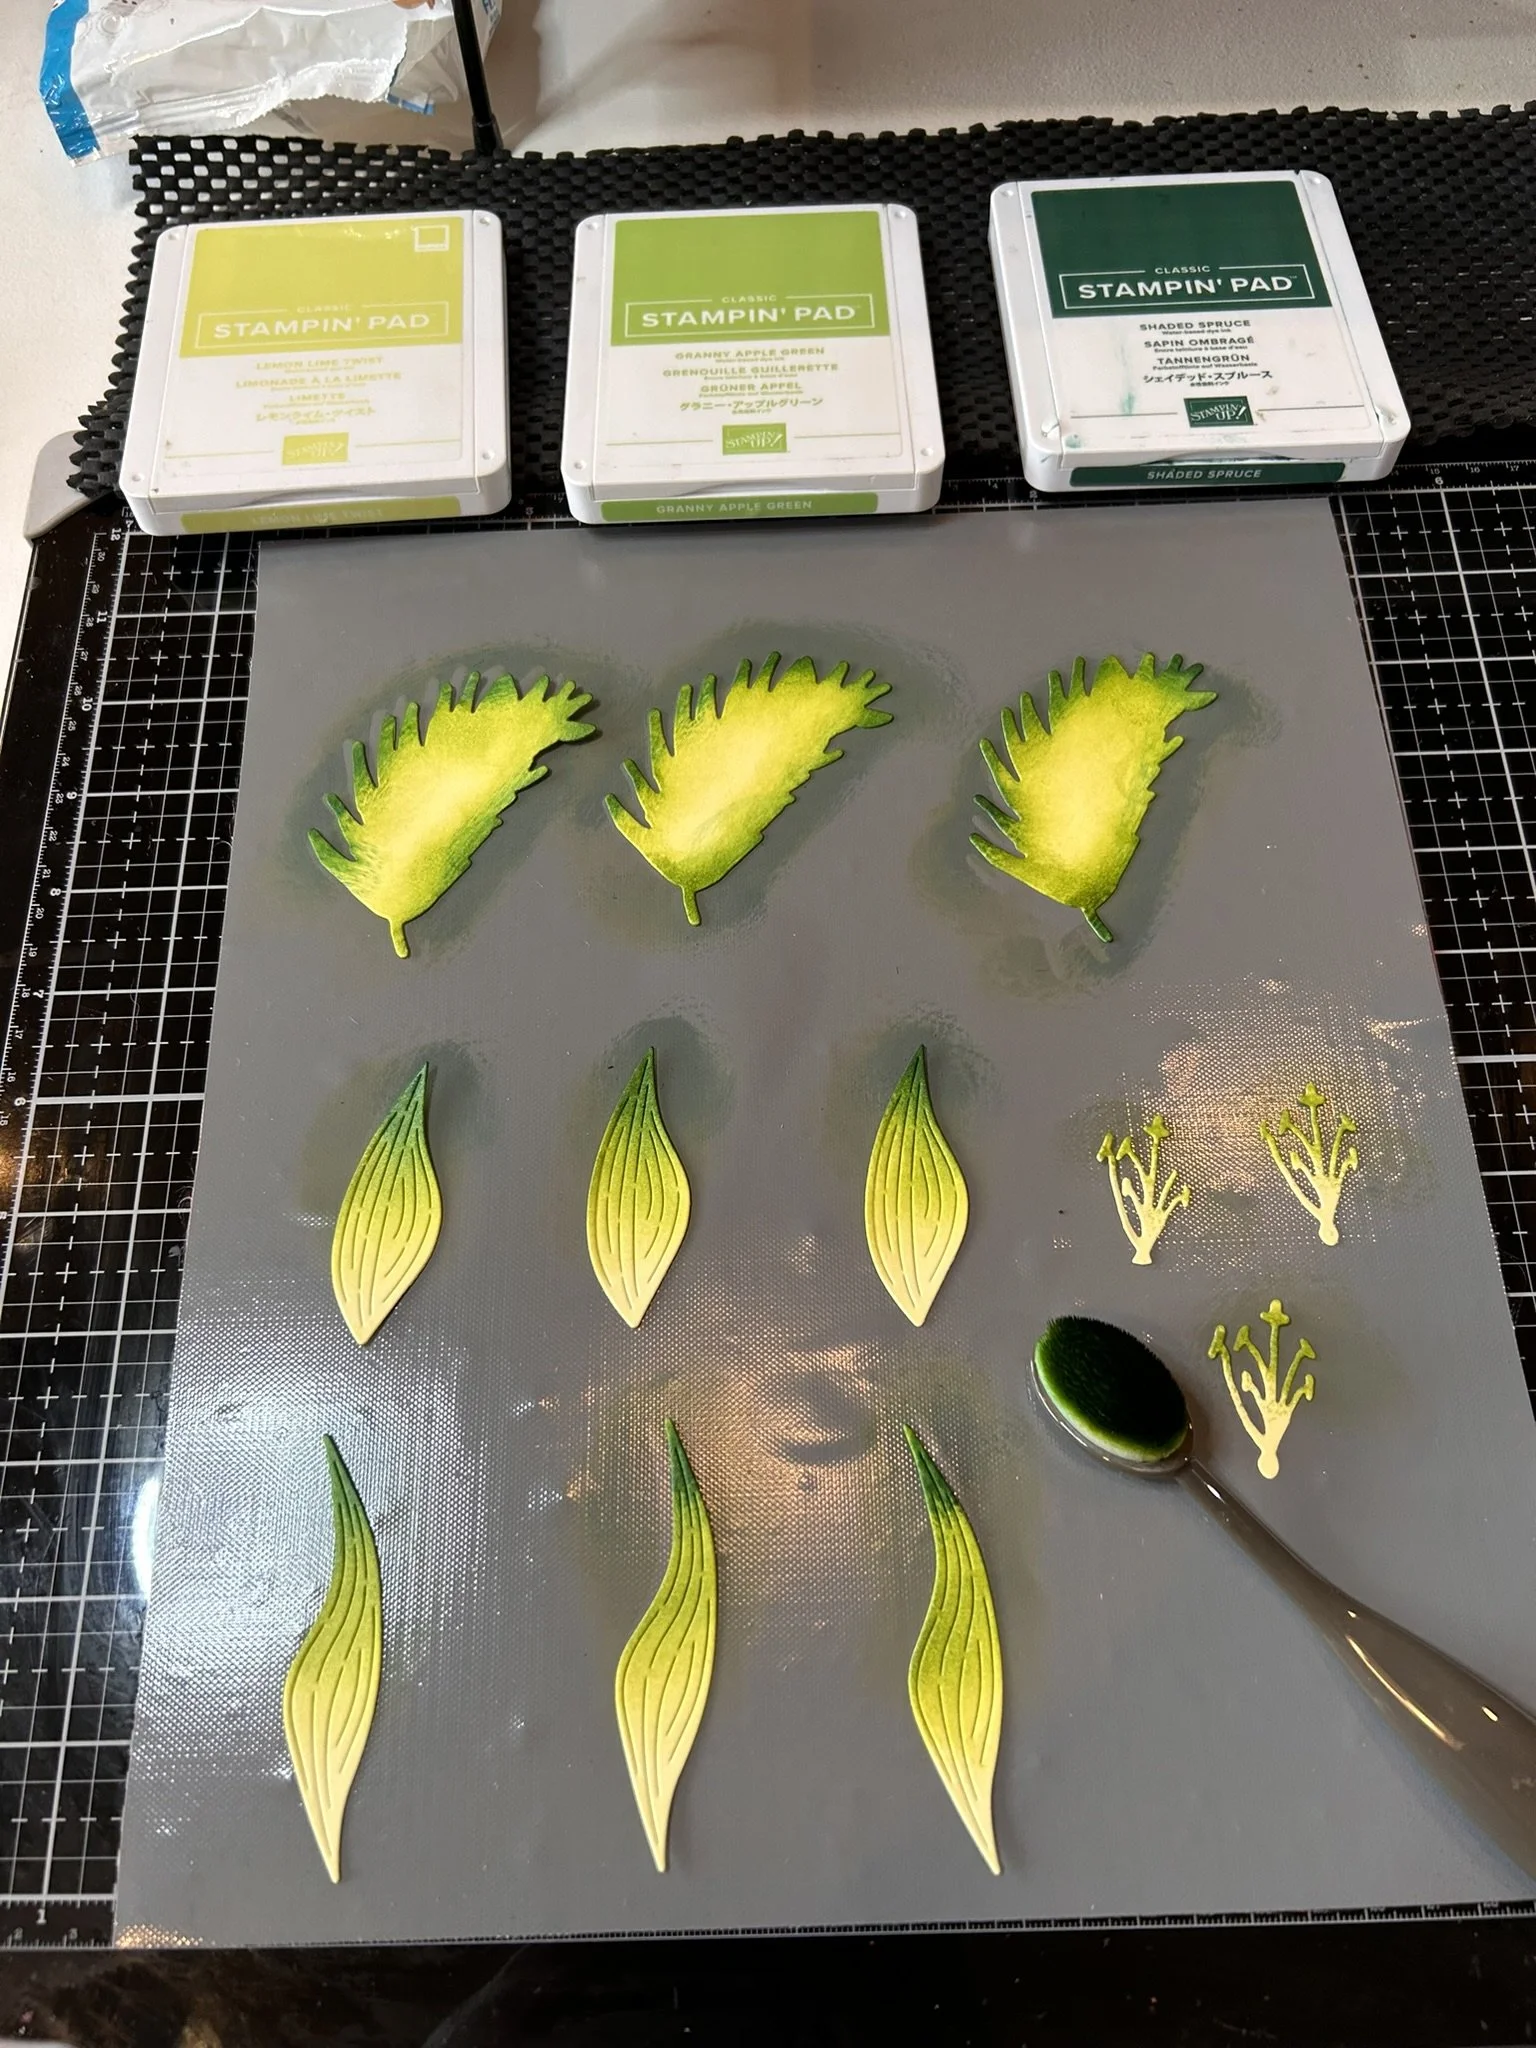
For your lemon lolly die cuts, using your small blending brushes, brush on Lemon Lime Twist ink on two thirds of the piece, pretty much almost all over, just leave a little of the lemon lolly color showing through.
Then around the edges blend Granny Apple Green, about a third of the way in.
Lastly take your shaded spruce and just ink blend the very edges for a nice bright contrast.
On your white leaves repeat the above steps except go all over the leaves with the lemon lime twist first.
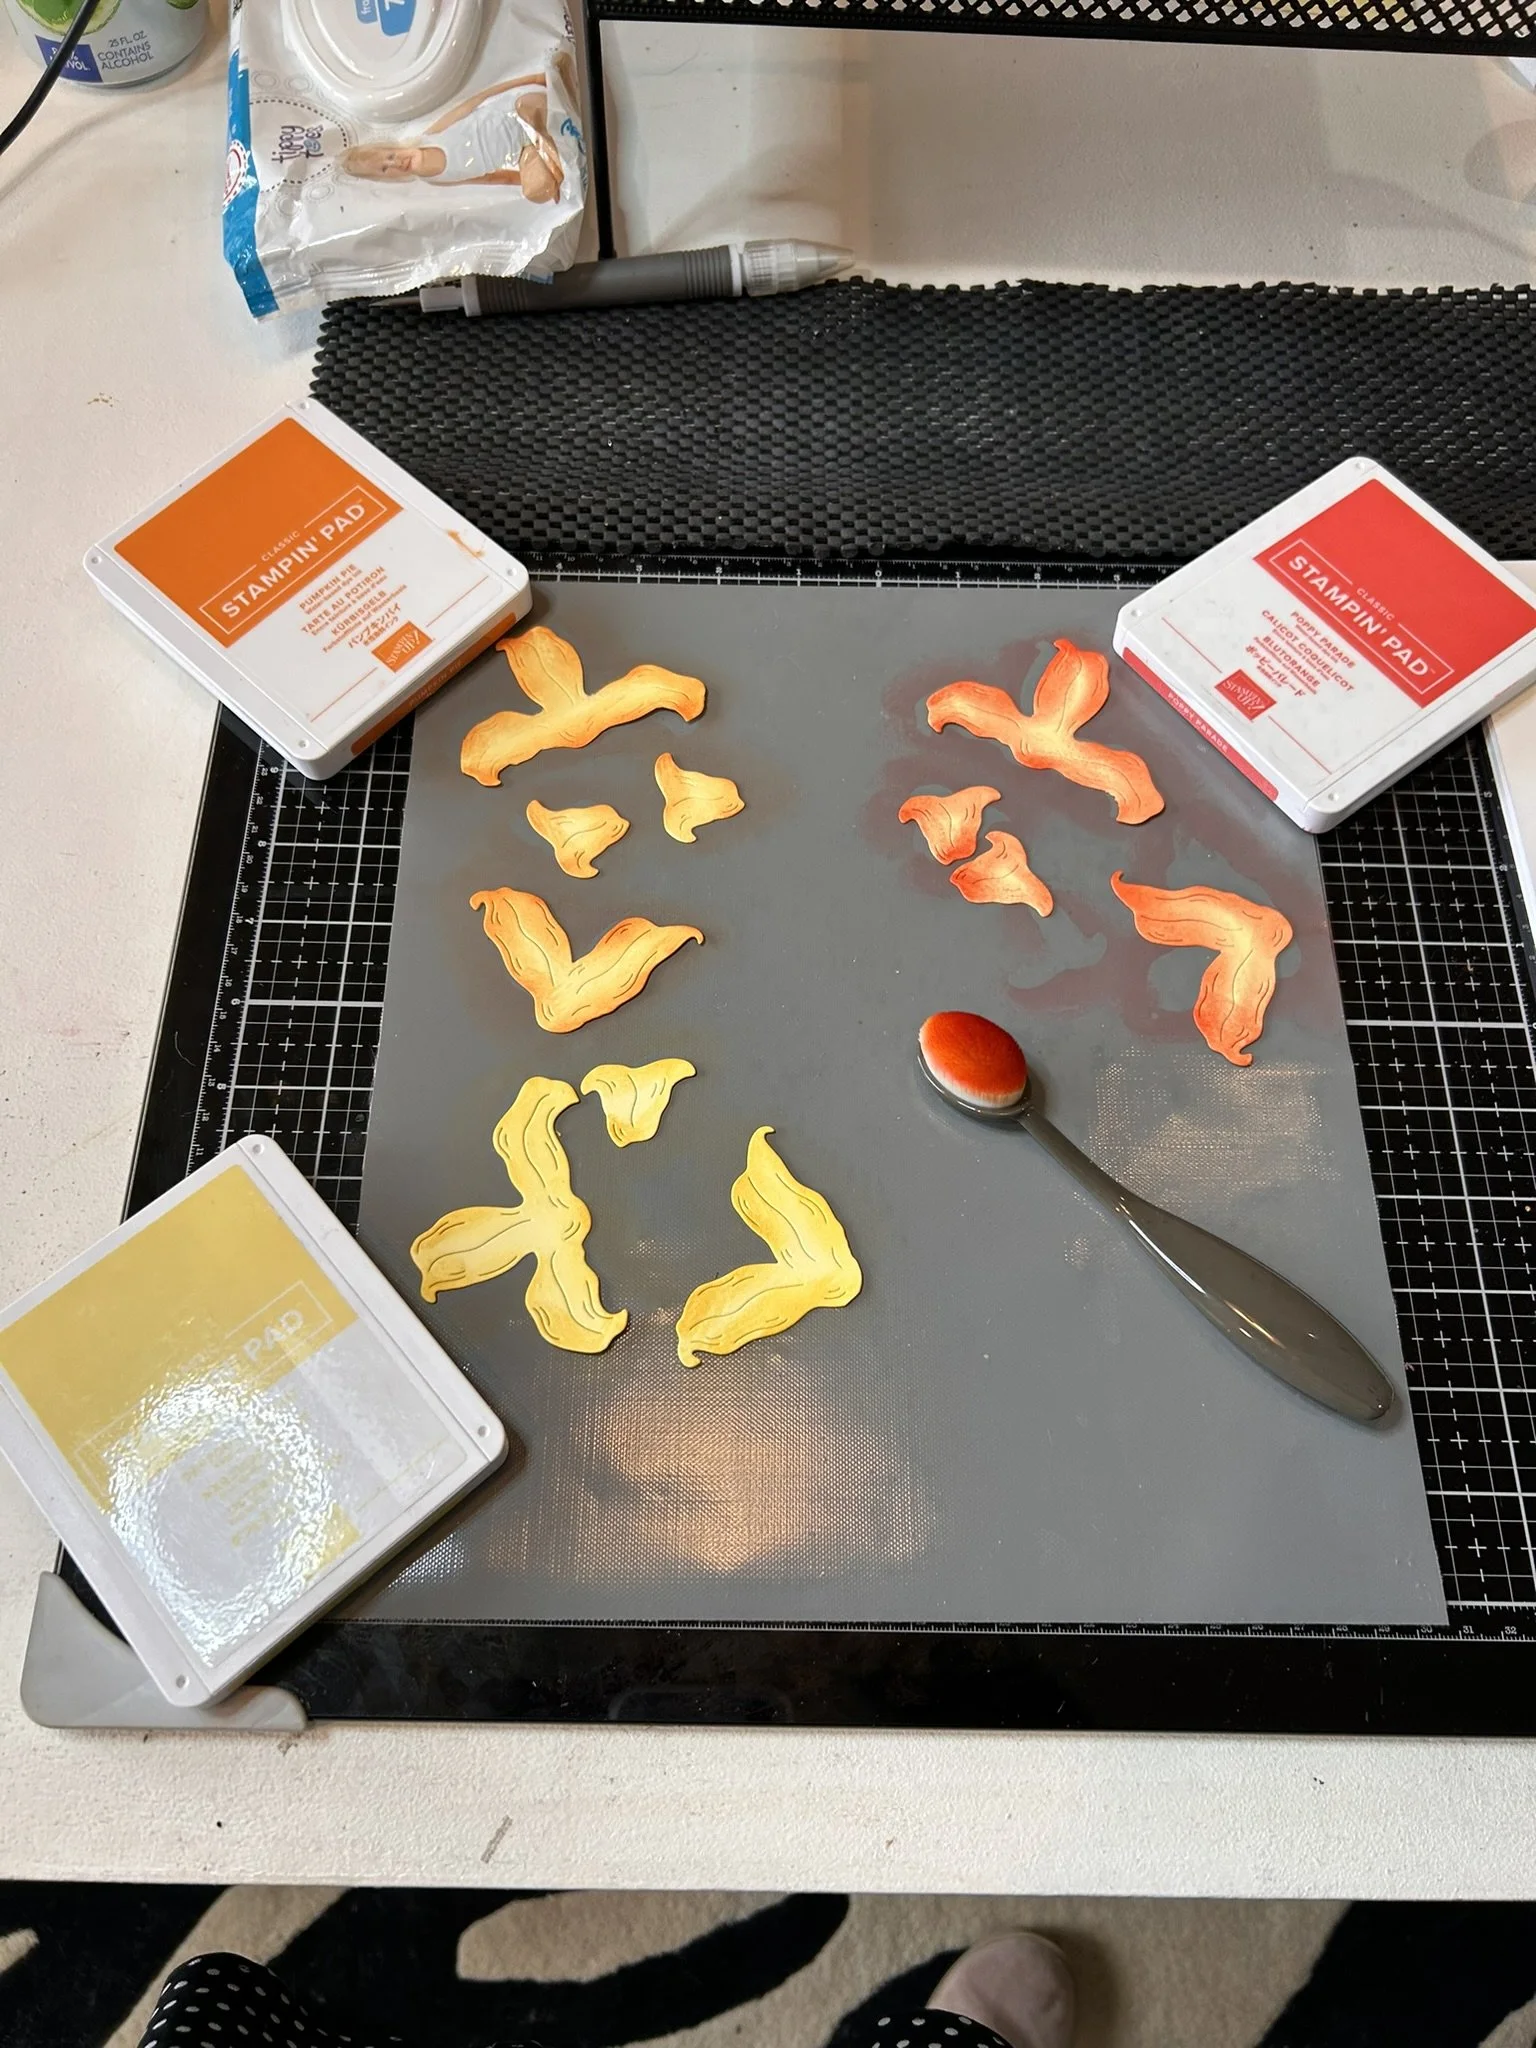
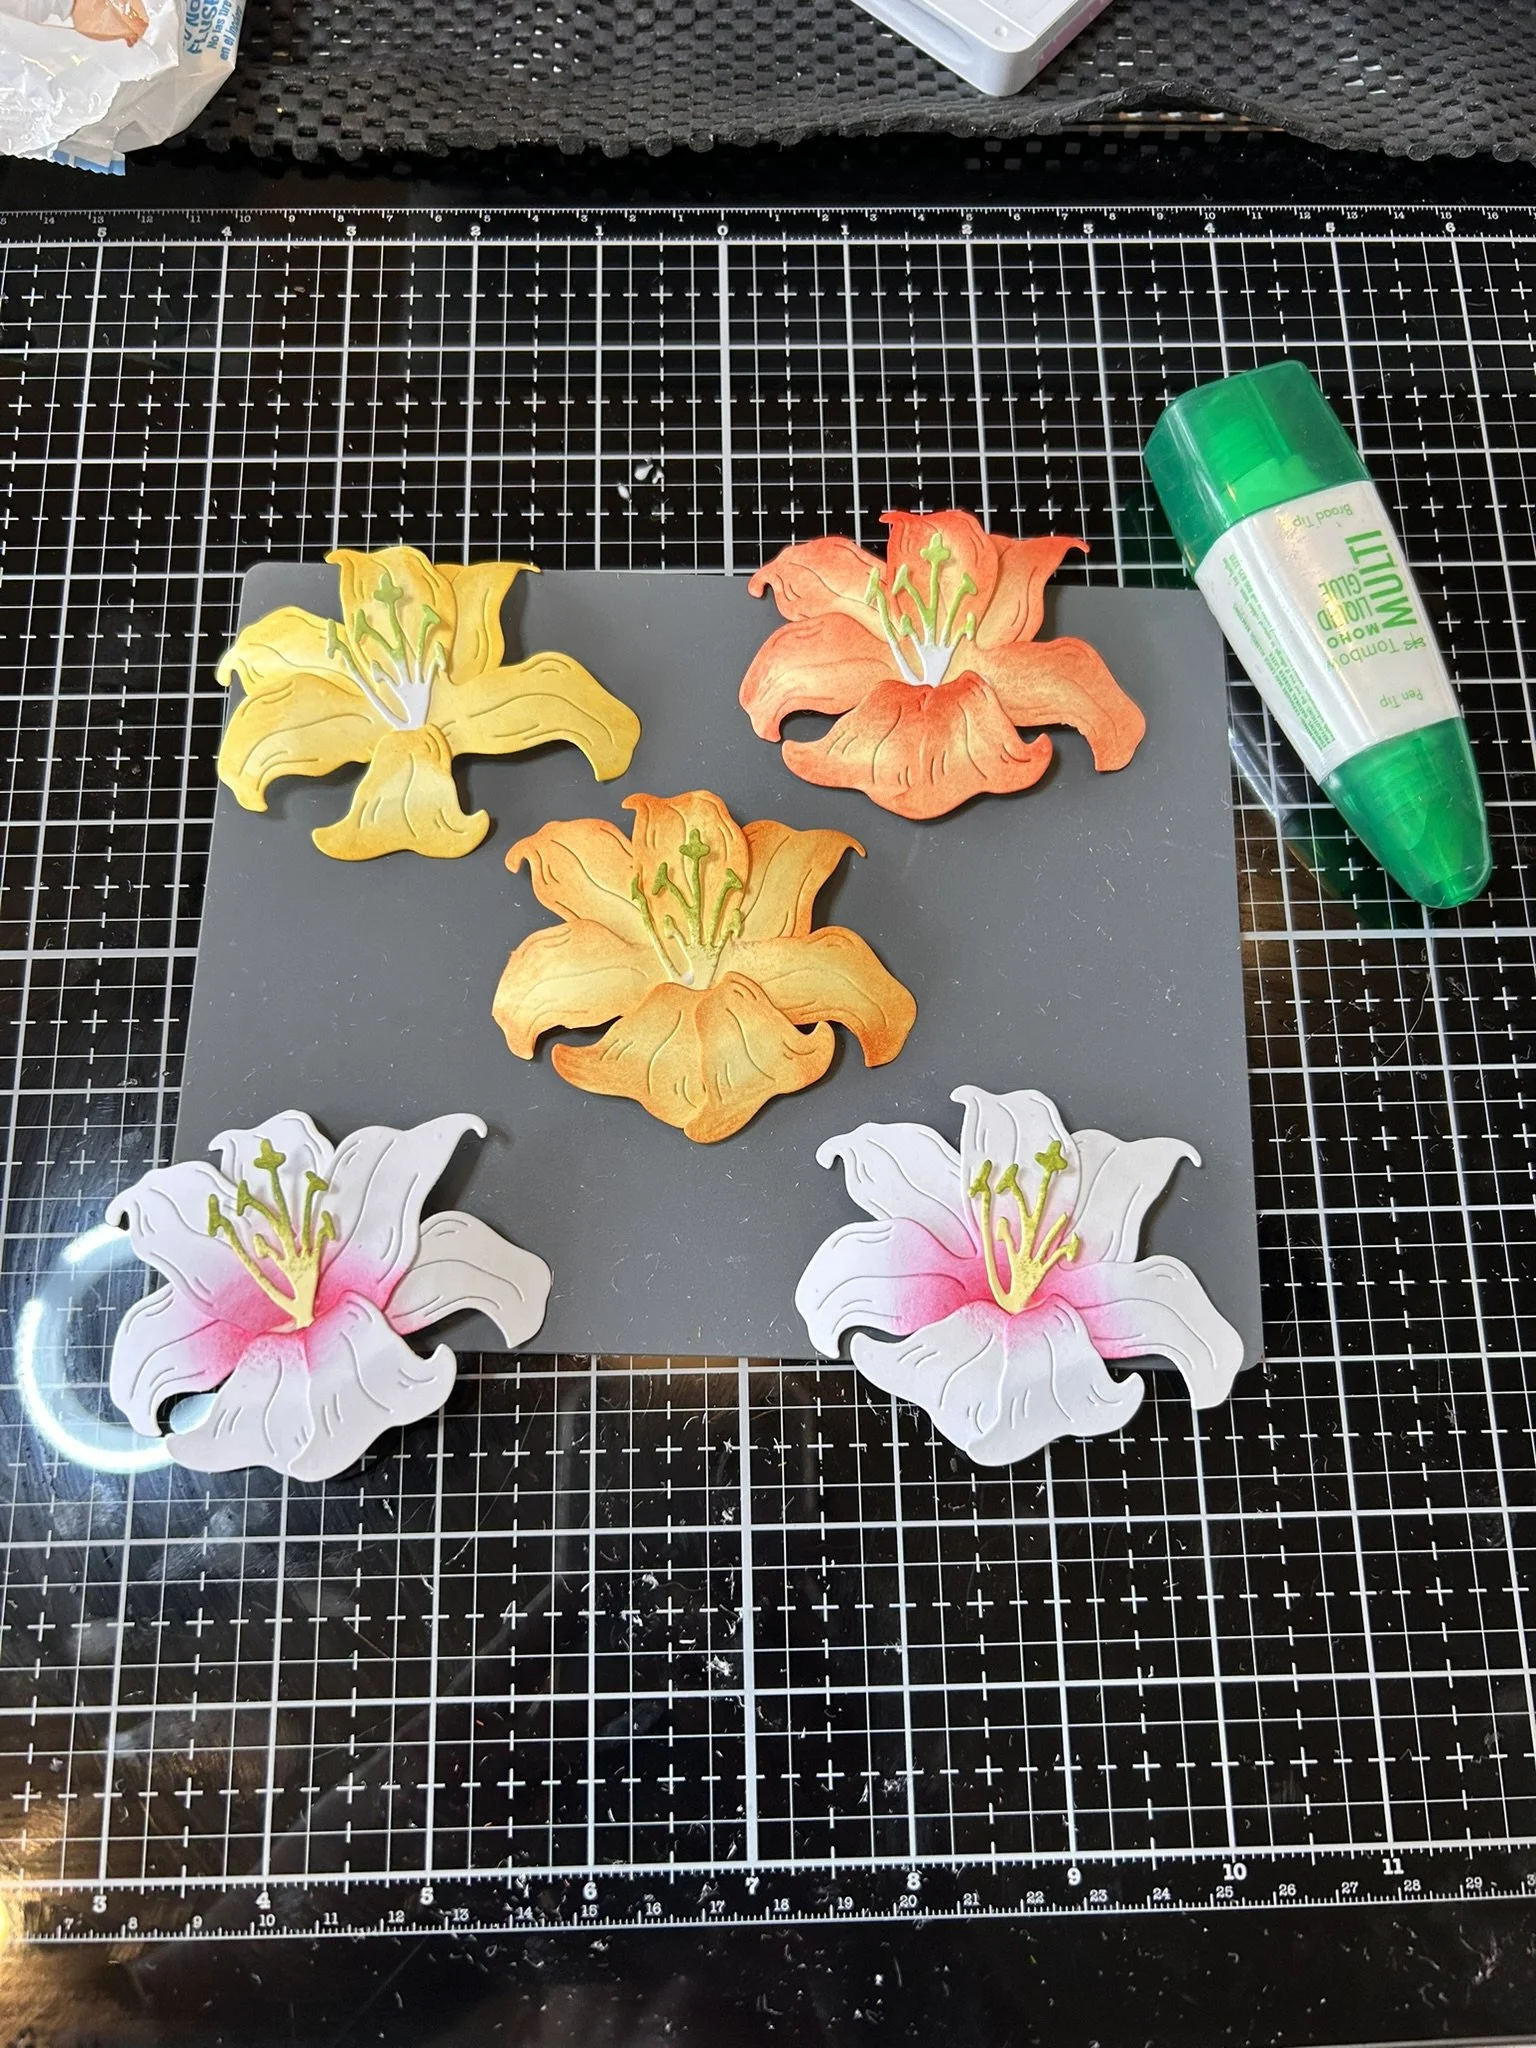
For your lemon lolly flower pieces, on one set, ink the edges using Daffodil Delight, on the second set ink the edges using pumpkin pie and then lastly ink the edges on the last set using poppy parade.
For your white flower pieces, ink just the center of the pieces using Melon Mambo.
Set aside all of your pieces to dry for at least 30 minutes, or use your heat tool to speed up the process.
Curl your flower and leaf pieces to give a more realistic look (optional)
Glue your flower pieces together – highly recommend watching my video, set aside to dry for about 10 minutes.
On your white layers that have the sentiments – on one stamp the pattern from the Easter Lilies stamp set in Daffodil delight randomly for a interesting background (optional)
On the other white layer, brush lightly in the center using Bubble Bath ink, brush roughly a two inch circleish shape (optional).
Adhere both white layers to your cardstock bases using foam tape or dimensionals (optional) or just use stamp and seal or mono glue.
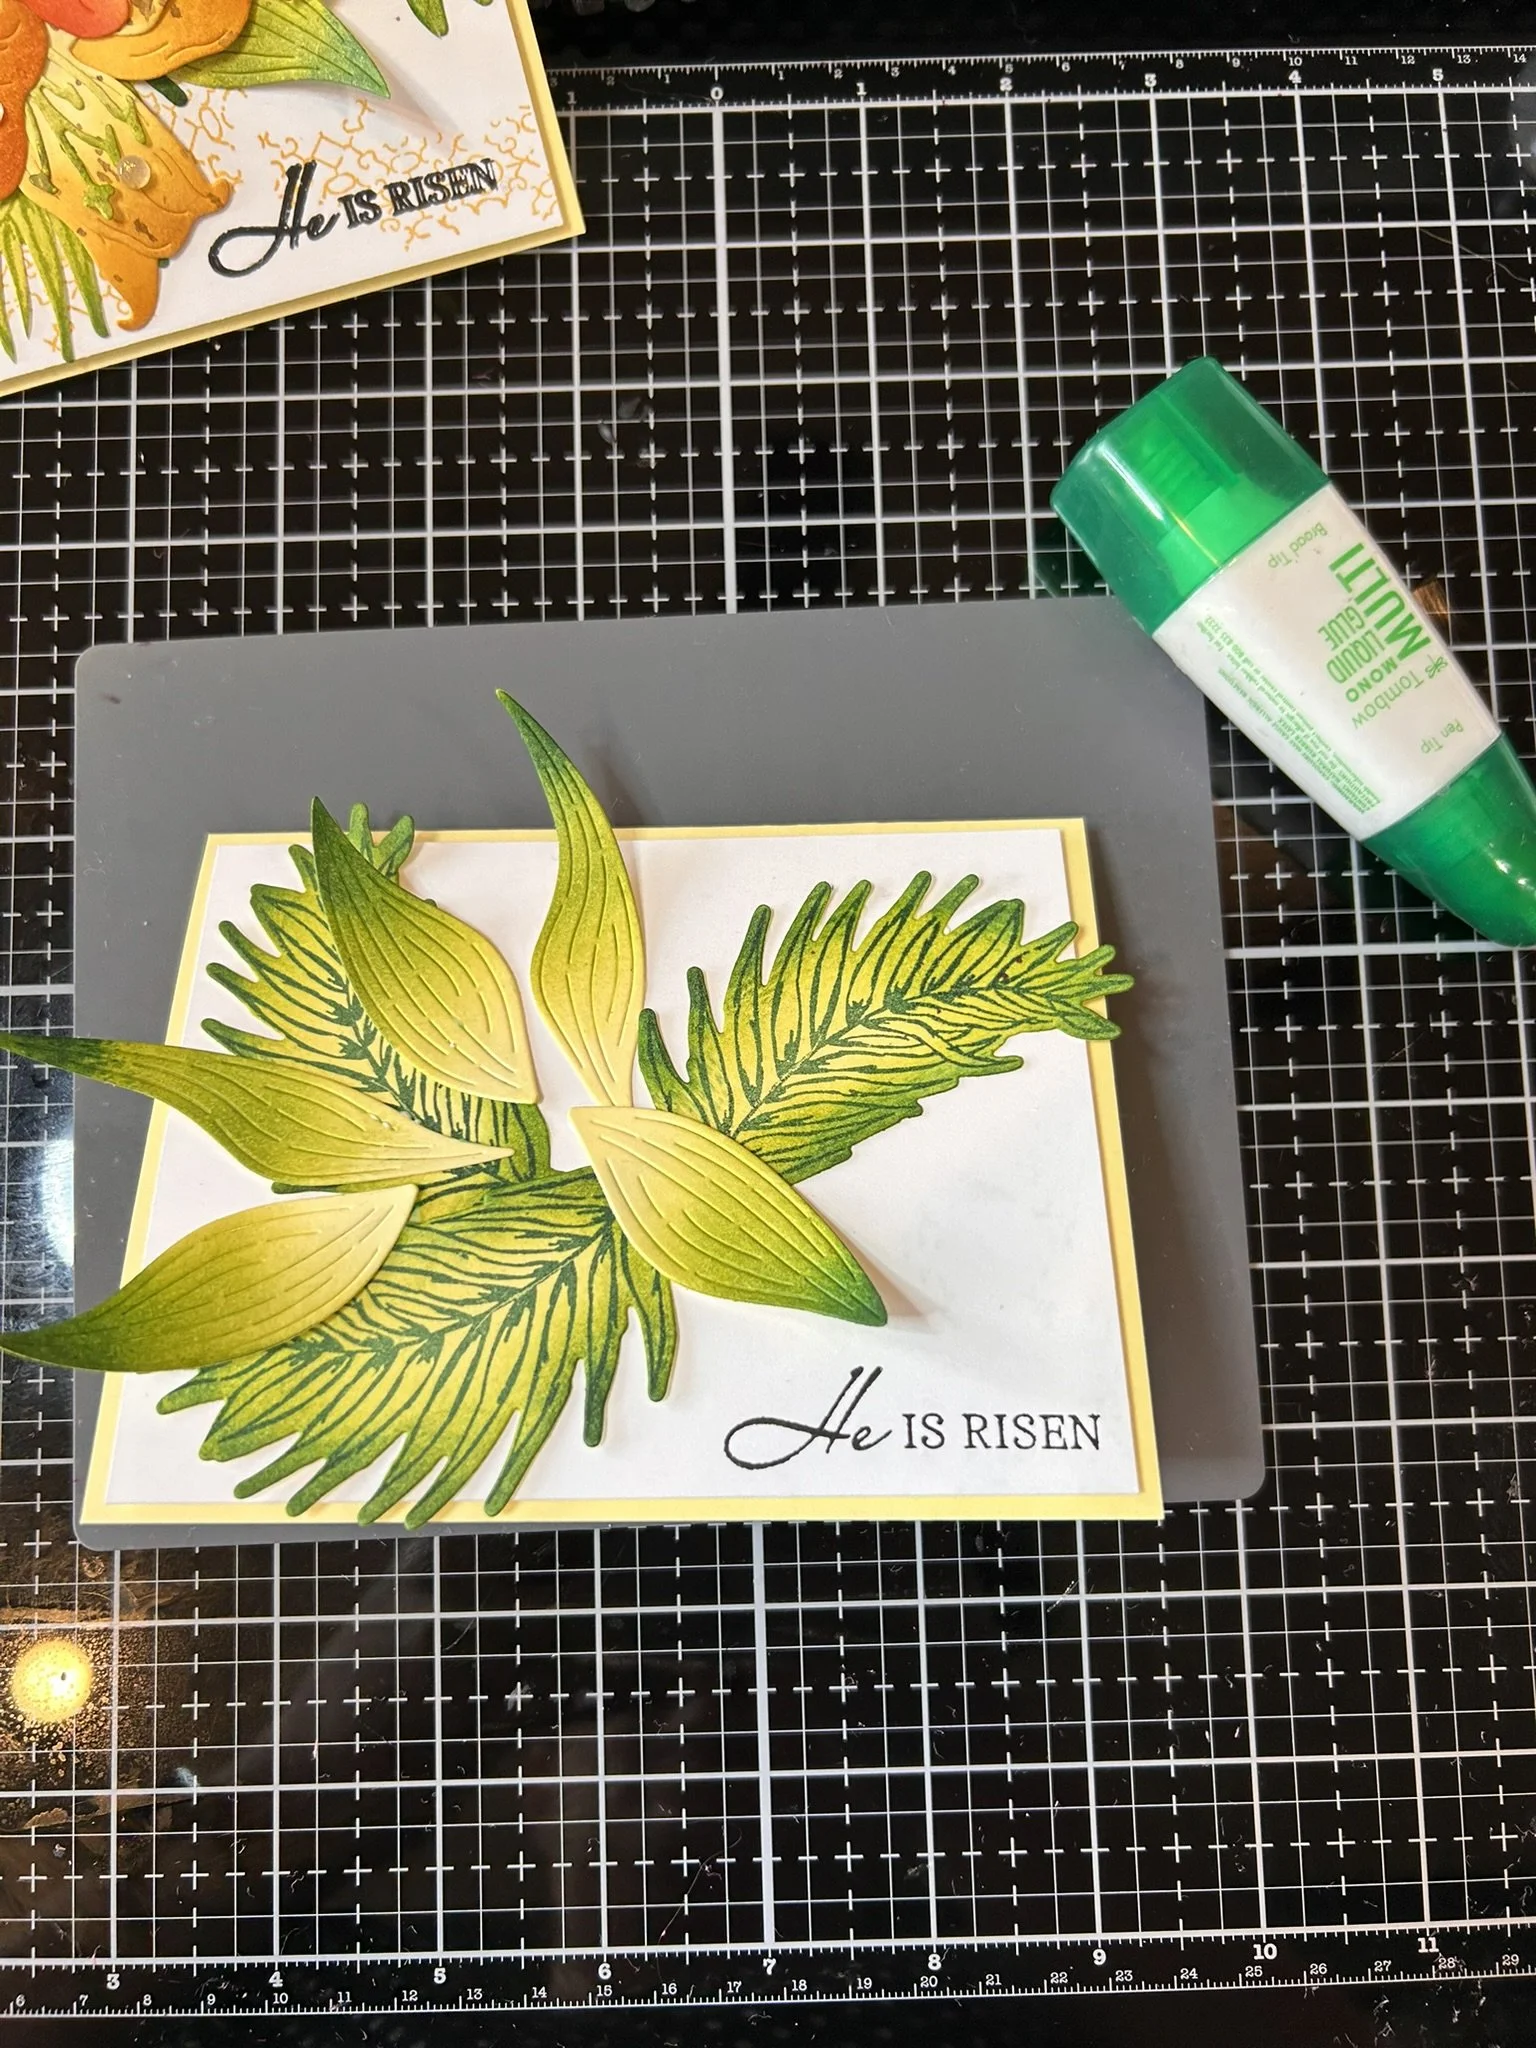
Glue your leaves down first, and then glue your flowers on top of the leaves (see pictures and/or video).
Next, and I think this is fun but totally optional, take some early espresso ink and little bit of water, using a fan brush do a little splatter on the card to give it that lily realistic look. On the pink card I used Blackberry bliss ink for my splatter.
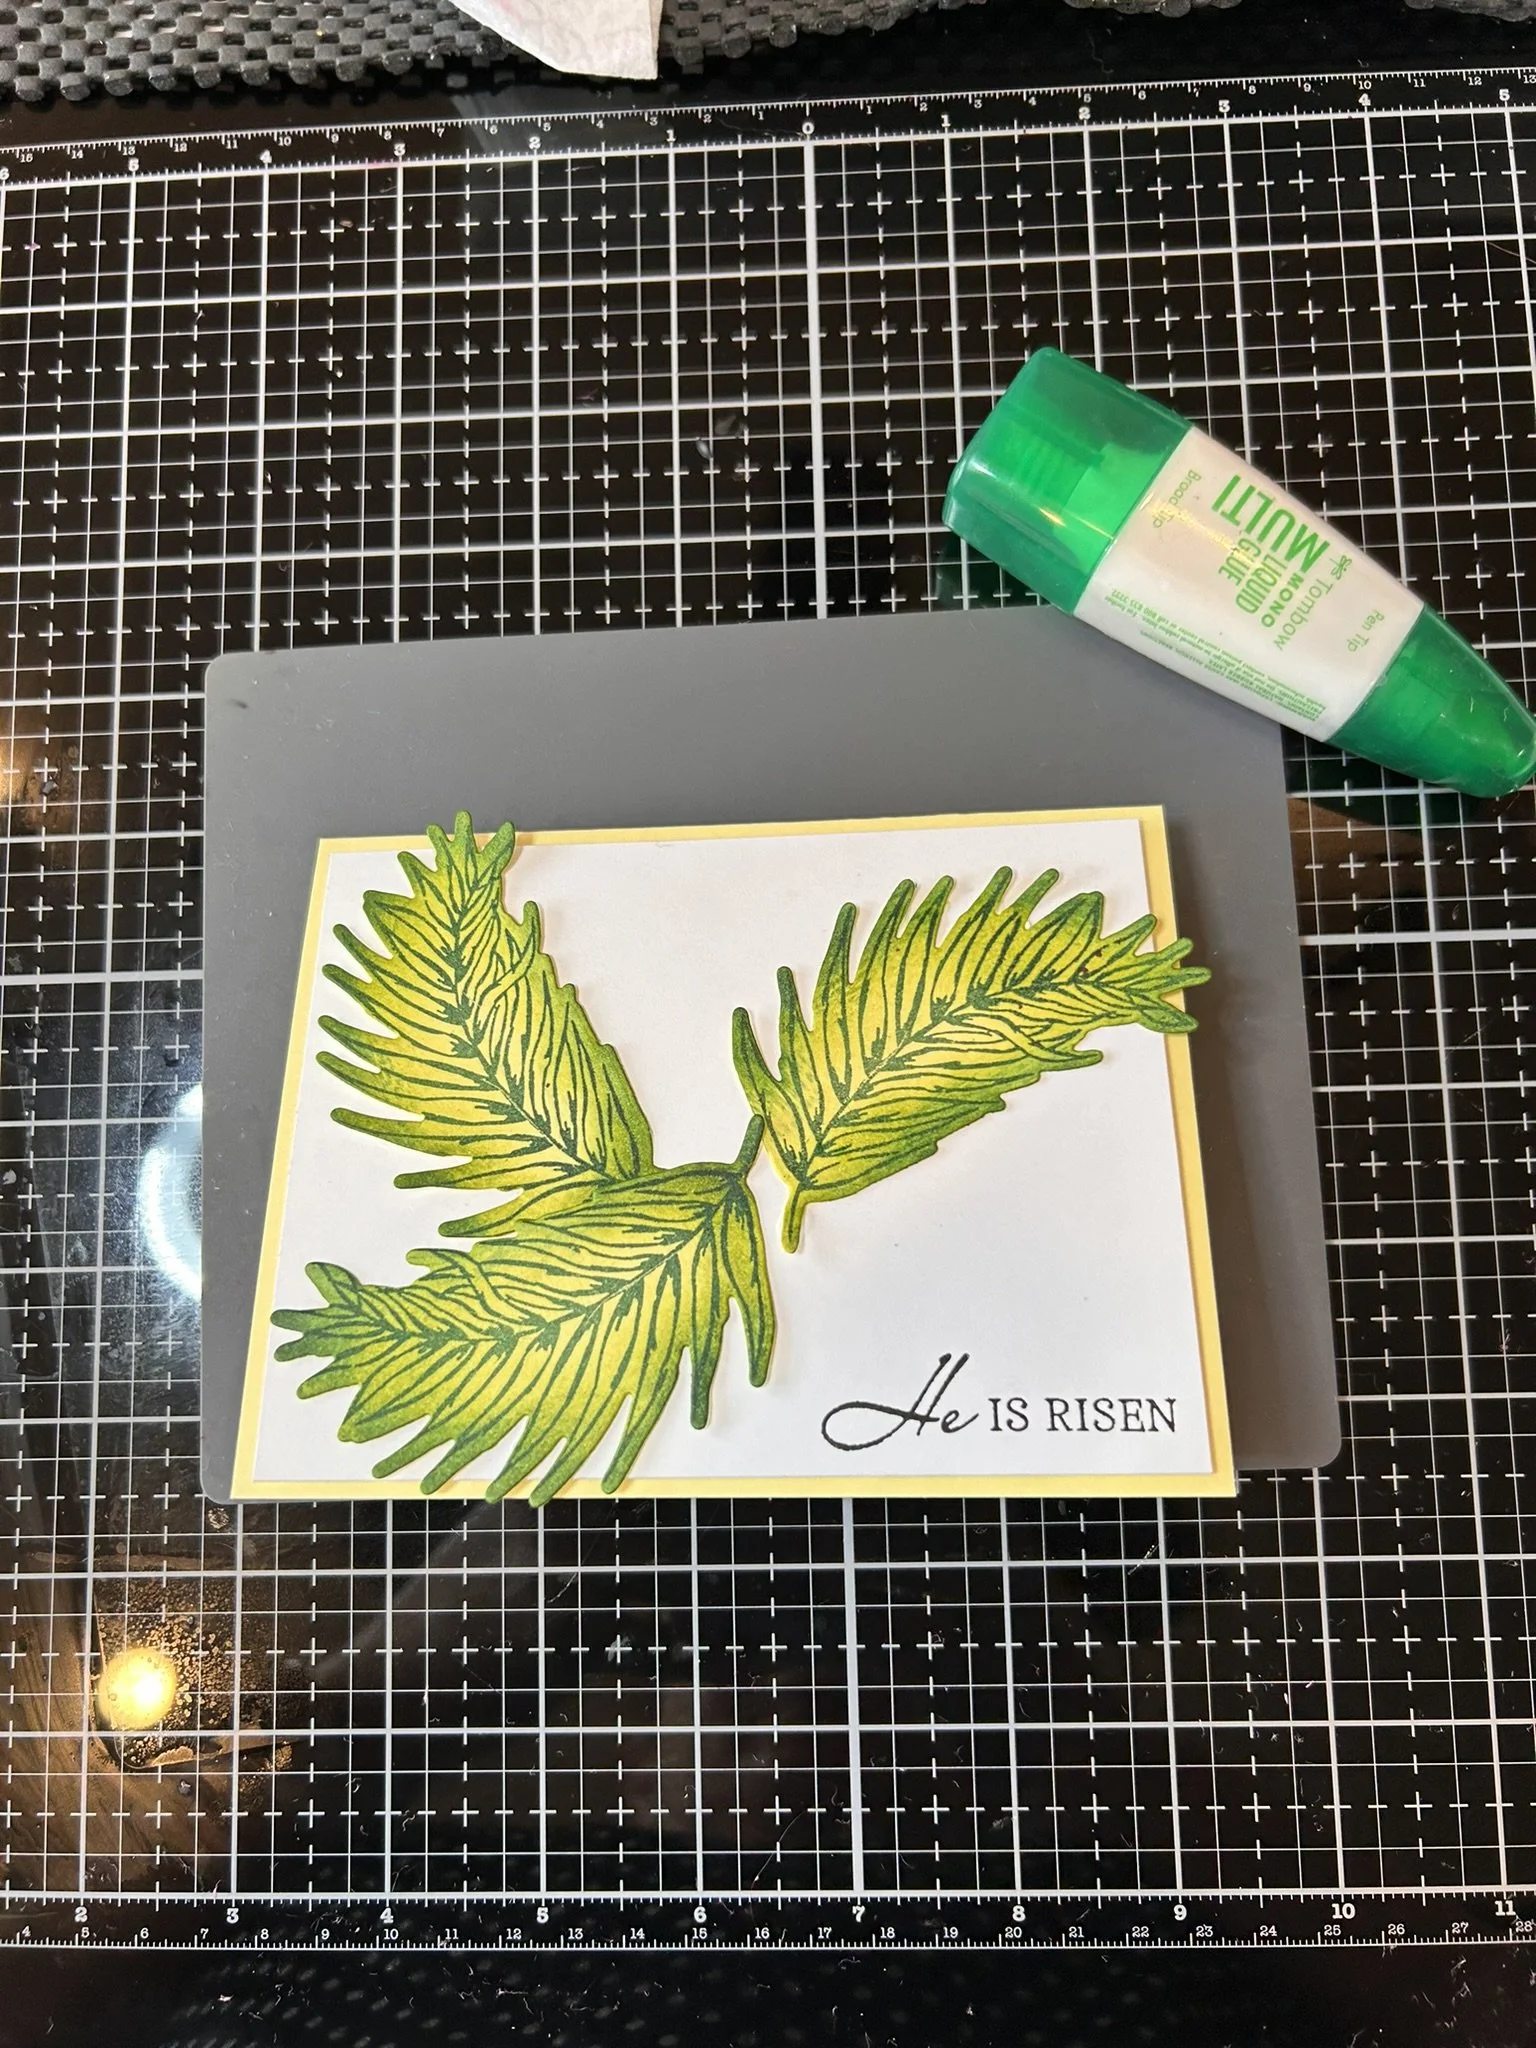
Finally stamp your inside sentiment on the other white layer cardstock pieces and glue those inside your cards.
Optional, I also stamped the image of the lily on the corner of my basic white envelopes and on the corner in the inside the card piece.

St. Patty’s Day - Lovely Day for a Guinness Card
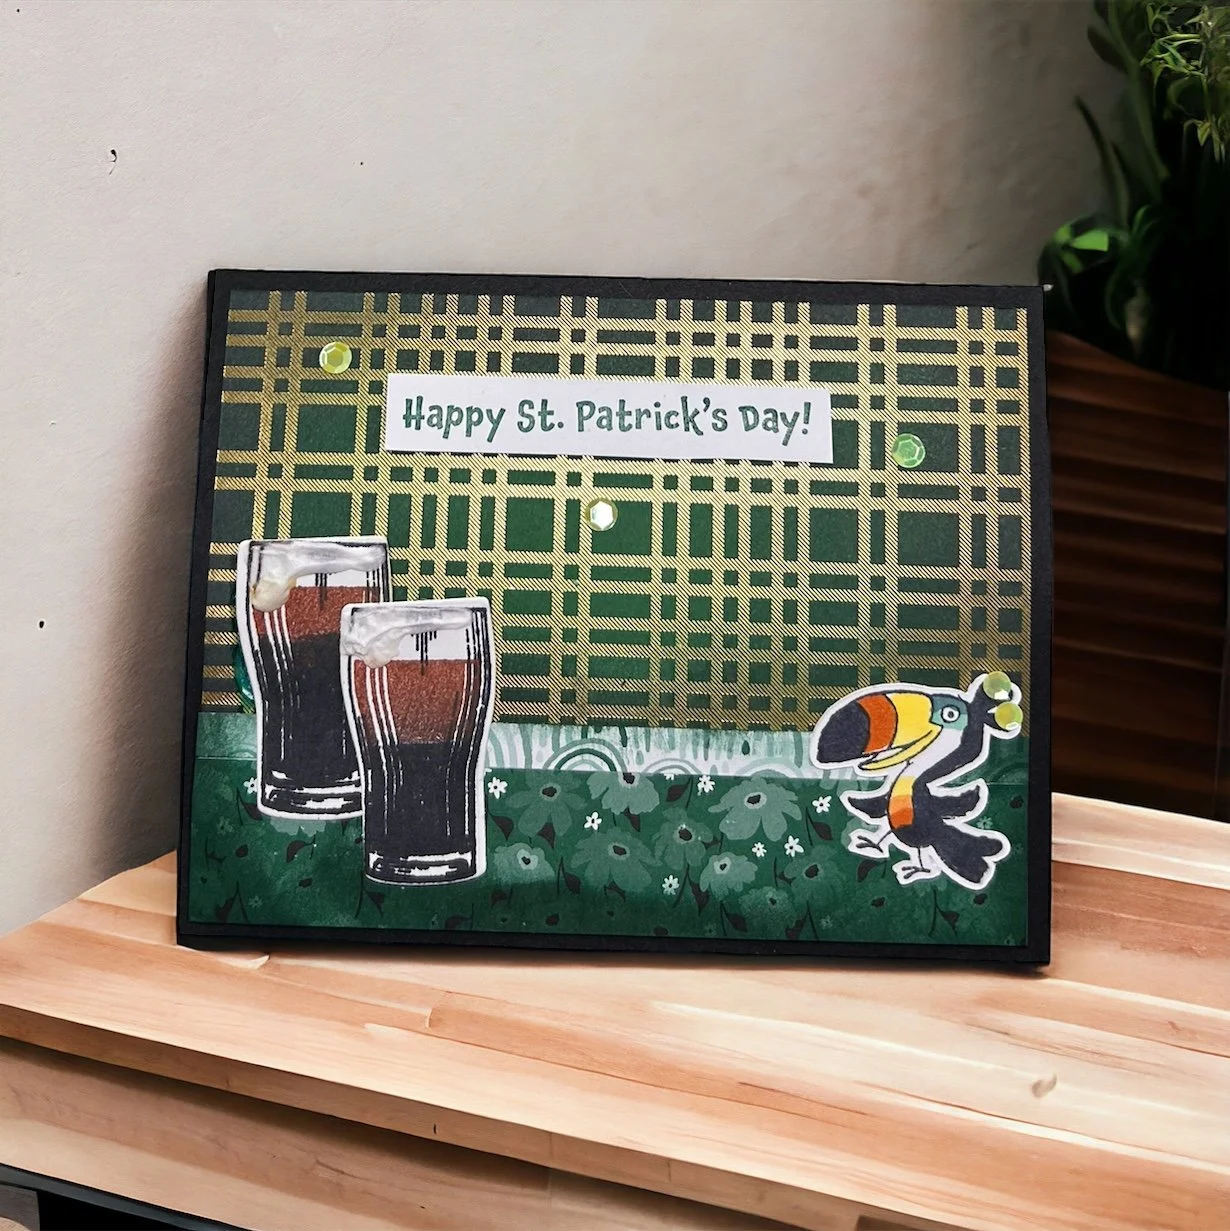
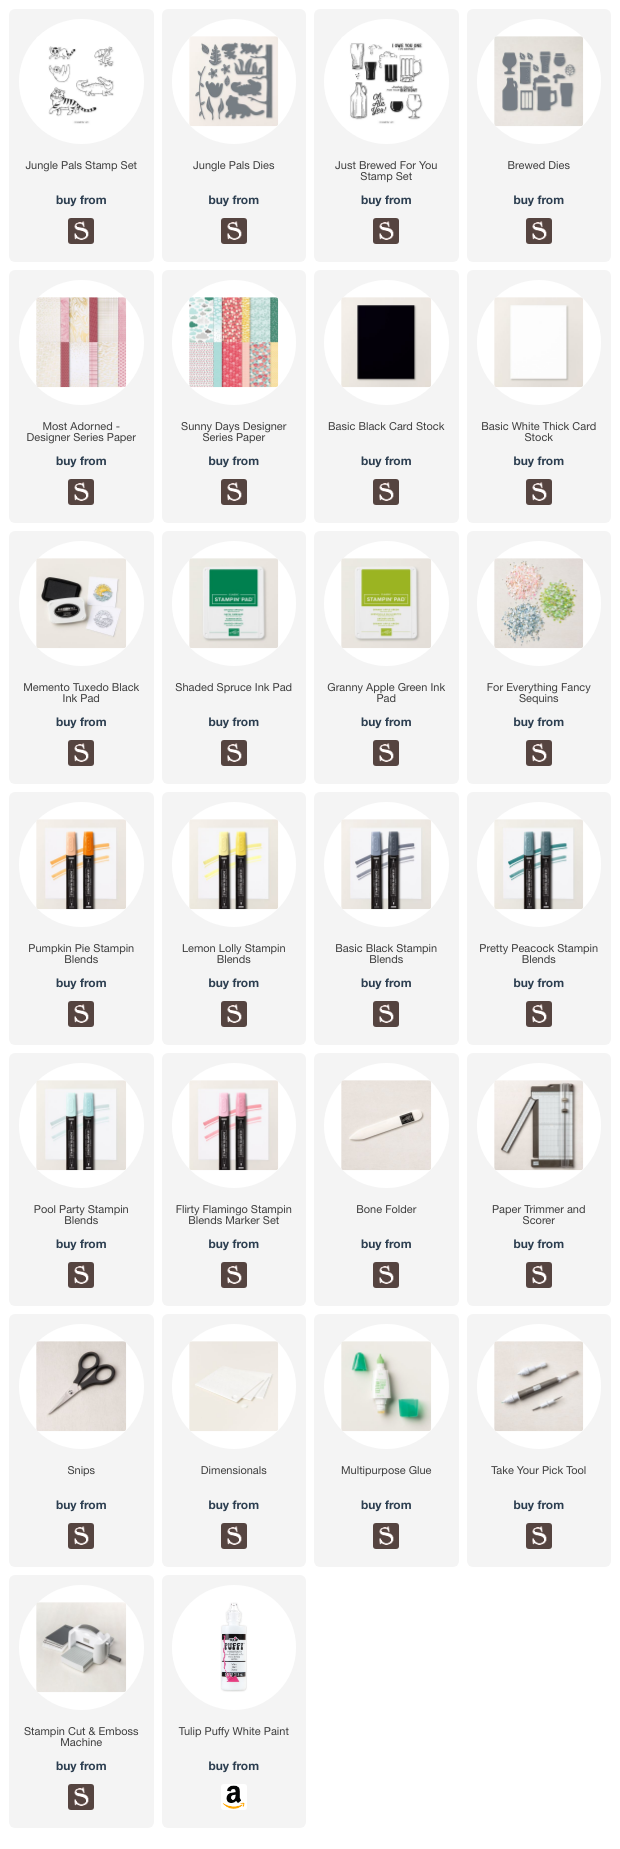
Instructions to come very soon. All the products I used are listed below with the exception of the Lucky Clover stamp set (“Happy St. Patrick’s Day), unfortunately that stamp set is retired.

Sending Love - 3D Mailbox Project
Make these adorable 3D Mailboxes which also server as special little candy holders for Valentine’s Day!

Sending Love - 3D Mailboxes
I have written the instructions down here as best I can, however this is more of an advanced 3D project, so it’s hard to convey some steps in words, so I highly recommend watching the YouTube video via the link below. Even though this lady is not using Stampin’ Up! Products like I have in my example, she gives excellent very detailed instructions.
YouTube Video: https://youtu.be/75SsPU5ryUM?si=h-6n_oKd5NlgHgKj
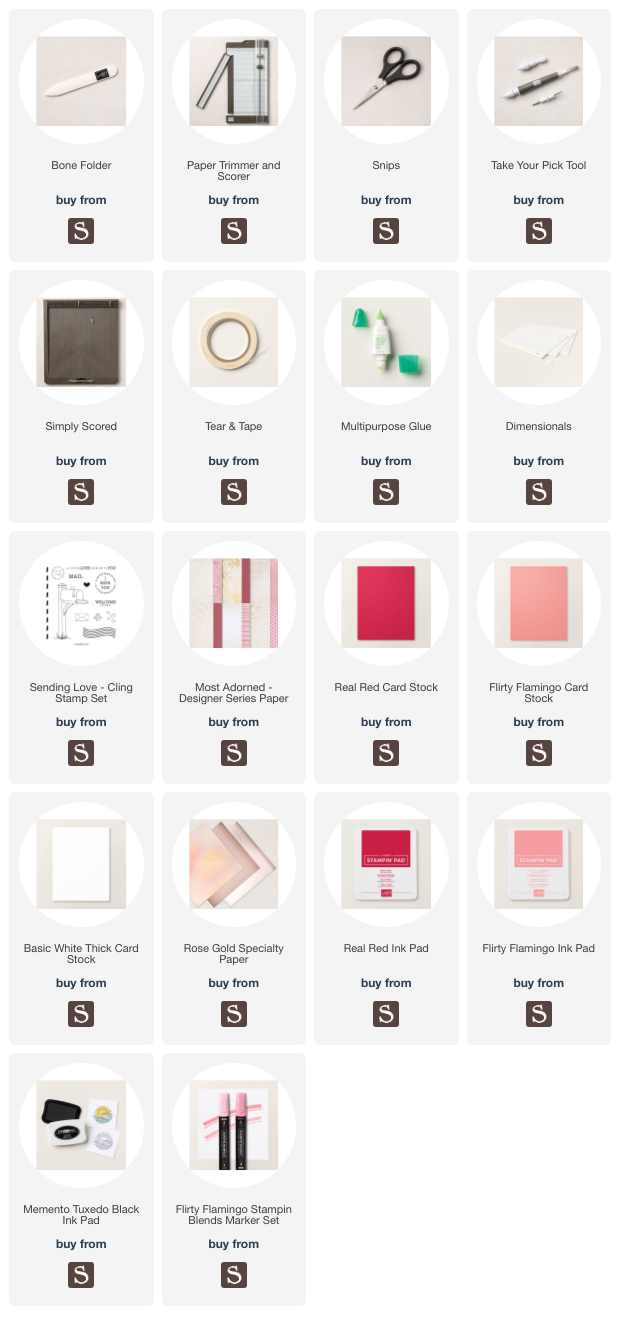
List of Products Used: https://ldli.co/e/zrlp2q1
Instructions:
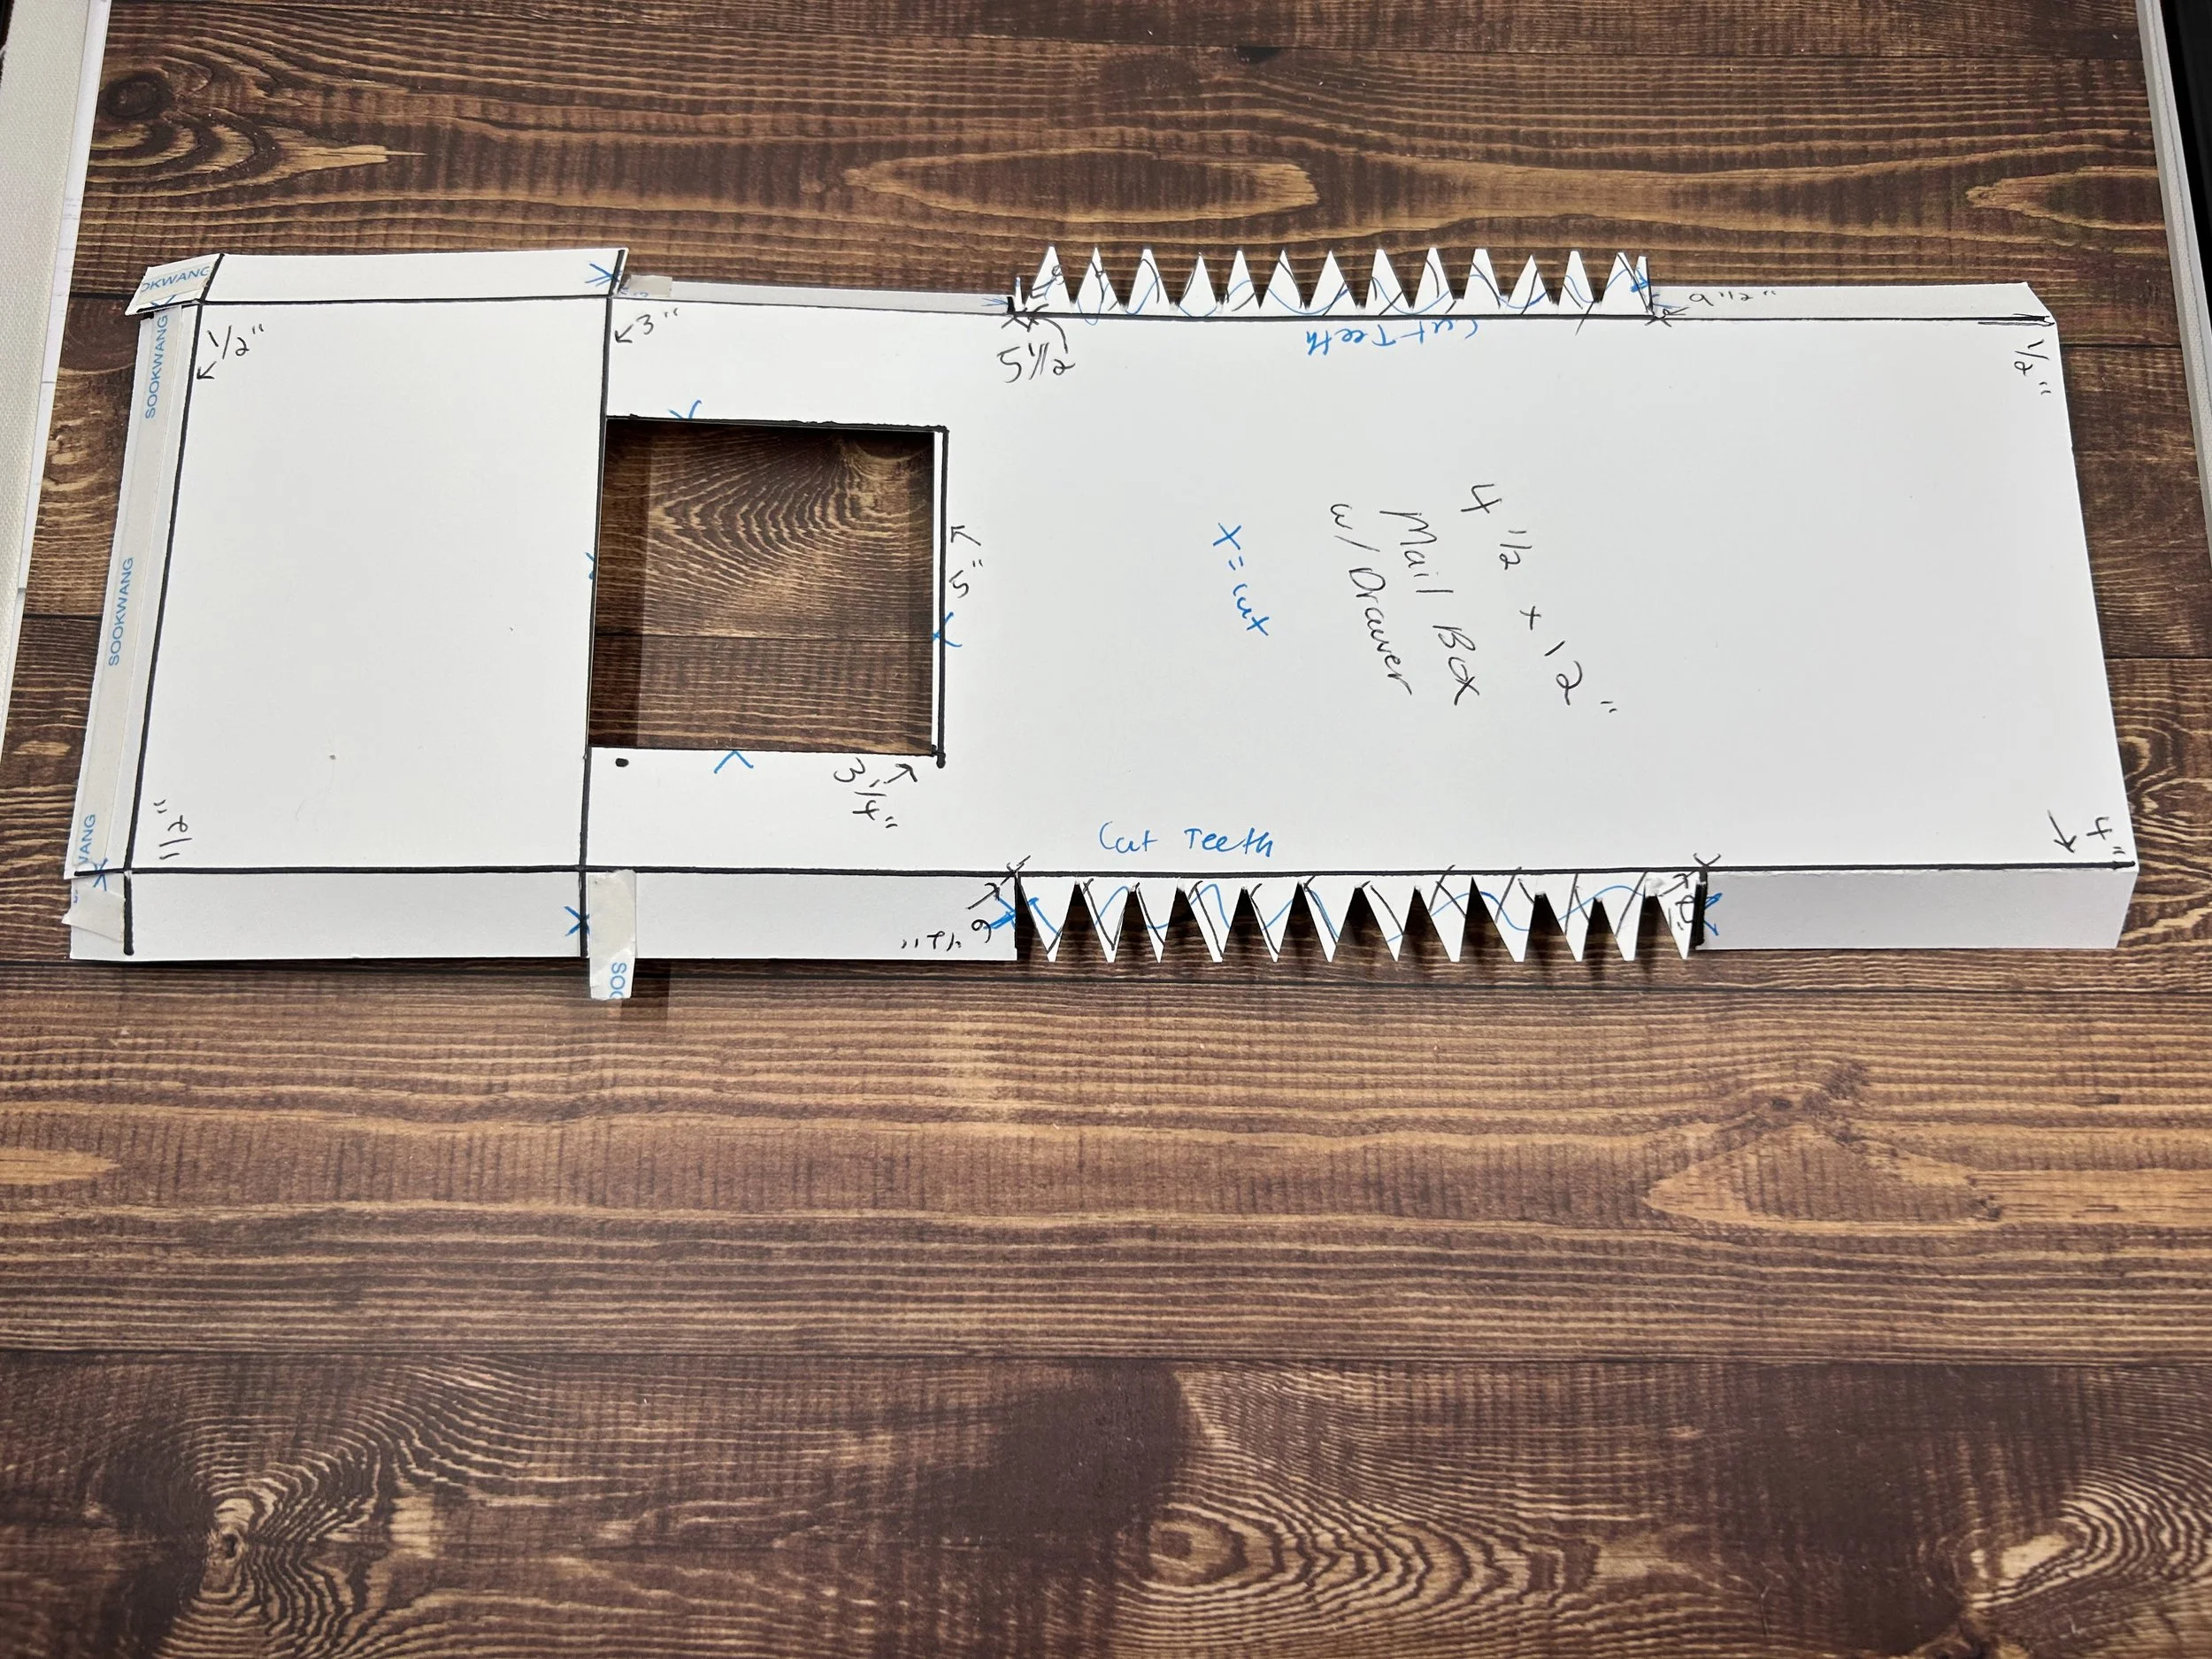
To Make main body of the mailbox:
1. Take a pink or red themed piece of 12 x 12 DSP paper from the Most Adorned pack, cut on one side to 4 ½ inches. Now your piece should measure 12 x 4 ½ inches.
2. On short side, or short side facing up, score at ½” and at 4”
3. Turn to long side, score at ½ “, and at 3”
4. Then score, but only to the horizontal score line, not all the way through, at 5 ½ and 9 ½ , and then turn to the other long side and do the same but you will score at 2 ½ and 6 ½
5. At the 3” score line and Score a 2” x 2” square, it will be in the middle of the ½ score lines on the side, approximately ½” in from those, best to see picture.
6. Cut out the 2” square using a paper trimmer.
7. Fold and burnish all of your score lines that go through the piece of paper
8. Starting from the cut out square to the end of the long side, curl your paper with your fingers so that the arch is easier to form.
9. Cut the mini score lines on the side, and then cut teeth marks on the longest tabs on the sides, see picture. The teeth will allow the paper to curve much more easily.

To Make the base:
1. Cut a piece of thick basic white card stock down to 4 ½ x 5 ½ inches
2. Score on all four sides at 1”
3. Score notches, these will be ½ “ in, and ½” from each of the four corners, see picture
.
4. Fold and burnish all score lines
5. Cut out notches and glue them down
6. Fold and glue the corners together, note you will need to trim one side in because it will stick out to much.

To make Drawer box:
1. Cut a piece of thick basic white card stock down to 8 ½ x 4 “
2. Score on long side at 2” , 4”, 6” and 8”
3. Turn to short side and score at 2”
4. Fold and burnish all of your score lines
5. With long side facing up, cut up to the horizontal score line, see picture of template.
6. Cut also on the same side the bottom tab off, and notch the top tab, see picture.
List of Products Used:
Become A Demonstrator During Sale-A-Bration!

We have a fantastic offering for customers who sign up to be a Stampin’ Up! demonstrator during Sale-A-Bration! Customers who join our fun crafting community as a new demonstrator can get $125 USD | $165 CAD worth of product PLUS our Stampin’ Glass Mat Studio* (a $60 USD | $82 CAD value) for just $99 USD | $135 CAD!
STAMPIN’ GLASS MAT STUDIO
The Stampin’ Glass Mat Studio is a paper crafter’s dream! The heavy-duty glass mat comes printed with a ruler and grid lines for easy measuring, while the large surface space gives ample room for spreading out while paper crafting. The safety-tempered glass has a heat and scratch resistant surface that wipes clean with the included cloth and water—no chemicals needed. The reusable cloth also cleans ink off your stamps! The nonslip, heat resistant, waterproof silicone mat features four palette squares for mixing custom ink colors or for holding small ink spots in place while crafting. Each component can be used separately or you can use all three items together for a multipurpose paper crafting studio that’s both functional and elegant.
The Stampin’ Glass Mat Studio includes:
GLASS MAT
* 5 mm thick
* 17" x 14" (43.2 x 35.6 cm)
* Safety-tempered
* Heat and scratch resistant
* Wipes clean with water or alcohol
SILICONE MAT
* 8-3/8" x 6" (21.3 x 15.2 cm)
* Multiuse, nonslip
* Waterproof, heat resistant
* 4 palette squares for custom-color mixing or holding Stampin’ Spots
* Product color: white
CLEANING CLOTH
* 8-1/4" x 8-1/4" (21 x 21 cm)
* Durable, reusable
* Lint free
* Cleans stamps and other surfaces with only water
* Product color: dark gray
$60 USD | $82 CAD
Customers who want to join Stampin’ Up! during Sale-A-Bration but are interested in a different join option can instead get $125 USD | $165 CAD worth of product PLUS an additional $30 USD | $41 CAD worth of product of their choice when they join for $99 USD | $135 CAD. That’s a $155 USD | $206 CAD value!
*Please note that the Stampin’ Glass Mat Studio will not be immediately available for purchase once Sale-A-Bration is over. We will then evaluate inventory levels to determine when we can offer this product for purchase.
Sale-A-Bration Spring 2024!

Dear Customer,
It’s our favorite time of the year—time to Sale-A-Brate! That’s right! From 4 January to 29 February, you can shop and earn FREE products during Sale-A-Bration. Simply shop and spend $50 or more to qualify. Plus, earn additional Stampin’ Rewards when you host a party, or choose from two great join offers when you sign up to be a demonstrator.
There’s so many perks and fun products, so don’t miss out! Happy Sale-A-Brating!
Sincerely,
Amanda De Longchamp
Stampin ‘N The Pines
Intro to Card Making: Cutting and Scoring Card Bases - Part 2
It all begins with an idea.
In this video, I will be showing you how to cut and score cardstock to make a slimline (8 1/2 x 3 1/2) , mini slimline (6 x 3) and a 4-bar card.
For a list of products that I used —> https://ldli.co/e/1p5mnx7
If you have any suggestions for future videos, please feel free to go to my contact page and send me a message, I’d be more than happy to hear from you.
Intro to Card Making - Cutting and Scoring Card Bases
It all begins with an idea.
In this video, I will be showing you how to cut and score cardstock to make the most popular standard A2 (5 1/2 x 4 1/4) and A7 (5 x 7 ) card bases.
For a list of products that I used —> https://ldli.co/e/1p5mnx7
If you have any suggestions for future videos, please feel free to go to my contact page and send me a message, I’d be more than happy to hear from you.